


This article is intended to briefly tell the story of one not particularly well known action that took place on 16 June 1915. The starting point in the story is this photograph.
![]()
Taken near Hooge, a photo of the first attack on Bellewaarde Farm by the Liverpool Scottish, 6 am, 16 June 1915. Photo by Private F.A. Fyfe, 'Z' Company, 1/10th King's (Liverpool) Regiment (Liverpool Scottish). IWM Q49750
The photo was taken by Private Frederick Alexander Fyfe of Liverpool Scottish (the 1/10th King’s (Liverpool) Regiment). Before the war Fyfe was a newspaper photographer. There exists a series of images he took (against regulations) of life in the front line. This photograph is perhaps the most graphic as it shows the situation at about 6am on 16 June during an attack at Bellewaarde by his battalion. The flag on the right (which would have been yellow and red) is to enable artillery observers to note the progress of the attack and therefore (theoretically) avoid shelling of one’s own troops.
In addition to the above photograph, there are others from which a composite photo has been created, which has been stitched together using two of Private Fyfe’s photos. This is reproduced below.

The above photo is courtesy of Martin Clift, his web site The Battle of Bellewaarde is a rich resource about the attack of 16 June, with numerous other photographs of the area.
Reasons for the attack
At the close of the Second Battles of Ypres in April 1915, the German trenches on high ground north of Hooge between the Menin Road and the Ypres-Roulers railway formed a salient. This high ground, the Bellewaarde Ridge, gave good observation over the British lines. In early June 1915, it was decided to attack these German trenches and, if possible, gain possession of the ridge; the attack was to be carried out by the 9th Brigade of the 3rd Division.
Location
Running eastwards away from Ypres, towards relatively high ground, was the Menin Road. Just to the north of this, running in a north easterly direction was the Ypers to Roulers railway line. These two routes met at the aptly named “Hell Fire Corner”. Just over half a mile east of Hell Fire Corner is a small road, then known as Cambridge Road. This was the approximate location of the British Front Line Trenches that were overlooked by the Bellewaarde Ridge.
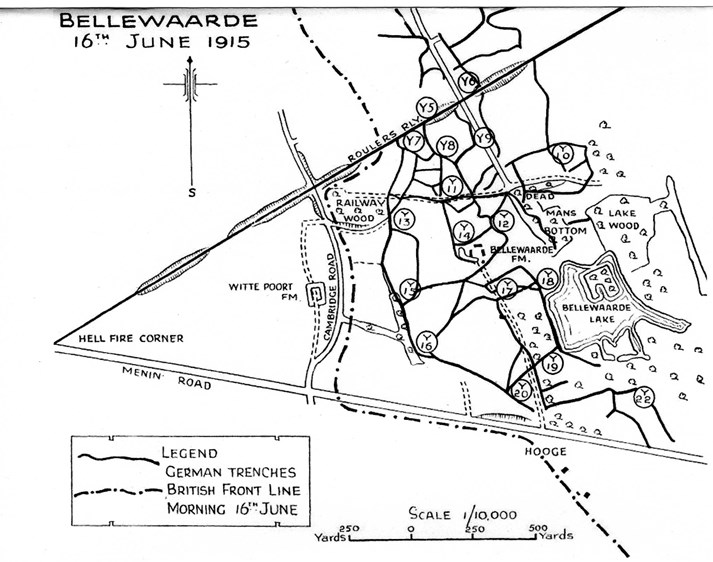
Map from 'The Fifth in the Great War' by Brigadier H.R. Sandilands
Click here to view the area using Google Maps. (“Begijnenbosstraat” on this link is “Cambridge Road” on the above map.)
Just to the south of this area was Hooge, while at the northern edge of the area (and adjacent to the Ypres-Roulers railway) was Railway Wood, the eastern edges of which were held by the enemy, and the western edges by British troops.
The Plan
As mentioned, in June 1915 it was decided to attack the high ground at the Bellewaarde Ridge; this was to be undertaken in three phases. In the first phase the objective was the eastern edge of a narrow strip of wood (Y.16 and Y.15), and the German front-line trenches as far as the north-east corner of Railway Wood (Y.13).
For the second phase, the objective was the line from Y.17, to Y.7., including the road from Hooge to Bellewaarde Farm.
The objective in the third phase was the western edge of Bellewaarde Lake, through Y.12 to Y.7.
The attacking troops for the first phase were (from right to left) the 4/Royal Fusiliers, 1/Royal Scots Fusiliers and 1/Northumberland Fusiliers.
As soon as the first objective had been gained the guns were to bombard the second objective. In the meantime it was planned that the supporting troops of 1/Lincolns and Liverpool Scottish (1/10th King’s Regiment) would move up to the front line vacated by the troops of the first phase, and then capture the third objective. From 2.50 a.m. with three pauses at 3.10 a.m., 3.40 a.m. and 4 a.m., until 4.15 a.m., the Divisional Artillery was to bombard the enemy trenches. At 4.15 a.m. the infantry were to advance.
The attack
The War Diary of the 1/10 King’s Liverpool Regiment describes how the battalion followed up the attack of the first wave…
“Our artillery bombardment started at 2.10am and carried out the work of demolition so successfully that little difficulty was experienced in taking the first and second line trenches. Unfortunately however in continuing the advance we suffered many casualties as, owing to the difficulty experienced in observing signals, it was impossible to keep our shells ahead of the advancing infantry. Although the third line German trenches were reached it was impossible to hold onto them and so the whole Brigade consolidated the first and part of the second line German trenches, manning them until 11.30pm pm the night of the 16th at which hour we were relived…. The casualties amongst our officers were particularly heavy and of the 24 officers who went up only Lt Wall, 2/Lt TG Roddick and Lt Chavasse came back unscathed.”
Lieutenant Noel Chavasse was awarded a Military Cross for his gallantry in this action. Later in the war he was to be awarded the VC twice. He was killed in 1917 and has the unique distinction of being the only CWGC headstone with two Victoria Crosses engraved upon it.
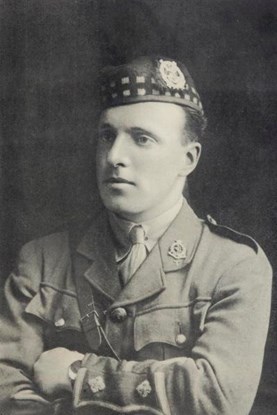
Portrait of Captain Noel Chavasse, VC*MC
The Third Phase
The Liverpool Scottish, along with the 1/Lincolns attacked advanced, but, against orders, soldiers from reserve battalions (2/Royal Irish Rifles and 1/1 HAC) also went forward. The battalions taking part in this third phase of the attack caught up with troops who had gone forward earlier, and who were waiting for the barrage to move forward. Because they had moved so quickly, they ran into their own barrage (mist and smoke prevented observation by the gunners). The trenches were now crowded with too many troops from different phases of the attack, as well as those who should not have attacked at all. Control of the battle broke down and heavy German artillery started to take its toll. Despite taking the trenches, these could not be held due to the bombardment of both British and German artillery. Counter-attacked at 7.30am, and again at 9.30am, the Liverpool Scottish and the Lincolns were forced back.
Casualties
In the attacking battalions, casualties were heavy. The three battalions of the first phase incurred 384 fatalities. The 4/Royal Fusiliers lost 7 officers and 125 other ranks; 1/Royal Scots Fusiliers 4 officers and 115 other ranks; and the 1/Northumberland Fusiliers 5 officers and 128 other ranks.
The 1/Lincolns also lost 4 officers and 94 other ranks, but the heaviest casualties were amongst the Liverpool Scottish who had 9 officers and 142 other ranks killed on this day, not one of whom has a known grave – all are commemorated on the Menin Gate Memorial in Ypres. The two reserve battalions that went forward with the attack against orders also lost heavily, with the 2 Royal Irish Rifles incurring 3 officers and 55 other ranks fatalities and the 1/1 HAC losing 1 officer and 34 other ranks.
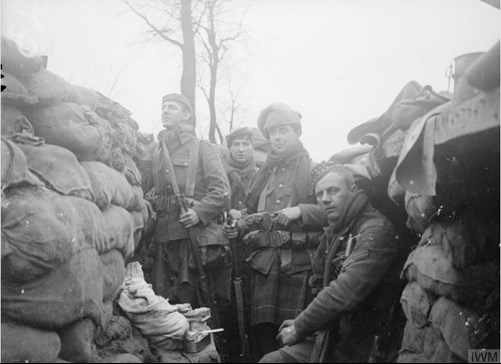
Above: Taken by Fyfe, this photo is captioned 'Troops of the 1/10th Battalion, King's Regiment (Liverpool Scottish) in the Q3 Trench at St. Eloi, April-May 1915.' (IWM Q49836)
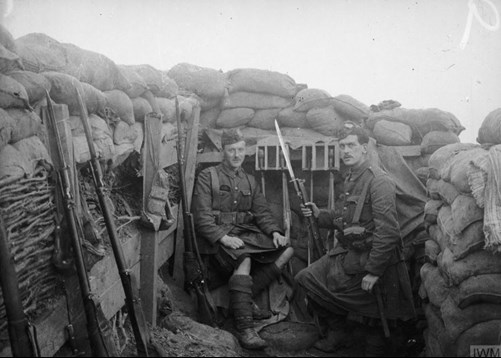
Above: Another of Fyfe's photos, this one is captioned 'Troops of the 1/10th Battalion, King's Regiment (Liverpool Scottish) in the Trench Q2 at St. Eloi, April-May 1915.' (IWM Q49822)
Private Fyfe
The press photographer, Frederick Fyfe survived this attack, was commissioned and awarded the Military Cross for gallantry for his part in a raid on the Somme in 1916. He later transferred to the Royal Flying Corps. After the war he became a freelance photographer in Liverpool.
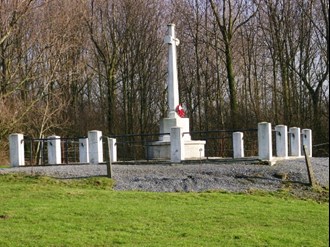
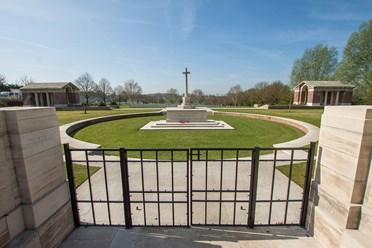
Visiting the area
There are two CWGC cemeteries in the immediate area, R.E. Grave, Railway Wood and Hooge Crater Cemetery (images below)
Further reading
An article about VCs awarded on the Western Front can be found via this link.
Fyfe's photos (26 in total) can be seen on the Imperial War Museum's web site here
Other Media
The WFA's Youtube channel has a splendid talk given by Mark Smith entitled For Valour: The Victoria Cross
Also on The Western Front Association's Youtube channel are two presentations, both given by Dr Spencer Jones in which he discusses other actions, and the broader perspective in 1915.
These are both worth reading:
The Royal Artillery and the crisis of 1915
Harsh Realities: The BEF's offensives 1915