


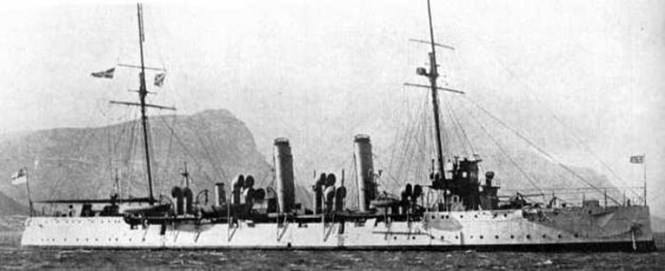
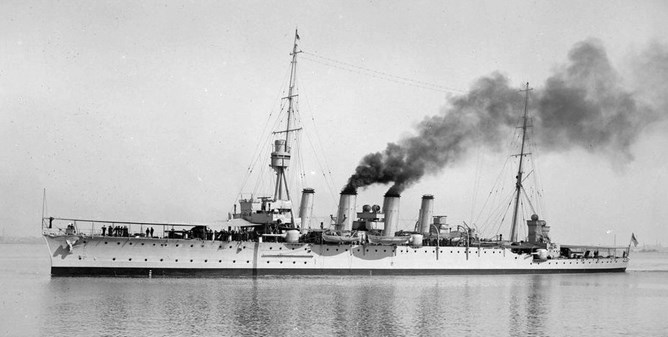
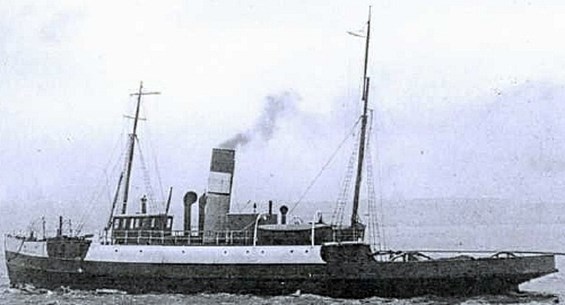
Early on the morning of 6 July 1915 two warships slipped away from Tirene Bay on Mafia Island, and slowly headed towards the coast of Tanzania, less than 30 miles away. The vessels were small, at 265 feet in length, and sat very low in the water: there was only three feet of freeboard fore and aft. However, they were heavily armed, each carrying two 6 inch and two 4.7 inch large calibre guns. The two ships - HMS Severn and HMS Mersey had endured a 5,000 mile journey. They had left Malta on 28 April and had been pulled by tugs at 6½ knots across the Mediterranean, through the Suez Canal and down the Red Sea. They were barely seaworthy, and to aid buoyancy for the operation they were to embark on, their holds were packed with 10,000 empty kerosene tins.
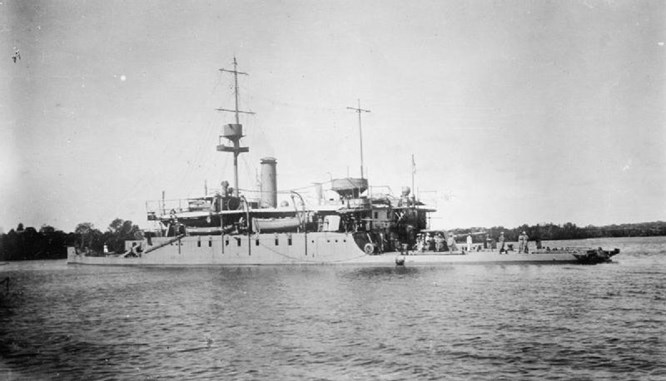
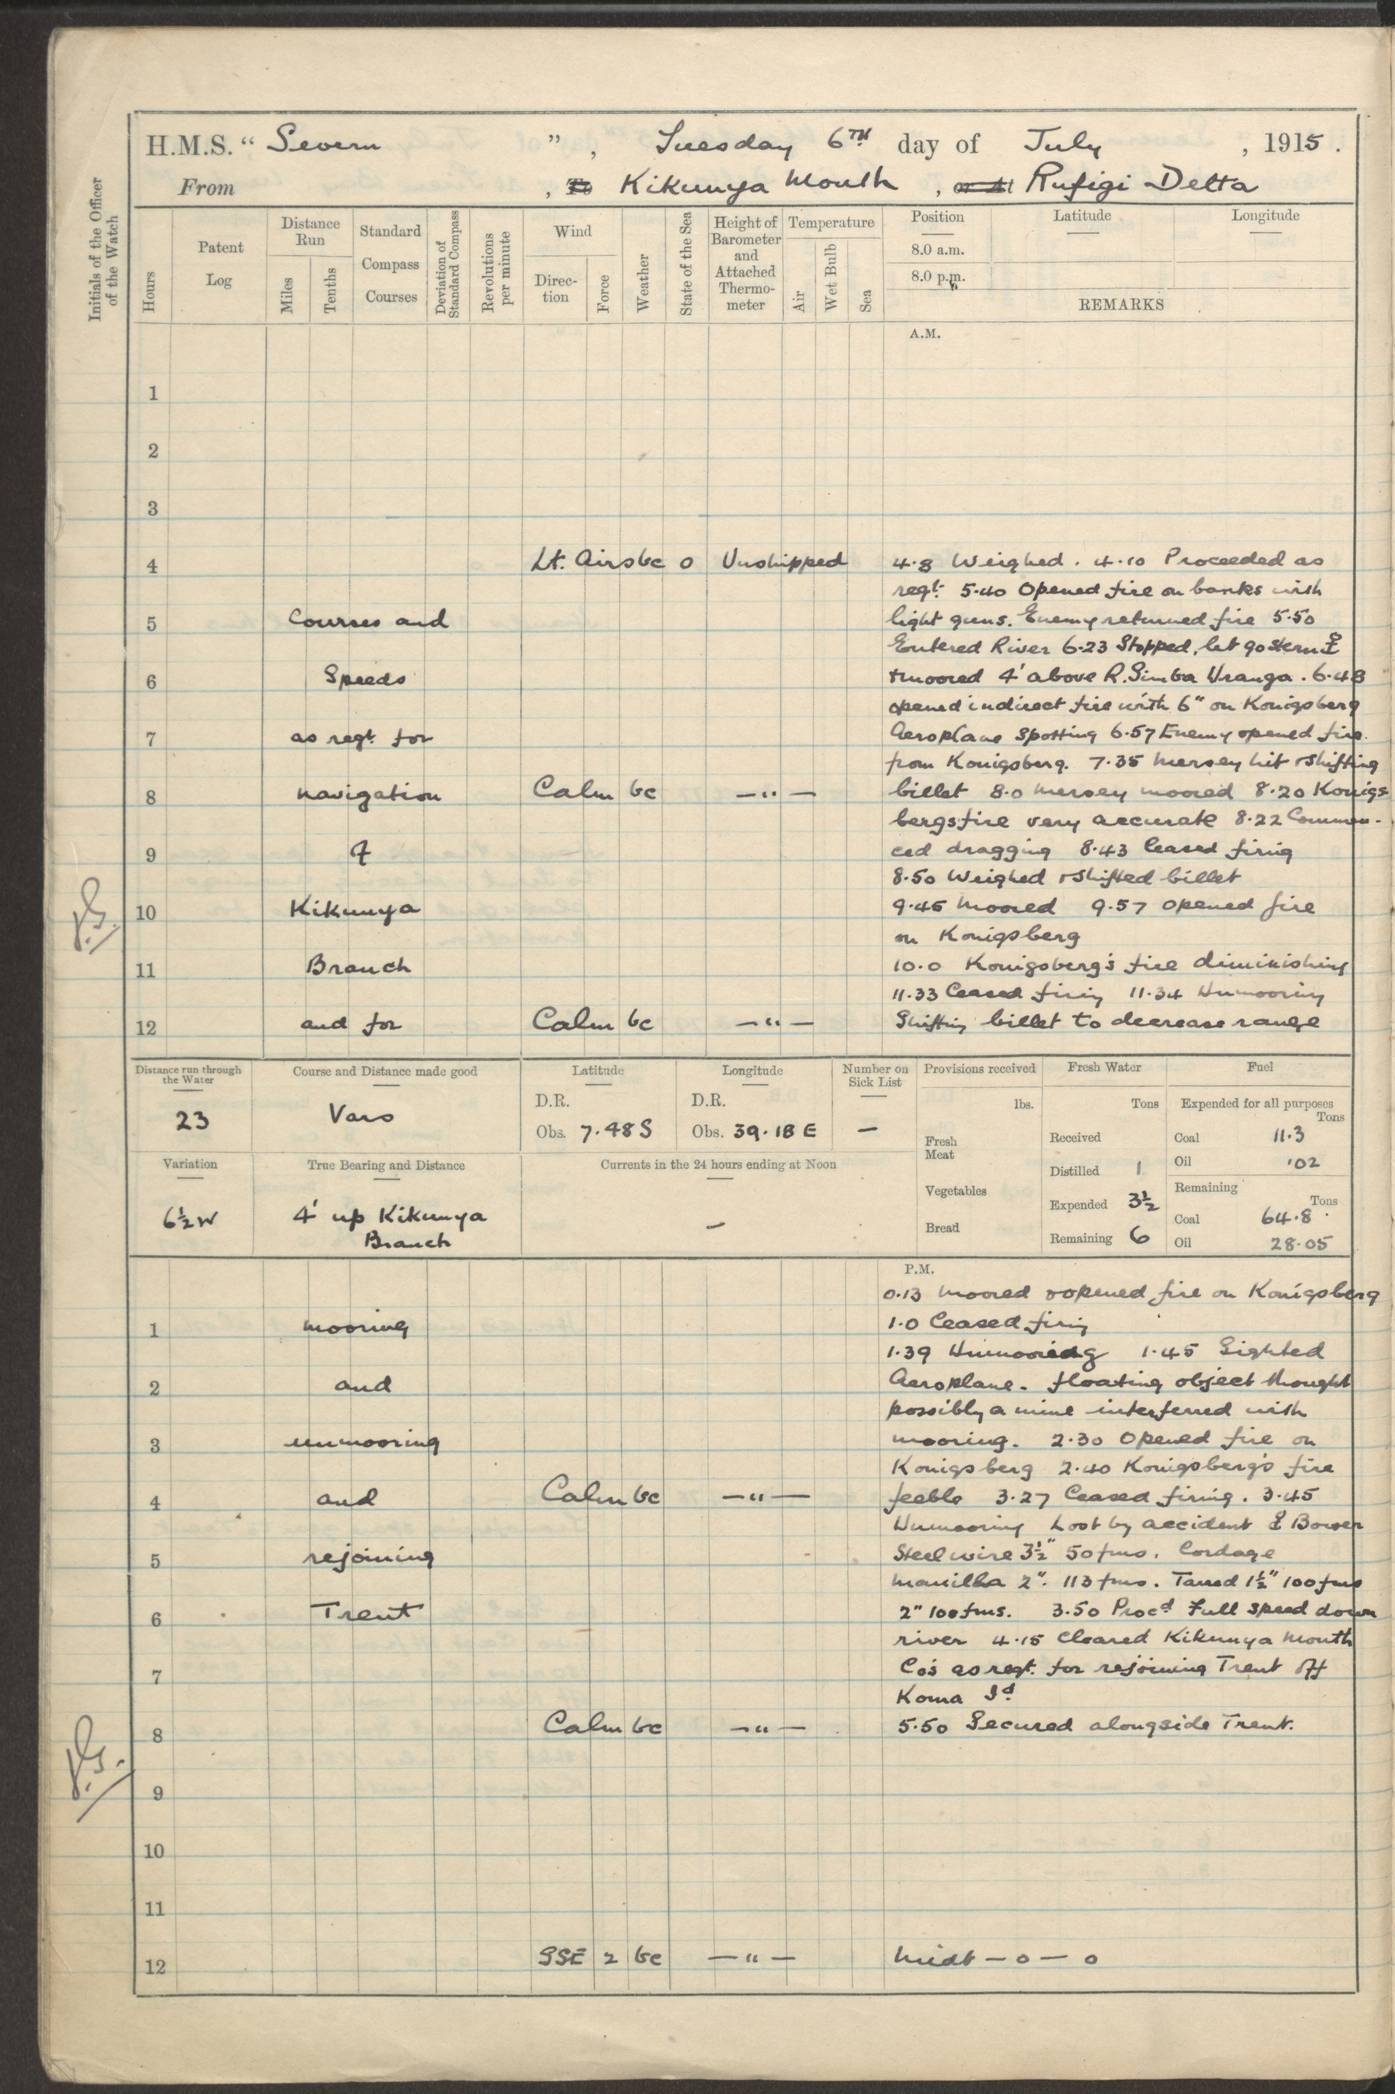
Above: HMS Severn
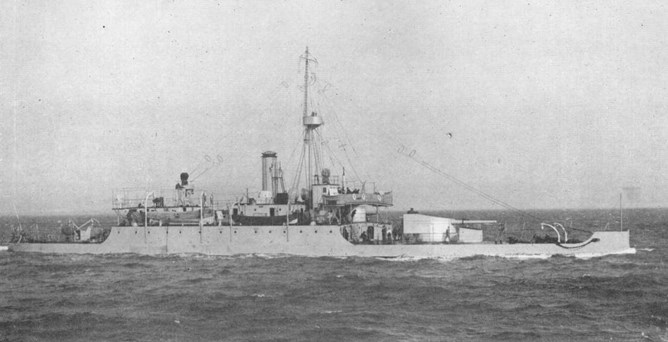
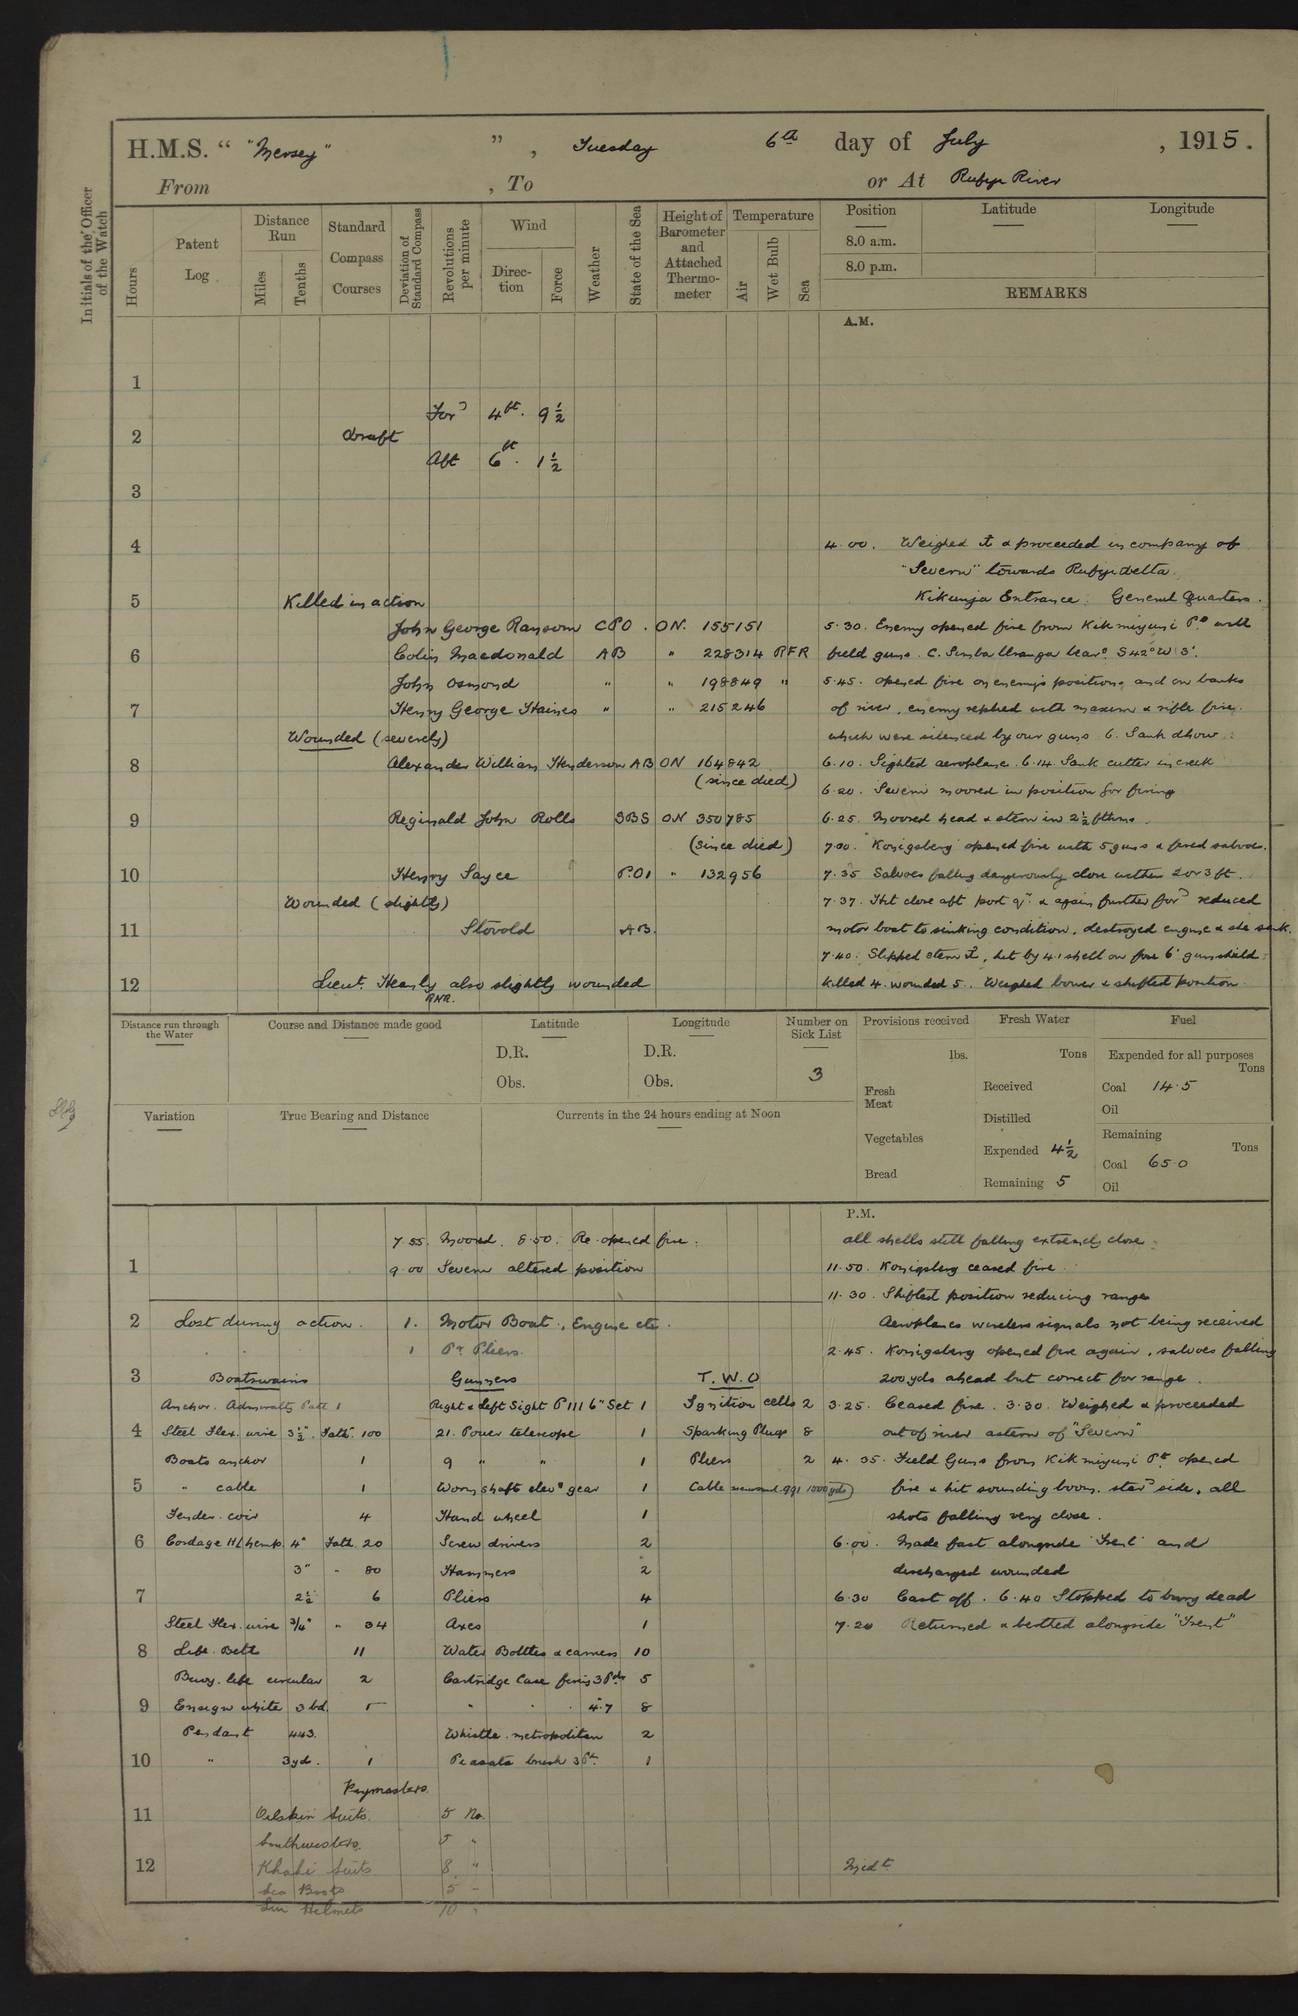
Above: HMS Mersey
Now under their own power, they headed towards the intricate network of waterways that made up the Rufiji Delta. The two vessels headed towards the Kikunja entrance - the widest opening to the Delta, but - despite the morning mists - they were observed by a patrol of German naval personnel.
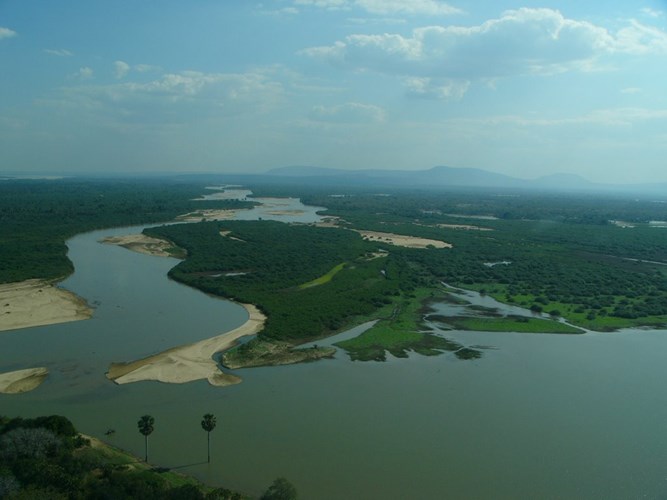
Above: The Rufiji Delta. Image via panoramio.com © Bernd Zehring (https://ssl.panoramio.com/photo/802524 )
Why had they come all this way and what were they about to do?
Commerce Raiders
At the outbreak of the First World War, the Imperial German Navy had eight cruisers stationed in various parts of the world. These warships were a serious threat to Britain's ability to trade and disruption of the trade routes was something that First Lord of the Admiralty, Winston Churchill, obviously wished to avoid. The cruisers SMS Karlsruhe and SMS Dresden were off the east coast of Mexico; in the Pacific was a strong squadron of vessels, which included the famous SMS Emden, which soon embarked on an epic voyage causing much panic to shipping in the Indian Ocean. Meanwhile, off the coast of East Africa was the cruiser SMS Konigsberg.
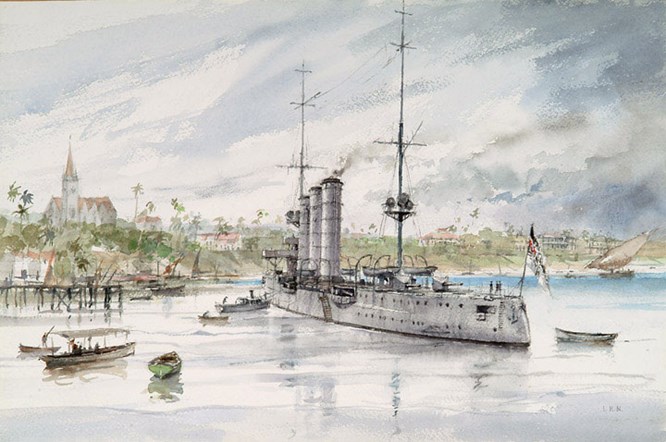
Above: SMS Konigsberg in Dar es Salaam. A watercolour by Ian Marshall. ©Ian Marshall / J. Russell Jinishian - www.jrusselljinishiangallery.com
SMS Konigsberg was soon in action, intercepting on the 6 August the British cargo ship City of Winchester which was heading for the UK loaded with tea. Konigsberg was more interested in the coal in the bunkers than in the cargo of tea, but much to the disappointment of Commander Max Looff, the warship's captain, he discovered the City of Winchester was carrying inferior coal which he decided not to use.
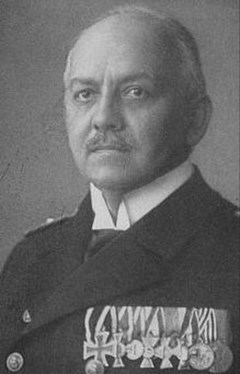
Above: Commander Max Looff
The City of Winchester was scuttled, and so had the dubious distinction of becoming the first merchant vessel to be lost by the British in the First World War. Although unknown at the time, this was to be the Konigsberg's only success against British cargo vessels.
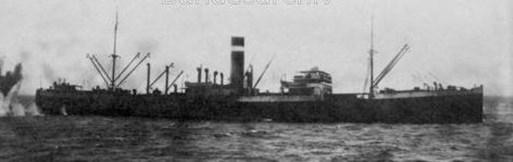
Above: The City of Winchester. Image courtesy of www.bild.bundesarchiv.de
The Cruise of the Königsberg
The Königsberg was armed with ten 105mm guns and was designed for 24 knots, making her faster than the three obsolete British cruisers in the area; these British warships were HMS Astraea, HMS Hyacinth and HMS Pegasus.
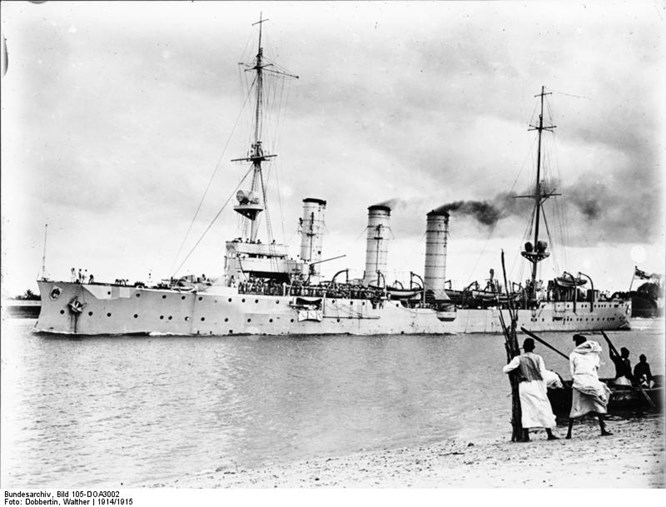
Above: SMS Königsberg
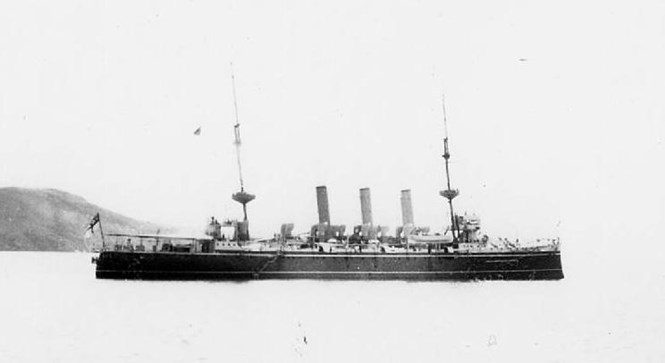
Above: HMS Hyacinth - Image courtesy of www.naval-history.net
Despite her firepower and speed, the German warship was severely hampered by her inability to obtain regular supplies of good quality coal.
Max Looff eventually resupplied the Königsberg with coal from a German supply ship, the Somali, (the warship was down to just 14 tons of coal) and continued searching for allied cargo vessels, but without finding any. In early September, with the Königsberg needing an engine overhaul, Looff sailed into the Rufiji Delta.
During the overhaul, information came to Looff that a British warship had entered Zanzibar harbour. Setting sail at once, by early the next morning (20 September 1914) Königsberg was off Zanzibar island. The intelligence was correct, HMS Pegasus was at anchor and completely helpless.
Above: HMS Pegasus
For twenty-five minutes the Konigsberg continually bombarded the Pegasus whose boilers were cold. The German ship slowly reduced the range from 9000 yards to 7000 yards, but she was careful to keep out of range of the guns on board Pegasus. One of the first to be hit was the gunnery officer, Lieutenant Richard Turner, whose legs were shattered by a shell. As he lay bleeding to death it is said that he encouraged the men by shouting “Keep it up, lads” and “We’re outclassed and done for; but damn them, and keep it up!”
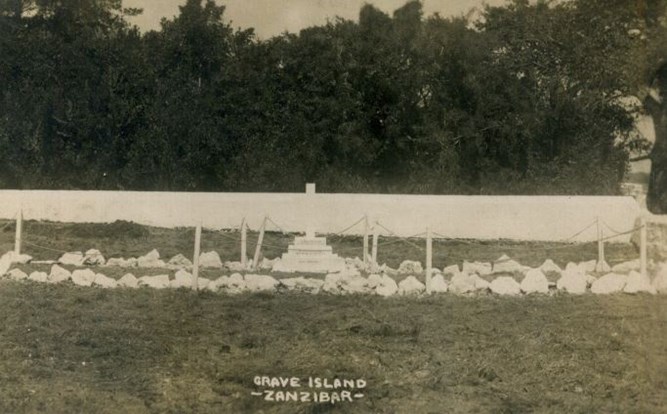
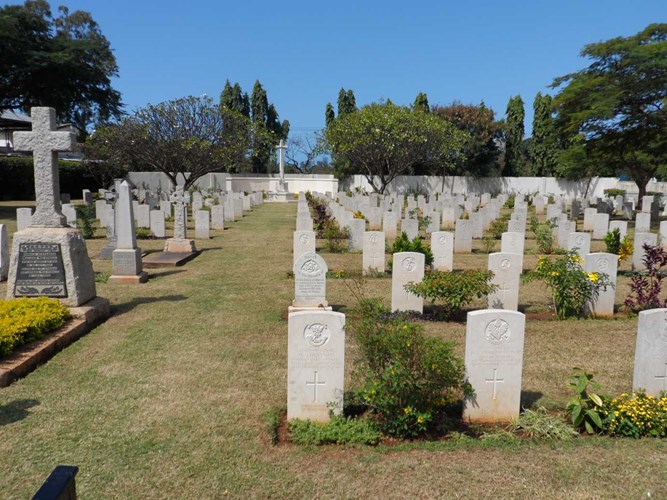
Eventually HMS Pegasus was sunk. The wreck site is just off the coast of Zanzibar. The majority of the fatalities (24 out of the 34 killed) from this engagement are buried at the Zanzibar (Grave Island) Cemetery.
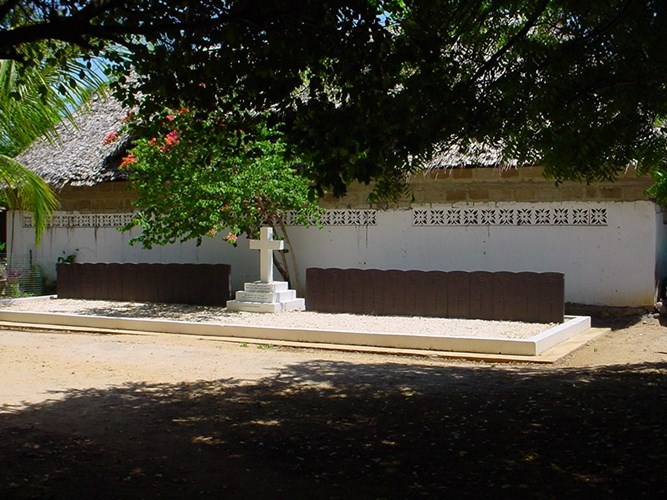
Above: Zanzibar (Grave Island) Cemetery as it is now and (below) just after the First World War.
Ten other fatalities from the action were buried in Zanzibar English Cemetery, but were re-buried at the newly created Dar es Salaam War Cemetery in 1971.
One version of the story of the Pegasus appears in 'Deeds that Thrill The Empire', which states:
During the action the flag of the "Pegasus" was shot away from its staff. A Marine at once ran forward, picked it up and waved it aloft. He was struck down while standing on the deck exposed to the enemy's fire ,but another came forward to take his place. Until the end the flag was kept flying. Most of the casualties occurred on deck, and with utmost bravery Staff-Surgeon Alfred J Hewitt rendered every assistance to the wounded.
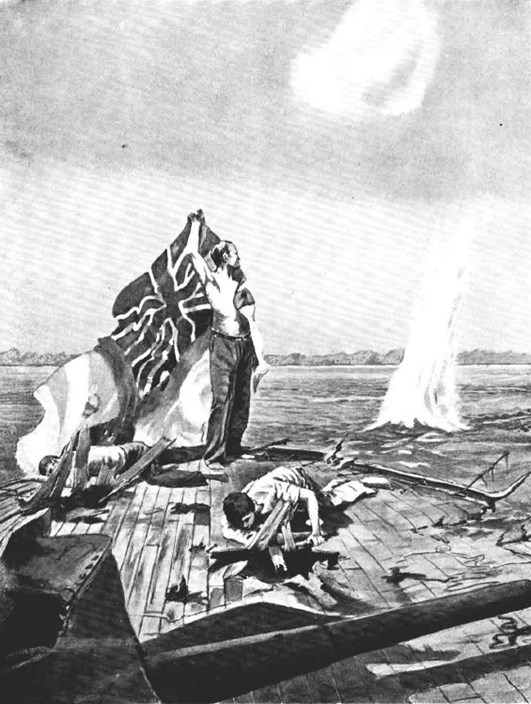
Above: Flying the flag on the Pegasus. Image from Deeds that Thrill The Empire.
The reality of the story is somewhat different.
The captain of the Pegasus had ordered the ensign struck and a white flag raised in order to prevent further loss to his crew. The fact that a British warship had struck her colours was never disclosed during the war and the story of the brave marines took hold.
The Königsberg breaks down
The sinking of one of the three Royal Naval ships could have been a major advantage, but luck was to turn against Looff. At this point, a major fault developed in one of the Königsberg's engines and with the Germans unable to use the facilities at Dar er Salaam, all they could do was head back to the Rufiji delta and send for spare parts overland - a trip of 100 miles each way.
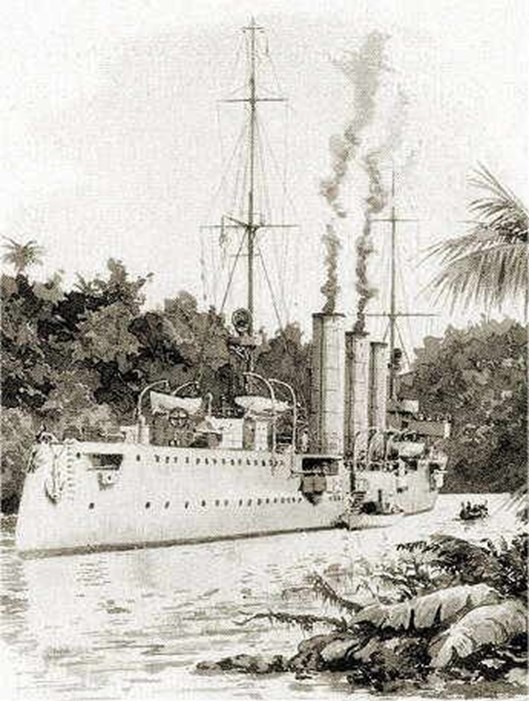
Above: Königsberg in the Rufiji Delta. Image courtesy of www.deutsche-schutzgebiete.de
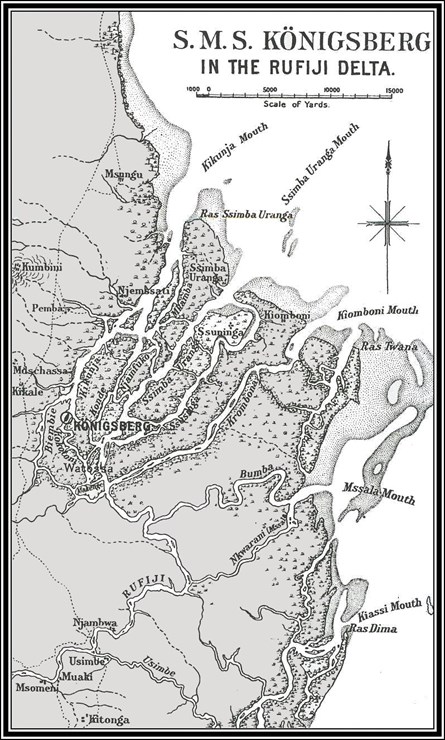
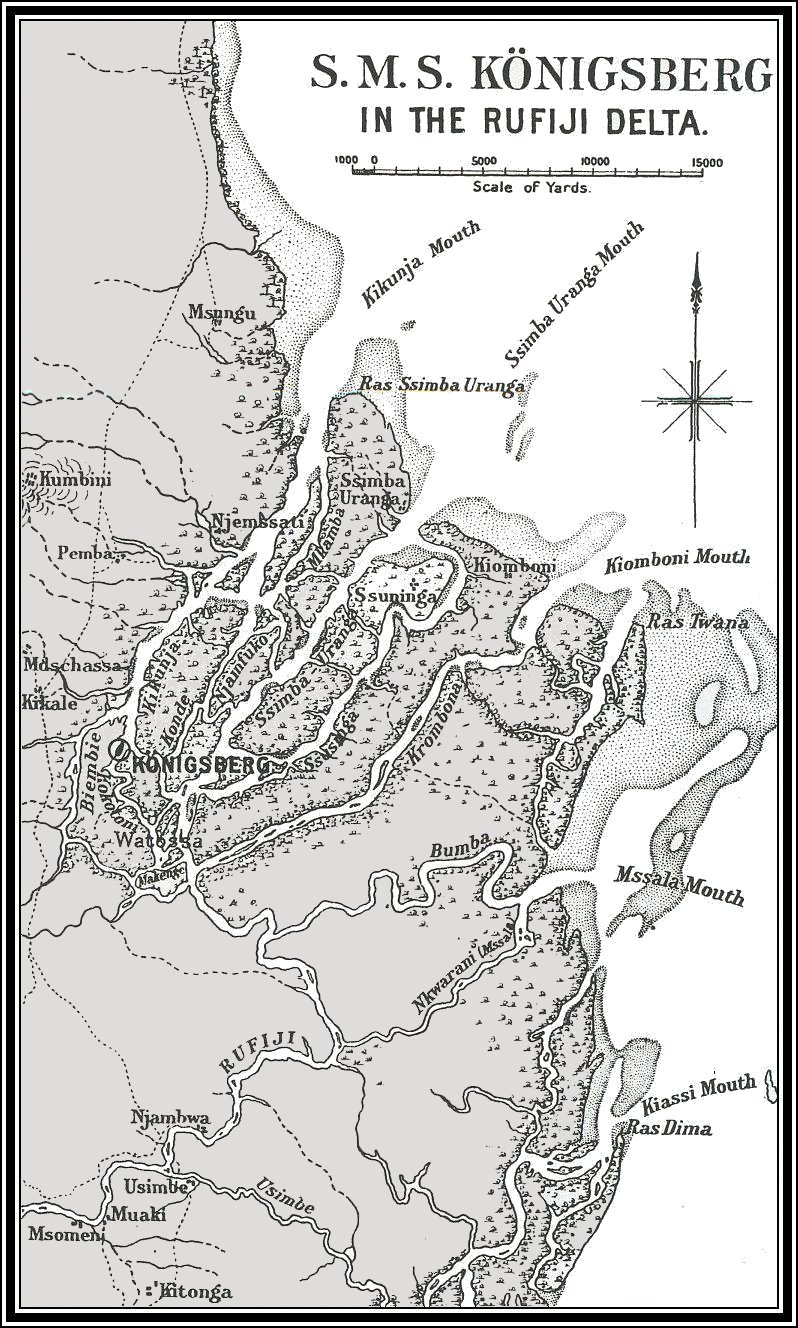
Above: A map showing the intricate and numerous channels within the delta system. Click here for larger map. (Image courtesy of www.naval-history.net)
Although the new parts arrived within just ten days - a remarkable achievement - this was to no avail. During this time, the British had made a concentrated effort to find the Königsberg and despatched three new, much more powerful, warships to the area: HMS Chatham, HMS Dartmouth and HMS Weymouth with Captain Drury-Lowe of Chatham in command of the operation.
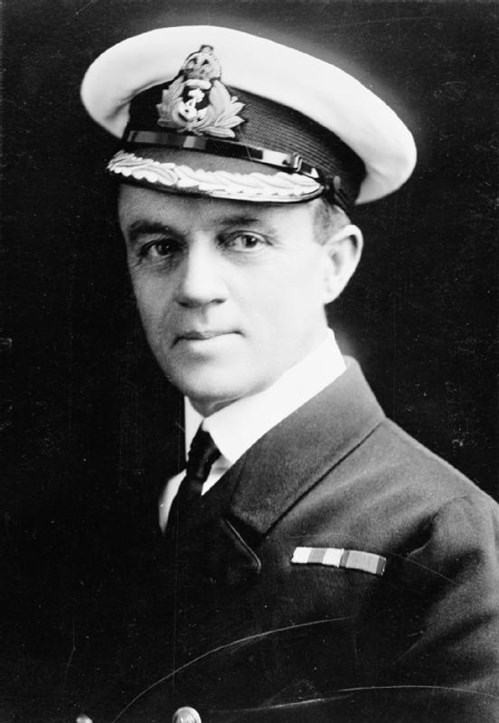
Above: Captain Sidney Drury-Lowe
Above: HMS Chatham
On 29 September, HMS Chatham intercepted the German liner Präsident and discovered an order for shipments of coal. This coal was to be delivered to the Rufiji delta.
Above: Präsident - Image courtesy of www.wrecksite.eu
Suspicious of this document, Chatham headed to the delta and on the afternoon of 20 October a landing party was ashore. Before long a British sailor who had climbed a tree observed the disguised masts of the Königsberg and her supply ship, the Somali rising above the jungle. Within hours, HMS Chatham had been joined by the Dartmouth and and Weymouth .
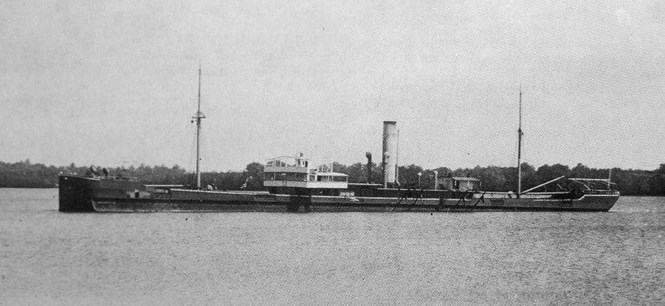
Some days after the Präsident was intercepted, another German vessel - the German Tug Adjutant - was captured and converted for use by the British. Because of its shallow draught, this was an ideal vessel to use in the delta.
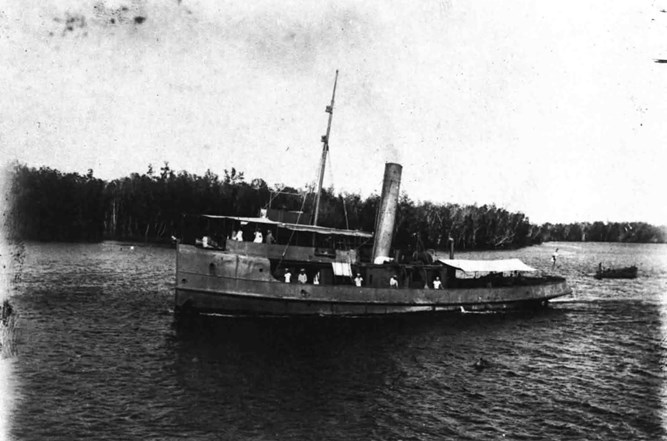
Above: Adjutant
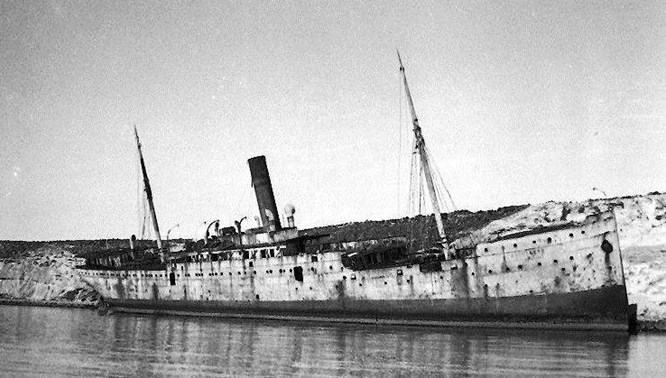
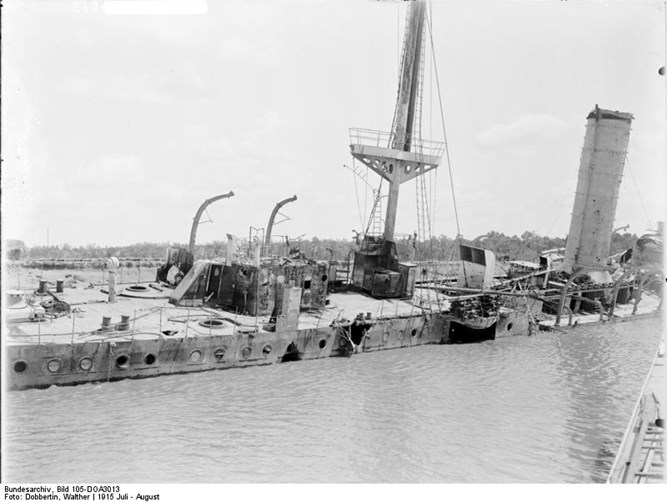
Because of their deep draught, the British were unable to follow the Königsberg into the river. The British warships soon targeted and sank the Somali, but British warships' guns did not have the range to hit the Königsberg which was moved further into the delta system.
Above: The wrecked Somali
In order to try to prevent a breakout, and reduce the number of escape routes for the Königsberg, on 9 November 1914, an old collier - the Newbridge - was sunk at the entrance of one of the channels of the Rufiji Delta.
Above: The crew of the collier Newbridge abandon the vessel after commencing the scuttling. Image from Deeds that Thrill the Empire
Above: Newbridge. Image courtesy of www.naval-history.net
Unable to reach the German warship, the British decided to employ aircraft to either bomb, or at the very least, observe the Königsberg. This was fraught with problems as there was neither aircraft nor pilots within hundreds of miles. A pilot and aircraft were located in South Africa and sent north. Quickly commissioned as a sub-lieutenant in the Royal Naval Reserve, Dennis Cutler undertook the first aerial reconnaissance in East Africa. The initial flight did not go well, with his aircraft breaking down. The only way of effecting repairs was to send a warship 200 miles to Mombasa to collect a radiator from a Model T Ford. Nevertheless repairs were made, and the Königsberg was spotted from the air on 21 November. However, because the aircraft being used was grossly underpowered, and could barely get airborne, let alone carry bombs no attack was made on the German warship.
Other aircraft were sent, including some Sopwith 'Folder' type seaplanes. These were despatched from Bombay in early February 1915.
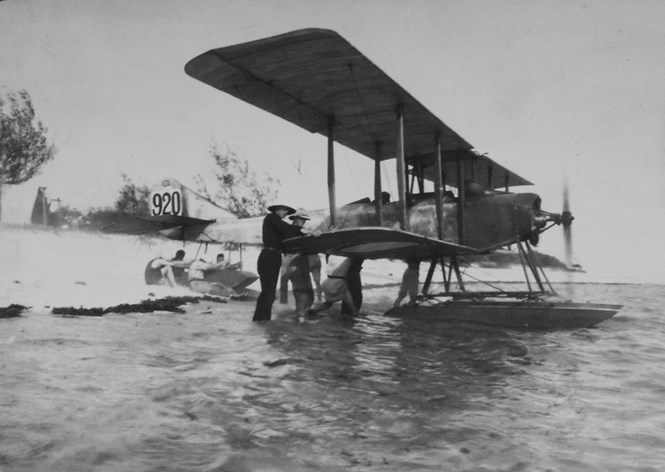
Above: Sopwith Folder No.920 on the beach at Niororo with the exposed engine running whilst the aircraft's tail float and wings are held back. Image courtesy of www.kingstonaviation.org.
These 'Folder' aircraft were equally unsuccessful as the tropical heat warped the wood and melted the glue that held the airframes together. Eventually two new Henri Farman and two Caudron landplanes were delivered in June 1915 and a base set up on Mafia Island.
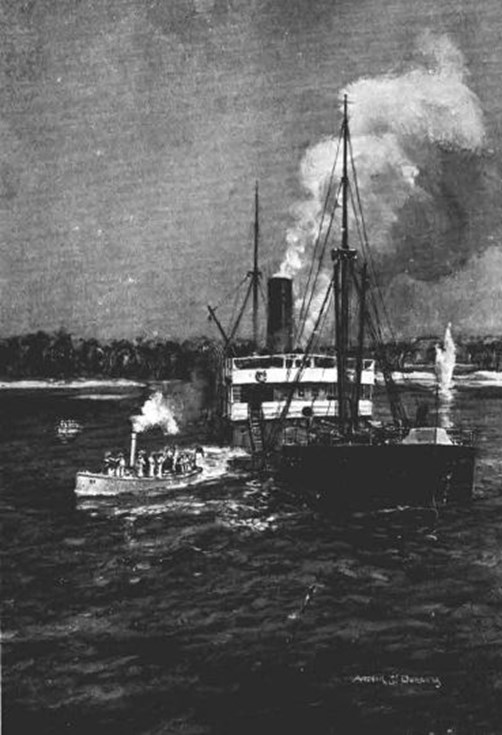
Meanwhile, operations to locate the Königsberg continued, with the ex-German Adjutant - crewed by British sailors with Sub‑Lt Wilfred Price in command - hunted through the delta for the German warship. The Germans were not passively waiting - they had set up forces on the shore-line with guns from the Königsberg. Spotting the Adjutant on 6 February, they shelled the tugboat and cut a steam pipe. The tug drifted to shore and with one crew member - Edward Piddock - dead. Edward is buried at Dar es Salaam (Upanga Road) Cemetery (image below).
The rest of the crew of the Adjutant were captured and the armaments on board made a useful addition to the German arsenal. The tug once again belonged to the Germans !
Despatch of The Monitors
By early 1915 it had become obvious that there was deadlock which would need radical action to resolve. The Gallipoli landings had commenced on 25 April and three monitors, HMS Humber, HMS Severn and HMS Mersey had arrived at Malta en route to the peninsula to support the landings. Too late into the theatre to be effective at Gallipoli, it was realised that these vessels (which had previously been used to bombard the Germans off the Belgian coast) would be potentially very effective in the Rufiji river system. Their draught was only 6½ feet which would enable them to get within range of the Königsberg.
Leaving HMS Humber behind in Malta, the Severn and Mersey - towed by a number of tugs - and with their crews on board HMS Trent, exited the Suez canal on 6 May and headed down the Red Sea. Over the next few days, the temperature gradually increased. Even at night, it was unbearably hot, with the thermometer reportedly rarely falling below 87° Fahrenheit (30° Celsius). On board one of the tugs, the Sarah Joliffe, two men were rendered unconscious when the temperature in the engine room hit 145° Fahrenheit (63° Celsius).
Above: The tug Sarah Joliffe. Image courtesy of www.thamestugs.co.uk
On 15 May, the convoy anchored off Aden. Whilst here, two men died from heat stroke. Ship's Steward Assistant Edward Phair and Engineer Henry Beaton were buried at Maala Cemetery.
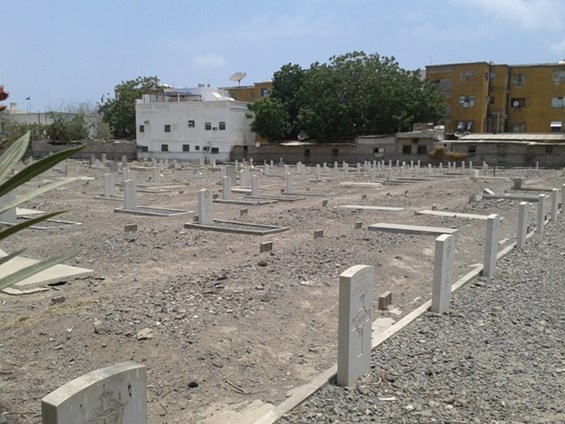
Above: Maala Cemetery, at Aden in the Republic of Yemen
The convoy arrived at Mafia Island on 3 June. Preparations were put in train for an attack on the Königsberg. After working out the different tides, it was decided to commence the attack on 6 July. This was not going to be a foregone conclusion. With the Germans manning guns on the approaches to the delta, there was every chance that serious damage - or worse - could be inflicted on the two Royal Navy monitors.
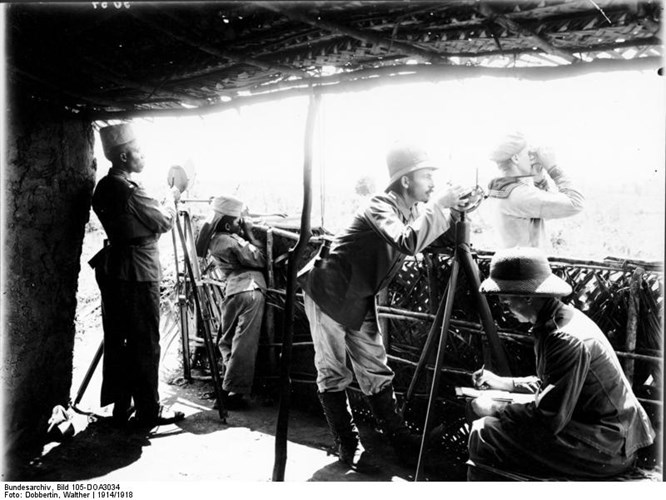
Above: A German artillery observation post, part of the land defences set up around Königsberg in the Rufiji Delta.
The First Attack
As they approached the mouth of the river system, the Severn and Mersey were battered by the shore defences. A torpedo was fired from the shore, but was destroyed by one of Severn's guns. Fortunately the Captain of the Königsberg had elected not to strip the cruiser of its heavier guns and despite a number of hits on the monitors (particularly HMS Mersey) the two vessels successfully entered the delta.
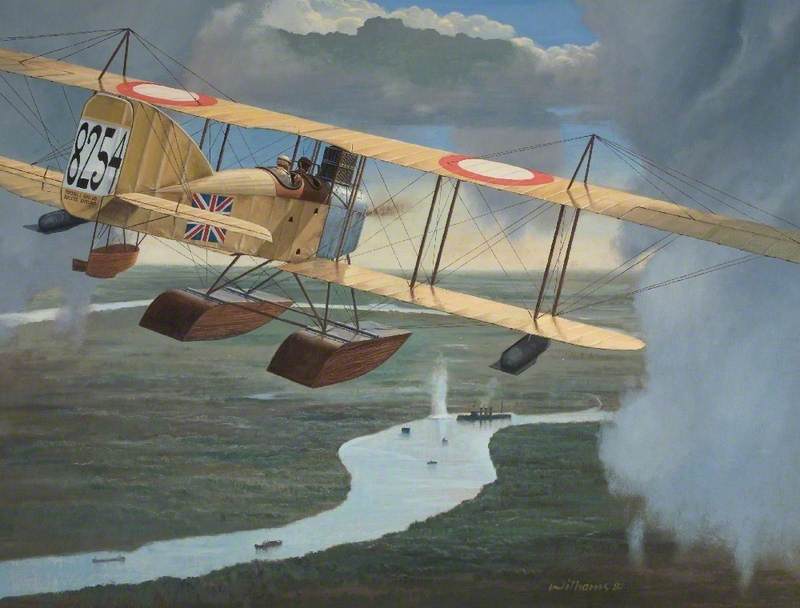
After running the gauntlet of the shore defences, and feeling their way through the channels of the river system, two hours later the Severn and Mersey dropped anchors and - using the instructions coming from the spotter aircraft - commenced firing on the Königsberg.
The German cruiser shot back, Captain Looff correcting his fire by the observations of crew who had been placed in strategic points in the undergrowth. Because the use of spotter aircraft to report on the fall of shots was unpractised, the German guns found their range first and straddled the British monitors. By 7.40am Mersey had been hit twice - one shell penetrating the shield of one of her 6 inch guns and killing four men. It is without doubt that these fatalities were buried at sea, as they are now commemorated on the Portsmouth Naval Memorial.
One of the men killed was Chief Petty Officer Moses (known as Jack) Ransom.
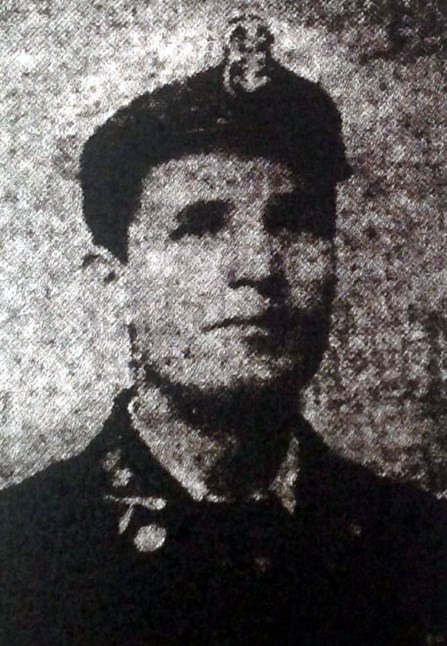
Above: CPO Jack Ransom who was born in Maidstone in 1872. Before joining the Royal Navy in 1890 he was a charcoal burner. Image courtesy of www.tonbridgehistory.org.uk
Two other men died of the wounds over the course of the next few days, one of whom, Reginald Rolls was originally buried at Zanzibar English Cemetery but is now buried at Dar es Salaam War Cemetery.
The monitors shifted their position - which resulted in the German observers being unable to spot where the Königsberg's shells were landing.
By early afternoon the tide was falling and the monitors' guns were overheating so the British decided to disengage: there was no point risking the monitors becoming grounded in the treacherous river. Again, the German defenders at the mouth of the river plastered the retiring ships with shell fire, but no serious damage was inflicted.
The log of HMS Mersey detailing the day's action can be seen here and the log of HMS Severn is here.
The first day’s efforts resulted in just four hits on the Königsberg out of 635 shots fired. It had not been a success for the British, but they had ridden their luck despite coming under fire before during and after the engagement.
The Second Attack
Five days later, on Sunday 11 July, the Severn and Mersey were again heading across the channel from Mafia island. Incoming fire from the shore was again intense, and two sailors on the Mersey were wounded. The two monitors again found suitable positions to fire from, but even before they had anchored, the Königsberg had opened fire and straddled both ships. The Mersey was hit by two shells, wounding another two sailors.
Circling overhead was the British spotter aeroplane calling the fall of shots fired from the Mersey and Severn.
Above: SMS Königsberg by Brian Withams courtesy FAA musueum
This time, after eight salvoes the British hit the Königsberg, and a further seven more hits were made in the next few minutes. It did not all go the way of the British though, as the aeroplane was hit and had to make an emergency landing alongside the monitors. Another plane went up to replace the damaged one, and further hits were made on the Königsberg.
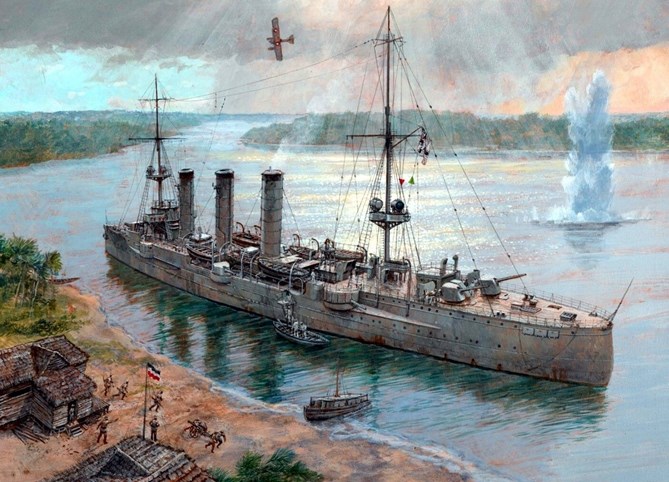
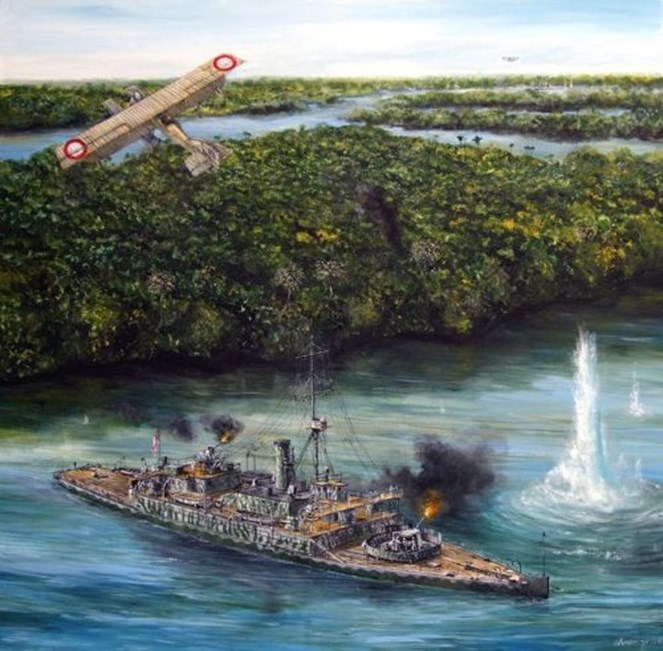
Above: SMS Königsberg in the Rufiji Delta by Paul Wright
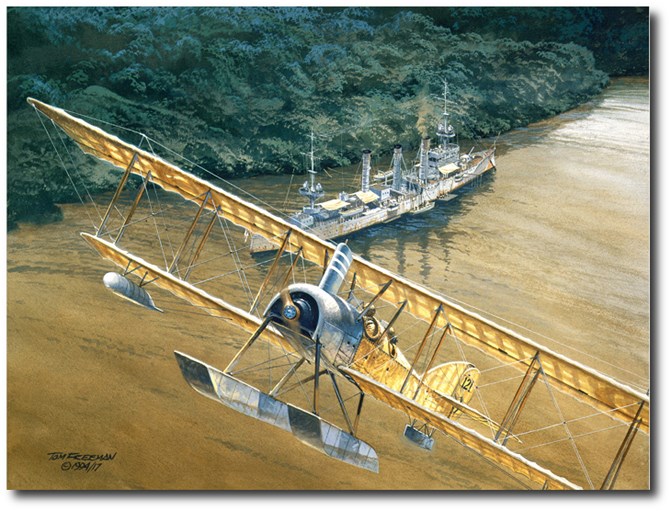
Above: SMS Königsberg by Tom Freeman
Under continual shelling and on fire, it was realised that the end was near.
Above: HMS Mersey vs SMS Königsberg - Lukasz Kasperczyk
The Königsberg's First Officer wired up torpedoes to blow out the cruiser's keel, and after making the order to abandon ship, set off the explosives. Königsberg heeled to port, sinking into the mud of the Rufiji River.
On board the monitors, the series of massive explosions could be heard from the German cruiser and a mushroom-shaped cloud emerged over the tops of the trees. The Mersey's log book records the following:
“Königsberg has ceased firing. Am convinced she is total wreck, five enormous explosions, she is burning hard now.”
On board HMS Severn, the captain climbed a mast and was able to see that the Königsberg had in fact been destroyed. Orders were issued for the monitors to leave the delta. They again came under fire (but this time much less intensively) from the shore batteries at the mouth of the delta and headed back to Mafia Island.
The destruction of the Königsberg was far from inevitable, bottled up as she was she was still capable of fighting back. Indeed, even on this second attack, there had been a chance of the British coming unstuck as Looff had ordered two small German ships equipped with torpedoes to sink the monitors; fortunately they had failed to make contact.
Aftermath
The Germans soon set about removing the armaments from the Königsberg, these were supplied to the local German commander, Colonel von Lettow-Vorbeck, who used these to continue the fighting in East Africa until the end of the war.
Approximately 33 German sailors died during the blockade and the fighting, many of them from tropical disease. They were buried alongside the ship. A plaque reading "Beim Untergang S.M.S. Königsberg am 11.7.15 gefallen..." was placed near the graves, with a list of the dead.
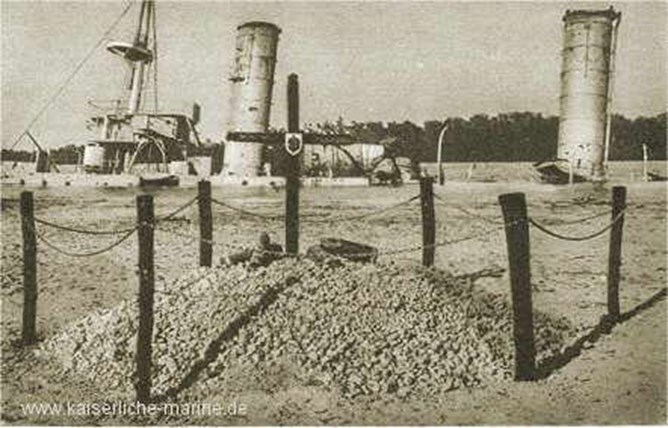
Above: German graves alongside the Königsberg. Image courtesy of www.deutsche-schutzgebiete.de
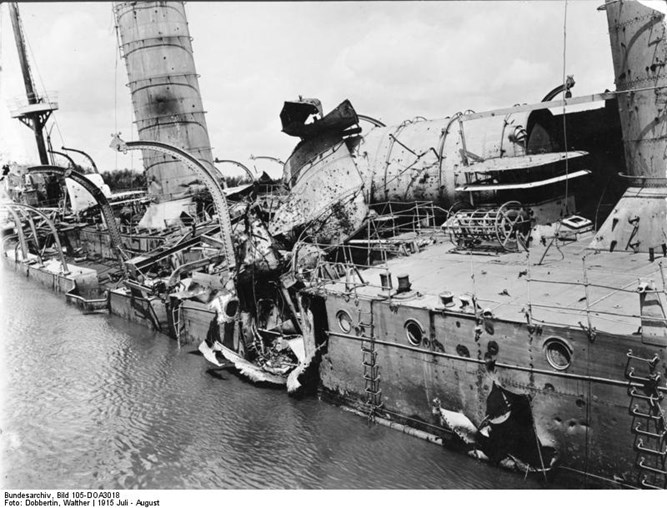
Above and below: Damage to the Königsberg
Echoes of the action
A little known modern day connection to the action is played out every year. In 1922, HMS Chatham donated a cup to the Football Association of New Zealand. This - the Chatham Cup - is the equivalent of the English FA Cup and continues to be competed for to this day.
The Site today
The most obvious feature of the Rufiji Delta is its mangrove forest which is the largest in Tanzania. The mangrove forest supports an extensive food system and the delta (and Mafia Island) are important wintering grounds for migrant birds, including waders and terns. Wildlife, such as hippopotamus, crocodiles and monkeys, feed and shelter in the mangrove forest.
Because of the build up of sediment carried to the Indian Ocean by the river, the delta has shifted over the years and has swallowed up much of the evidence of the battle that took place here in 1915.
The location of the wreck of the Königsberg can be seen via this link
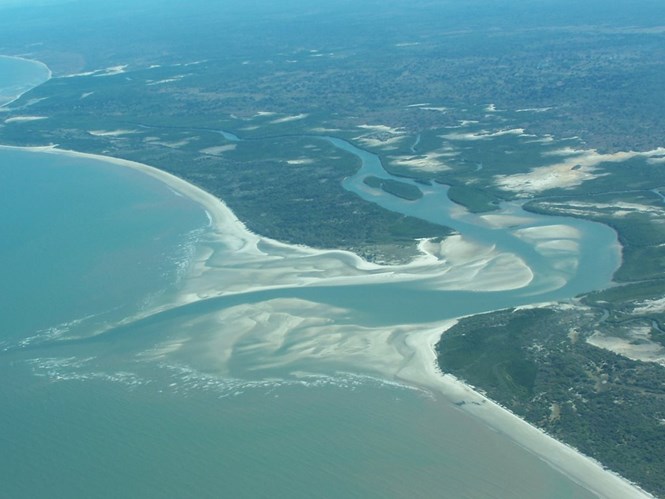
Above - the Rufiji Delta. Image via panoramio.com © arian_ag (https://ssl.panoramio.com/photo/2044367)

Above: The Rufijji River showing the numerous channels in the delta. Image courtesy of "RCAF in UN Operations" (www.115atu.ca)
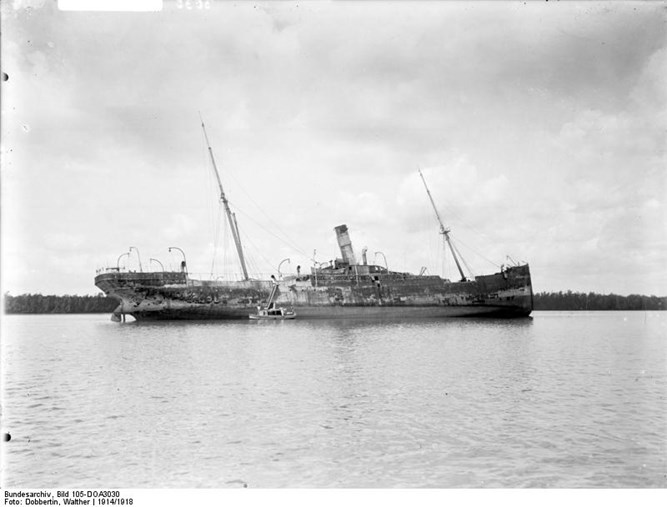
The only remaining vessel which can be viewed without diving is the Königsberg's supply ship Somali. After sinking, silt from the river formed around the ship, and eventually engulfed her in a shallow sandbar. Trees grew on the sandbar and within a few decades Somali was actually inside the encroaching forest.
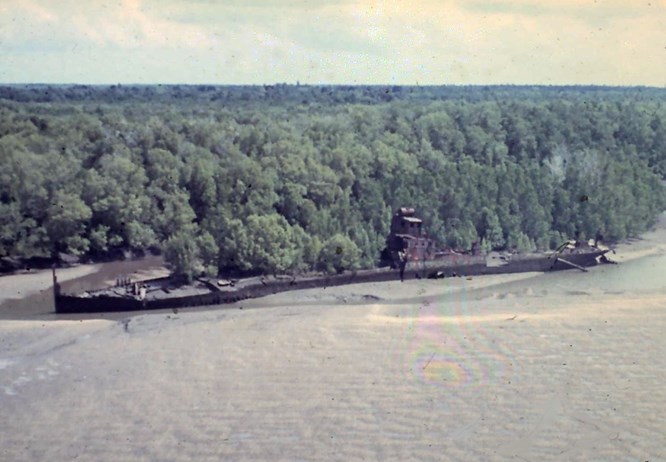
Above and below: Somali photographed in the late 1960s. Image courtesy of 'RCAF in UN Operations' (www.115atu.ca)

Further reading
The Great War in Africa by Byron Farwell.
Acknowledgements/Sources
The War Times Journal : www.wtj.com
Naval History Net : www.naval-history.net
Wreck Site : www.wrecksite.eu
Thames Tugs. The Thames Ship Handling Tugs and London Lighterage Tugs 1833 - 2020 : www.thamestugs.co.uk