TrenchMapper™: How we do it
It is often asked 'how exactly do you do it' when it comes to the identification of the current locations of aerial photos in TrenchMapper™.
Howard Anderson explains the process using an example of 'Square Farm' near Ypres:
Some aerial photos are quite hard to georeference but that does not stop the TrenchMapper™ team from achieving a high standard of accuracy.
Take this example. An aerial photo with no indication of the whereabouts or even the direction of North.
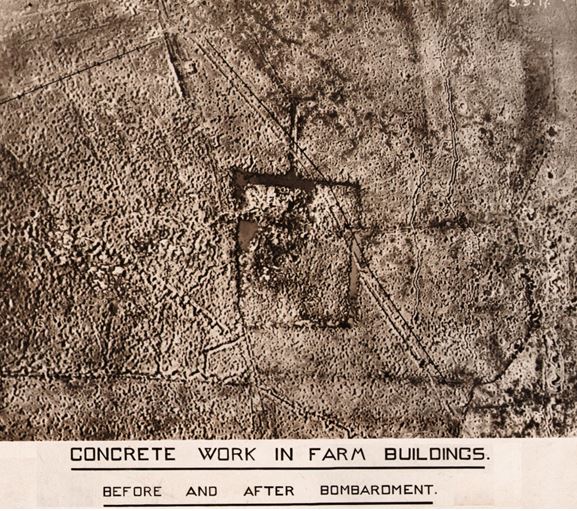
Stage one: research its location. A combination of prior knowledge, websites, the Great War Forum and intuition leads to a name. Square Farm, NE of Ypres.
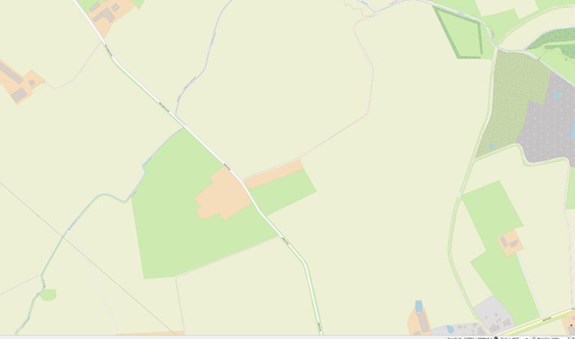
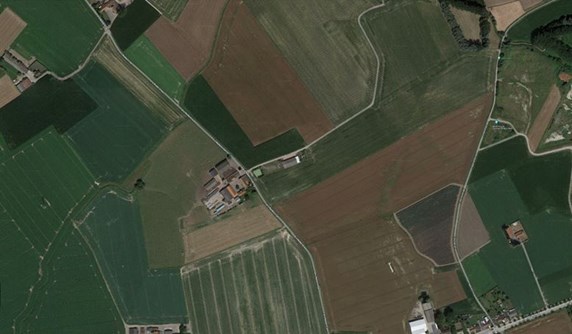
The OpenStreetMap of the Square Farm area is not very promising, it is almost blank. Aerial imagery is more promising, however, the modern farm buildings are no longer the same.
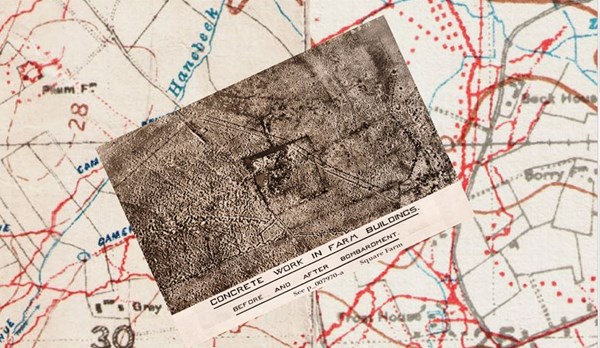
The next stage is to use a previously georeferenced trench map as a starting point. This is not ideal as errors in its georeferencing will add to errors when placing the photo. See image below.
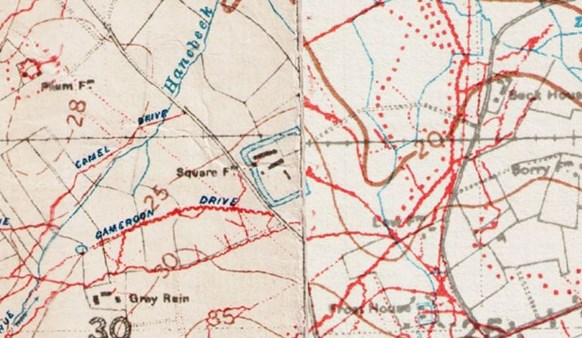
A tentative setting of at least three Ground Control Point is used to set the photo on the trench map as can be seen below.
Once the best fit is obtained, the trench map is removed to check if points are now visible on the OpenStreet Map.
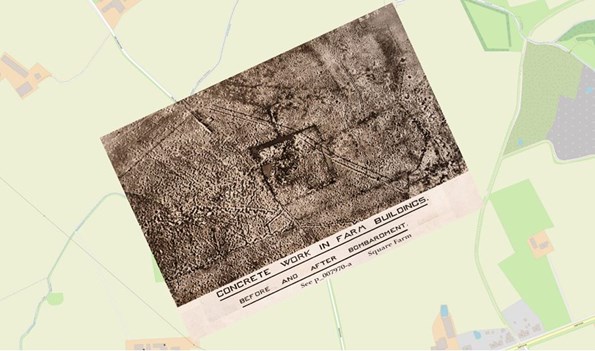
Points on the road junctions are compared with what is assumed to be the same points on OpenStreet Map (above) and the same check is used with aerial imagery (below).
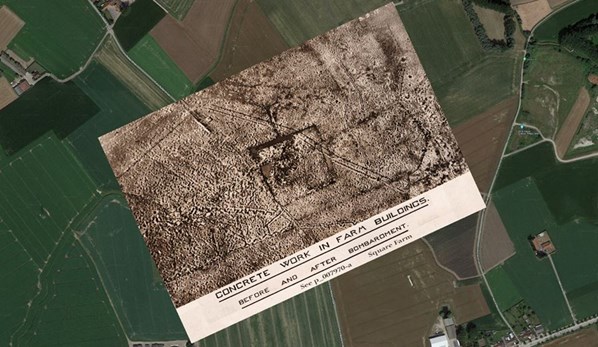
Once this is done, extra ground control points can be added because points that were not at all obvious can now be discerned in the photo and correlated with modern ground features and used as control points.
Then a feature of the GIS software we use (QGIS) can be used to slightly distort the photo to counteract the distortion caused during its production. This is called Thin Plate Spline transformation and may be required if the photo was taken not quite straight down etc.
The result is an accurate placement on what looks like an almost blank OpenStreet Map.
So now you know!
Please do take a look at the WFA's superb TrenchMapper™ portal if you've not already done so. A series of videos can be seen on the WFA's website> WFA TrenchMapper™ Video help.


