The Battle of Dogger Bank
The naval arms race between Britain and Germany had, in the early years of the 20th Century, been a major contribution to the increasing tensions in Europe. On the outbreak of the First World War it was uncertain how the Imperial German Navy would be used. Would the Germans challenge the British in the hope of eliminating the Royal Navy's superiority or would the Germans be more defensive in their approach?
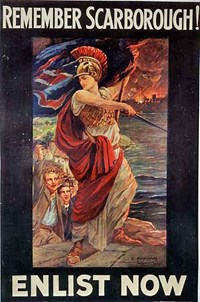
It soon became apparent that the Germans did not have the intention of undertaking a full-scale fleet action against the Royal Navy's 'Grand Fleet' in the North Sea. Instead, an alternative strategy was evolved by the Germans in which they used 'commerce raiders' in distant corners of the globe, whilst closer to home, they aimed to lure elements of the Grand Fleet in the North Sea onto superior forces and into minefields. One of the first examples of this strategy was seen in December 1914 when bombardments were made on the East Coast towns of Hartlepool, Whitby and Scarborough. The damage inflicted was minimal and the propaganda value for the British was immense.

It was not until January 1915 that a serious action in the North Sea involving major units from both sides took place.
From the German point of view, the attack on the East Coast towns had been successful, as damage had been done and the raiders had escaped (assisted in large part by the bad weather). As a result, Admiral Hipper, the commander of the I Scouting Group (a special reconnaissance unit within the German High Seas Fleet) decided to undertake a further raid.
On this occasion, his targets were the vessels comprising the British Fishing Fleet, which were suspected of gathering intelligence on German movements. The British Fishing Fleet regularly worked the Dogger Bank area of the North Sea. This was again a soft target and an even lower risk operation than the attack on Scarborough as the German warships would not have to sail as far from their bases as they had for the raid the previous month.
Unbeknown to the Germans, the British were reading their signals – the decoding of these German wireless messages being undertaken at Room 40 in the Admiralty buildings in London. The department responsible was headed by the Director of Naval Intelligence, Admiral Sir William Hall.
Although they were unaware of the exact plans, the cryptographers of Room 40 were able to deduce that Hipper would be conducting an operation in the Dogger Bank area. Vice Admiral Beatty commanded the Royal Navy's First Battlecruiser Squadron and was ordered to intercept and destroy the German ships.
The First Battlecruiser Squadron was composed of the four newest battlecruisers in the Royal Navy including the recently completed HMS Tiger. Beatty led the force on-board HMS Lion, with HMS Princess Royal, HMS New Zealand and HMS Indomitable being the other battlecruisers present.
A further four light cruisers of the First Light Cruiser Squadron made up the main part of Beatty's command. In addition, three flotillas of destroyers (led by three light cruisers) of the Harwich Force (a total of 36 vessels) were attached. The British force was much larger than the German 'Scouting Group' and no doubt it was hoped this would ensure a decisive result.
At quarter past eight on 24 January, the German cruiser SMS Kolberg spotted the British light cruiser HMS Aurora and several destroyers from the Harwich Force. Sensing an opportunity for an easy victory against weaker warships, Admiral Hipper turned his Scouting Group towards the gunfire, but within moments SMS Stralsund spotted a large amount of smoke to the northwest. It was realised a large squadron of British warships was steaming towards Hipper's ships. Hipper later remarked:
"The presence of such a large force indicated the proximity of further sections of the British Fleet, especially as wireless intercepts revealed the approach of 2nd Battlecruiser Squadron ... They were also reported by Blücher at the rear of the German line, which had opened fire on a light cruiser and several destroyers coming up from astern ... The battlecruisers under my command found themselves, in view of the prevailing [East-North-East] wind, in the windward position and so in an unfavourable situation from the outset."
The story of what followed is told (and illustrated) in the war-time publication "Deeds That Thrill The Empire". As this book was intended to aid morale and boost recruitment there is no attempt at balance and the anti-German stance in many of the stories is very apparent. Unusually, the story of the Battle of the Dogger Bank gives a significant amount of credit to the heroism of the German sailors. The 'gripping yarn' approach provides an insight into the mind-set of the publishers, if not a totally reliable description of what happened. The captions below are in the original.
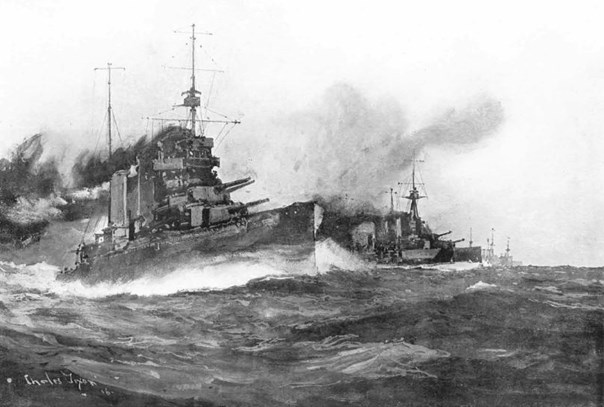
The original caption read....
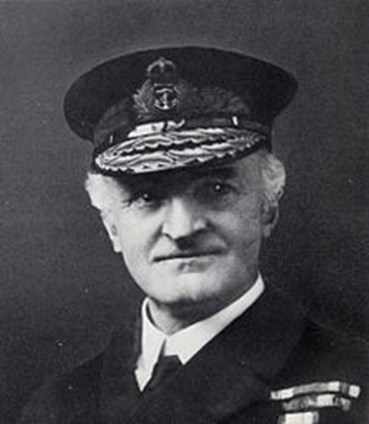
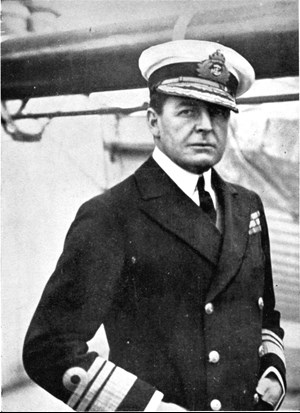
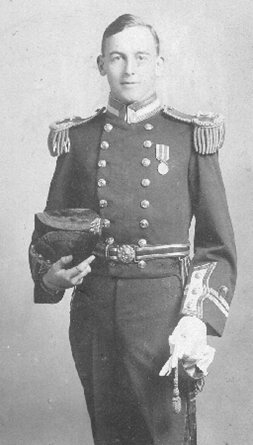
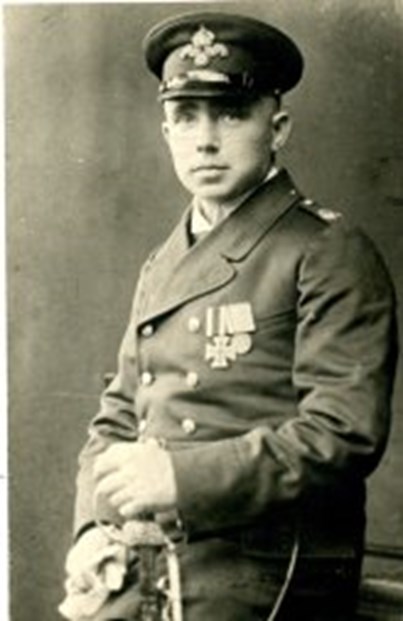
"Bit by bit the Blücher fell behind; bit by bit she was knocked to pieces as the 'Lion' shelled her, passed onto the next ahead, and left the following ship – the 'Tiger' to give the Blücher a round or two has she sped by. So the German ship, nobly fighting to the last against impossible odds was hammered by all the British ships in turn. What is not explained in Deeds That Thrill The Empire is that Admiral Hipper had to make a difficult decision whether to slow down to the speed of the Blücher or to try to engineer the escape of the main German force. He chose to steam away as fast as possible. It may still have been possible for the rest of the German warships to be sunk, but a misunderstanding between Beatty and his second in command, Rear-Admiral Gordon Moore (image, below) on HMS New Zealand meant that the British ships broke off to attack the Blücher. By the time correcting signals were issued, the rest of the German warships managed to put enough distance between themselves and the British vessels to ensure they would escape."

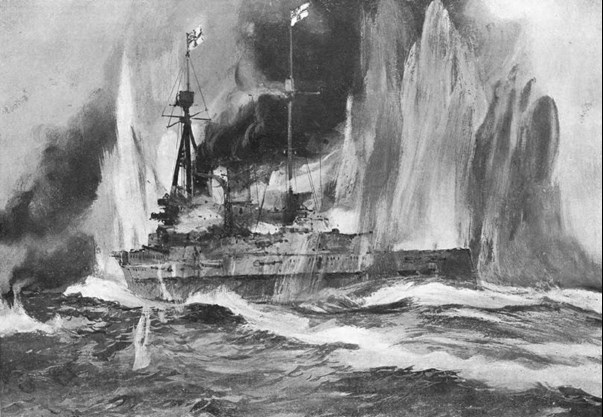
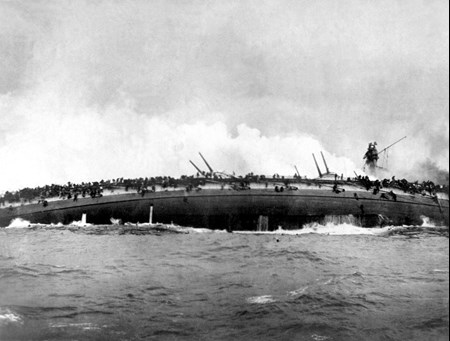
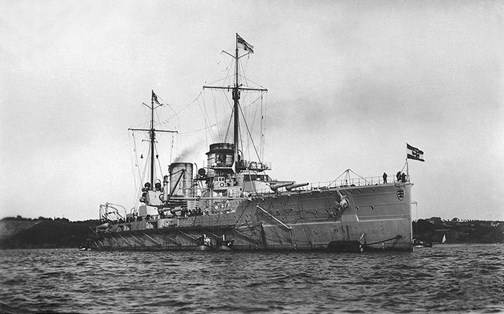
SMS Blücher
Another image and caption from Deeds That Thrill The Empire completes the story of the sinking of the Blücher.
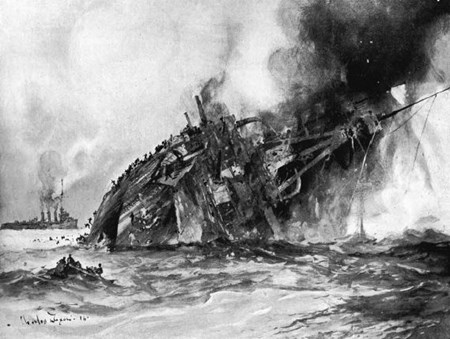
Another version of the last moments of the Blücher is provided in The Children's Story of the War Volume 4 by James Edward Parrott, this time from a British officer's perspective:
"She heeled completely over, and sank in eight and a half minutes, hundreds of men clambering over her side, and standing there, just as if it were the upper deck, waiting for the final plunge. But there was no plunge. Slowly and slowly she sank, and as she went down some were sliding into the sea, others taking running leaps. A few seconds more, and there was no sign of her left, except her dead and living clustered in the water together. We were about three hundred yards away, and watched her go down, and I was particularly struck with the ease and slowness with which she sank. Not till the waves had almost entirely closed over her did the bow heave slightly out of the water, and she disappeared stern first."
Yet another account of the sinking of the Blücher is given by one of the ship's survivors:
"The shells ... bore their way even to the stokehold. The coal in the bunkers was set on fire. Since the bunkers were half empty, the fire burned merrily. In the engine room a shell licked up the oil and sprayed it around in flames of blue and green ... The terrific air pressure resulting from [an] explosion in a confined space ... roar[ed] through every opening and [tore] its way through every weak spot ... Men were picked up by that terrific air pressure and tossed to a horrible death among the machinery."
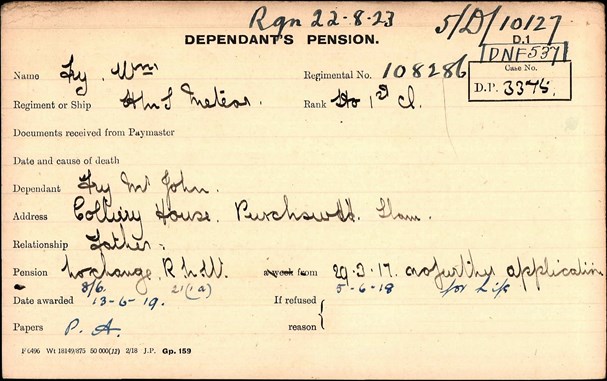
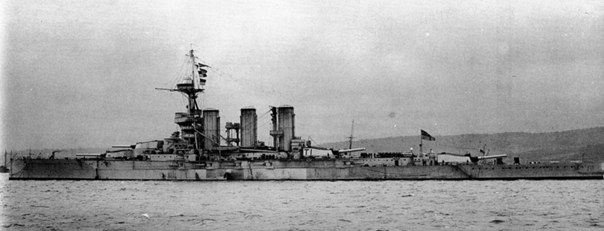
HMS Meteor
As implied in the story told in Deeds That Thrill The Empire, SMS Blücher went down fighting. One of her last salvoes hit HMS Meteor. This final gunfire caused loss of life and severe damage to HMS Meteor, whose second in command was a Canadian officer by the name of Frederic Thornton Peters, otherwise known as 'Fritz'.
The Meteor's engine room was hit by a large calibre shell. Despite the flames and damage, 'Fritz' Peters fought his way to the engine room and saved the lives of two men and also prevented further damage; for this bravery he was awarded a Distinguished Service Order.
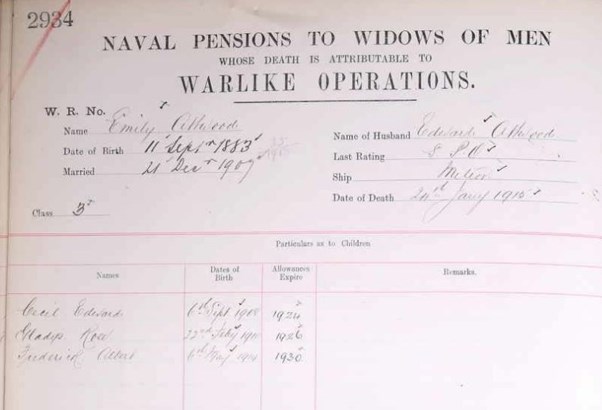
Four fatalities are recorded by the CWGC among the crew of HMS Meteor. Using the WFA's Pension Records we can see details of one of these men - Edward Attwood whose widow obtained a pension from the Admiralty.
Acts of bravery were shown by men from both sides during this action. One of the German battlecruisers, SMS Seydlitz was struck with a 13.5 inch shell, fired by HMS Lion. This holed the deck and the explosion flashed into a working chamber beneath a gun turret and detonated the propellant charges inside. The flames rose high up into the turret and down into the ammunition chamber, and made their way through to another ammunition chamber and up to a second turret. The explosion killed 159 men and destroyed both of the rear turrets. The fire was prevented from spreading to the shell magazines, which could have destroyed the ship, by the action of the Pumpenmeister, Wilhelm Heidkamp who was severely injured when he turned the valves, which were glowing red-hot, to flood the magazines. Heidkamp never fully recovered and died of his injuries in 1931.
Fatalities
Not untypically for naval actions, the loss of life was one sided. Apart from the small number of fatalities on board HMS Meteor, the only other loss of life on the British side during this action was onboard HMS Tiger, which suffered about ten fatalities. In contrast, SMS Blucher lost a large proportion of her crew. Fatalities are estimated as totalling at least 750.

One of the fatalities on board HMS Tiger was the ship's Engineering Captain, Charles Taylor. Charles Gerald Taylor was born in Ruabon, Wales on 8 May 1863. He was an outstanding athlete and excelled at cricket, rugby and pole-vaulting (being the Welsh champion). In 1885 Taylor found himself spending a lot of time in London, during which he helped to form a rugby club for London 'exiles'. Over the years London Welsh would become a famous club, providing many Welsh internationals; their very first team contained no fewer than six internationals including Taylor. In 1883 the Reverend. F. Marshall wrote of him:
"Three famous players came to the front in 1883, one of them being C G Taylor. [He] was one of the cleverest men in the kingdom with his feet. He was originally an Association player of some note. His first rugby experience was with the Royal Naval Engineering College at Portsmouth. Taylor was asked to play for a scratch Welsh Team against the 'Varsity' at Oxford. He played a clinking game, and scored the only two tries obtained against the then redoubtable Oxford team. He was immediately afterwards chosen for Wales, and played in most of the international matches. He was one of the most extraordinary players that ever played."
Taylor made his debut for Wales against England in 1884 and went on to represent his country on nine further occasions.
Taylor joined the Royal Navy in 1885 before moving to the Royal Naval College, Greenwich from where, a year later, he was commissioned as an assistant engineer. In February 1911 King George V appointed him a Member (Fourth Class) of the Royal Victorian Order and in 1912 he was promoted to engineer captain.
Shortly after the outbreak of the First World War, Taylor was posted to the battlecruiser HMS Queen Mary and then to HMS Tiger in November 1914.
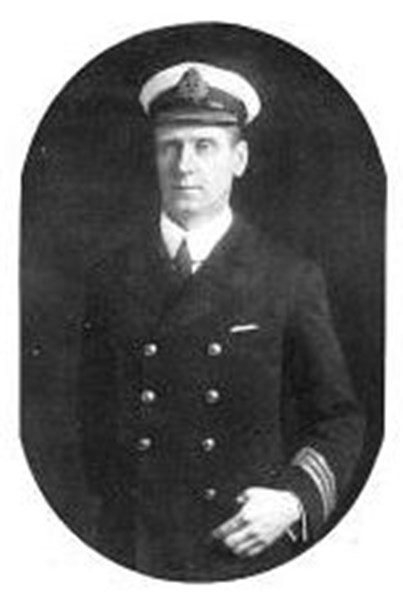
He had the unfortunate distinction of being the first Welsh International Rugby player to be killed during the Great War.During the action on 24 January, HMS Tiger was hit below the signal bridge. An 11-inch shell tore through the starboard aerial deck to explode inside the compartment. The steel hatchway of the starboard control tower was closed, but the port hatchway had been left open, and unfortunately Taylor was standing by the open hatchway acting as a spotting officer. He was killed instantly when the shell exploded.
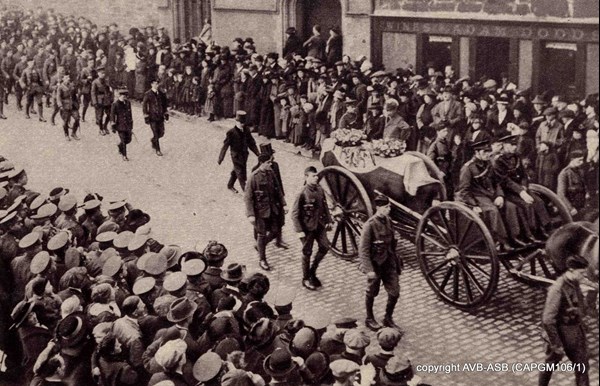
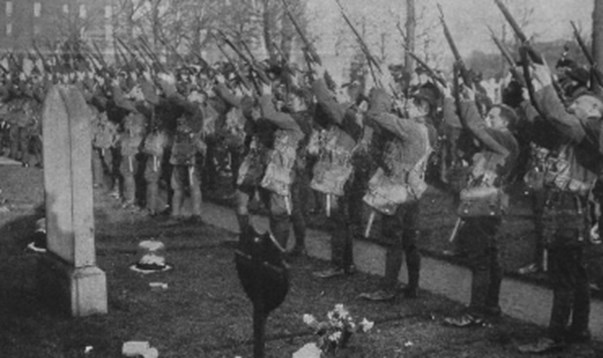
Some of the casualties from HMS Tiger killed in this action were buried at sea and are commemorated on the Plymouth Naval Memorial, but others were returned to Britain to be buried. Charles Taylor was interred at Tavistock New Cemetery in Devon.
Post-battle propaganda
Not surprisingly, much was made in the British Press of the victory, the fact that mistakes were made was obviously withheld.
'Punch' (3 February 1915) published a cartoon showing the head of the German Navy, Admiral Tirpitz, coming ashore to be met by an unhappy Kaiser Wilhelm. In fact Tirpitz had been almost totally sidelined and was to resign in 1916.
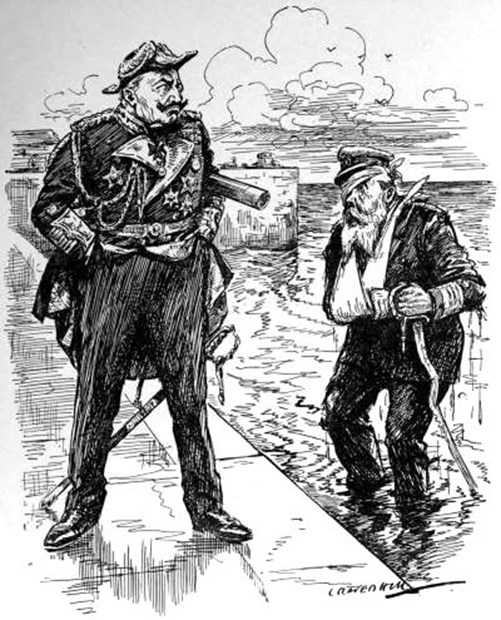
The Return of the Raider
Kaiser. "WELL, I AM SURPRISED!"
Tirpitz. "SO WERE WE."
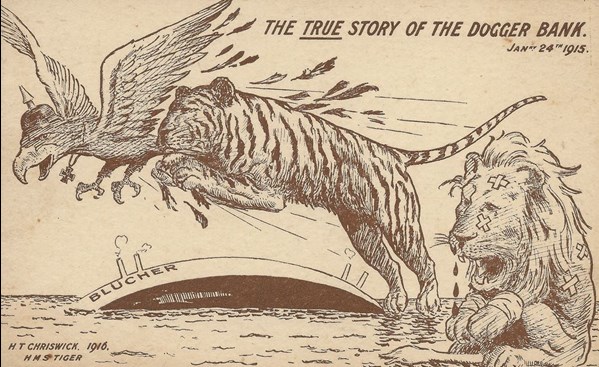
Other cartoons such as the one below were published. The implication of damage to HMS Lion is surprising as details of damage to her were suppressed. HMS Lion had fired 243 rounds from her main guns, but had only made four hits: one each on SMS Blücher and SMS Derfflinger, and two on SMS Seydlitz. In return she had been hit by the Germans sixteen times, but despite this (and having to be towed back to port with a 10° list) suffered no fatalities and about seventeen men only were wounded.
Further resources
To view a number of talks about the Royal Navy and related topics, please see the WFA's YouTube channel which includes the following videos:
Becoming a member of The Western Front Association (WFA) offers a wealth of resources and opportunities for those passionate about the history of the First World War. Here's just three of the benefits we offer:
The WFA regularly makes available webinars which can be viewed 'live' from home. These feature expert speakers talking about a particular aspect of the Great War.
Featured on The WFA's YouTube channel are modern day re-interpretations of the inter-war magazine 'I Was There!' which recount the memories of soldiers who 'were there'.
Explore over 8 million digitized pension records, Medal Index Cards and Ministry of Pension Documents, preserved by the WFA.
Other Articles


