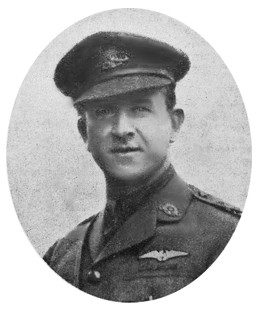
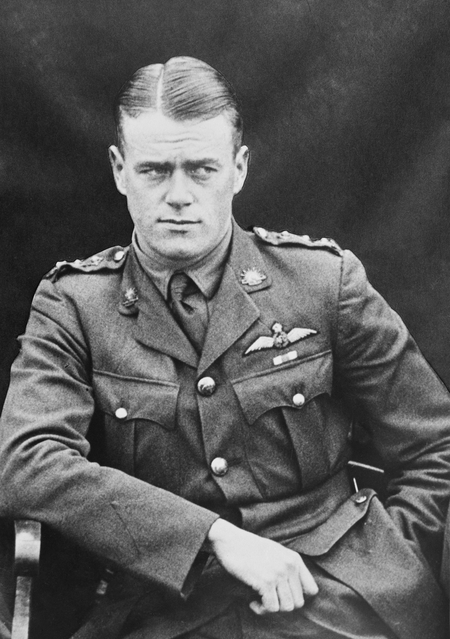
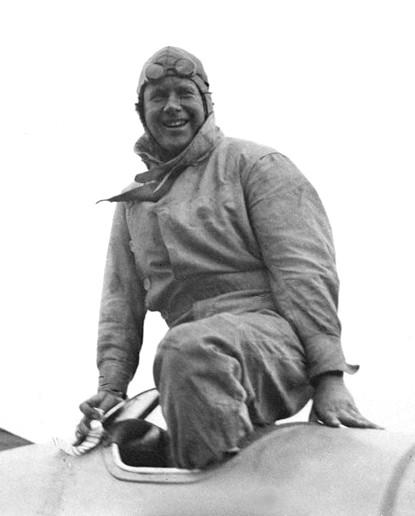
Lt Archie Pratt, The Australian Flying Corps and the Battle of Cambrai
The Airco (de Havilland) DH5 single-seat fighter was not one of the glamorous aeroplanes of the Great War. It wasn’t the mount of the aces – other than some who flew it early in their careers - it wasn’t able to hold its own with the better German fighters, or even many two-seaters, and its armament of a single Vickers machine gun was inadequate by the standards of mid to late 1917.
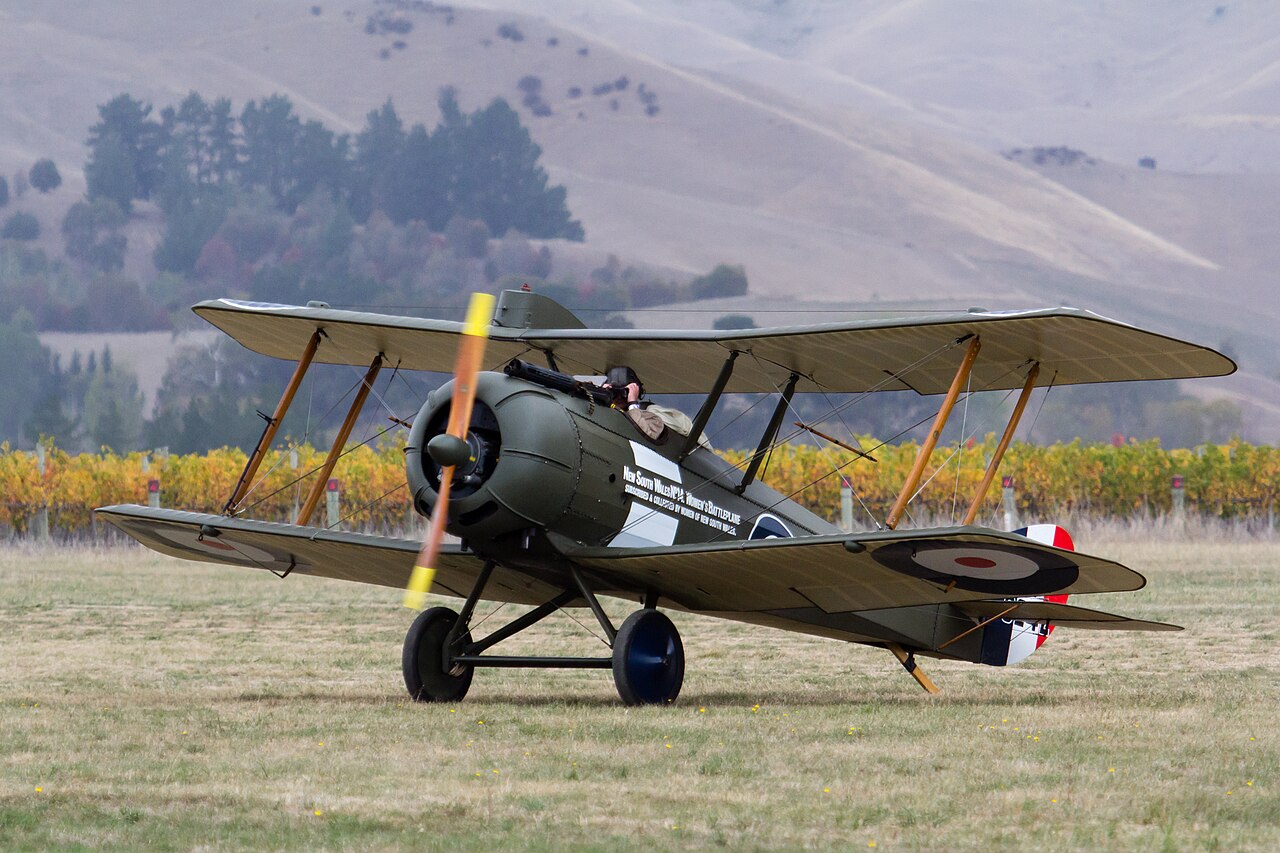
Nevertheless, the DH5, with its distinctive back-staggered wings, is remembered for the outstanding work carried out by its gallant pilots in support of the infantry during the November 1917 Battle of Cambrai. Two DH5 squadrons, Nos 64 and 68 (Australian) and, of course, other Royal Flying Corps (RFC) units, supported the ground troops during their advance and suffered heavy casualties while doing so.
This is the story of one of the airmen who flew the DH5 in its brief moment of glory.
Archibald Pratt: Early Life and Army Service
Archibald James Pratt was born in Melbourne in 1893. As was normal for youths of his generation, he acquired some military knowledge during his formative years, as he served for two years in the Naval Cadets while at school. In 1914, he was living with his parents in Ascot Vale while working in engineering for Mephan Ferguson’s, a prominent Melbourne firm specialising in the manufacture of industrial piping. The company produced the pipes used to supply water from Perth to the goldfields at Kalgoorlie.
On 20 August 1914, Arch Pratt enlisted in the Australian Imperial Force (AIF) and became No 128, Sapper A.J. Pratt, 2nd Field Company, Australian Engineers, 1st Division, AIF.
On 21 October 1914 his unit departed Melbourne on HMAT Orvieto [Transport A3 in the First AIF Convoy]. The Field Company trained in Egypt, and then, at 0700 on 25 April 1915, landed at Anzac Cove on the Gallipoli Peninsula, i.e. about two hours after the initial landings on that first Anzac Day.
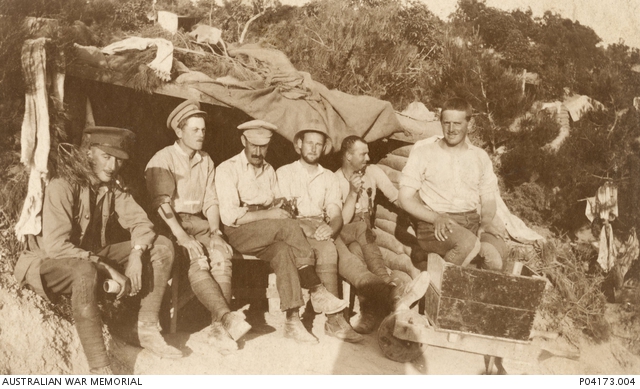
The Company played its part in the ill-fated campaign by digging wells, constructing dugouts and artillery positions, repairing shell damage to tracks and other infrastructure, plus many other tasks.
On 9 May Spr. Pratt came down with tonsillitis and was admitted to the 4th Field Ambulance, where he stayed for three days before discharge. He was again admitted to hospital on 11 August, this time due to iritis – an eye infection – which developed into conjunctivitis, and saw him evacuated from Gallipoli and sent to a hospital on Malta.
After successful treatment he rejoined the Field Company where he was promoted to Corporal on 15 January 1916 – he had previously held the rank on a temporary basis.
Following the end of the Gallipoli campaign in December 1915, the 2nd Field Company, together with the rest of the 1st Division, moved to France, and, therefore, the Western Front, in March 1916. Cpl Pratt was promoted to Sergeant in April.
On 23 July 1916, Sgt Pratt was wounded in the shoulder while serving with the Engineers during the desperate fighting for Pozières during the Battle of the Somme. He was admitted to the 7th Canadian General Hospital at Le Trequet two days later. On 3 August, he was transferred to the 3rd Convalescent Depot.
Later in August he was discharged from hospital and rejoined the Engineers. This time, his stay with the 2nd Field Company was a relatively brief one, as on 25 November 1916 he transferred to the Australian Flying Corps (AFC), which was then seeking men in the AIF on the Western Front, who were prepared to fight in the air.
Introduction to flying and the air war
The AFC wasted little time before sending Sgt Pratt to the RFC’s No 1 School of Military Aeronautics at Reading for ground training on 5 December; the AFC used RFC facilities until its own Training Squadrons were established later in the War. After completing the course at Reading, he then went to an RFC Training Squadron for flying instruction, but the particular unit is not shown in the AIF records.
On 17 April 1917, on completion of flying training, i.e. being awarded his ‘wings’, Sgt Pratt was promoted to Second Lieutenant. He was then posted to the Central Flying School (CFS) at Upavon before going to the School of Gunnery at Turnberry, Scotland on 24 April, for air fighting training.

After five days at Turnberry, he was posted to No 68 (Australian) Squadron, then coming up to strength at Harlaxton in Lincolnshire, after establishment at Kantara in Egypt on 20 September 1916. Although identified by the RFC as No 68 (Australian) Squadron, internally the unit called itself and was known inside the AIF, as either No 2 Squadron AFC or No 68 Squadron AFC (or 68th Squadron AFC).
Its personnel initially comprised some AFC men from Australia, supplemented by transfers from No 67 (Australian) Squadron RFC / No 1 Squadron AFC and other units of the AIF in Egypt. After arrival at Harlaxton on 30 January, under the command of Major Oswald,[1] the squadron was brought up to strength by men who, like 2/Lt Pratt, had joined from the AIF as well as at least one experienced Australian who was serving in the RFC.
On 1 July 1917 2/Lt Pratt returned to the CFS at Upavon, perhaps for further training before departure for the Western Front. On 13 July, he left Upavon, probably returning to Harlaxton. Then, like several other pilots from No 68 (A) Squadron, 2/Lt Pratt was temporarily transferred to the RFC to gain combat experience while his AFC unit was still training and forming up. On 28 July 1917 he crossed the Channel to France and reported to No 1 Aircraft Depot at St Omer, the main pilot pool for the RFC on the Western Front; aircrew would wait there until posted to an operational squadron.
Three other pilots - Capt R.C. Phillipps[2] and Lts G.C. Matthews[3] and G.C. Wilson [4] - were posted to No 32 Squadron RFC at Léalvillers, where they gained experience on the DH5, the aeroplane that they would later fly in combat with the AFC. At the same time, another man who would join No 68 (A) Squadron, was Lt R.W. Howard, 4 Squadron RFC.[5]
2/Lt Pratt wasn’t sent to a DH5 unit, but to No 70 Squadron RFC, and then flying Sopwith Camels from Liettres aerodrome on the Ypres sector of the Western Front.[6]
After familiarisation with the Camel’s rather infamous idiosyncratic handling characteristics, the Australian began his career as a fighter pilot. At 0640 on 19 August 1917, flying Camel B3813, (No 2 aircraft in ‘C’ Flight, and marked C~2 in white on the fuselage) Lt Pratt was credited with sending down an Albatros scout out-of-control [7] neither the Luftstreitkräfte nor the Marine-Feldjagdstaffel suffered a fighter loss that day that corresponds with 2/Lt Pratt’s claim, so it’s likely that the pilot recovered and landed safely.
No 68 (Australian) Squadron, RFC
Six days after his victory, 2/Lt Pratt returned to Harlaxton to rejoin No 68 (A) Squadron, before the unit’s deployment to France.[8]
One cannot help but wonder what his thoughts were as he left a unit flying Camels, then the most modern British aeroplane operational at the Front, to report back to his parent unit and fly the DH5.
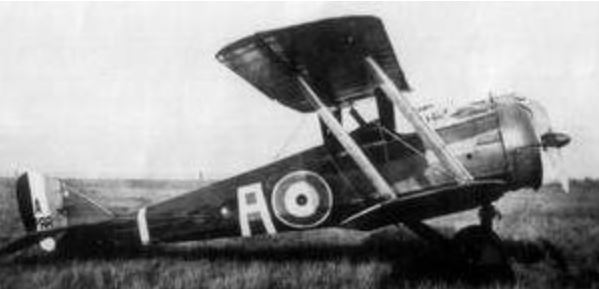
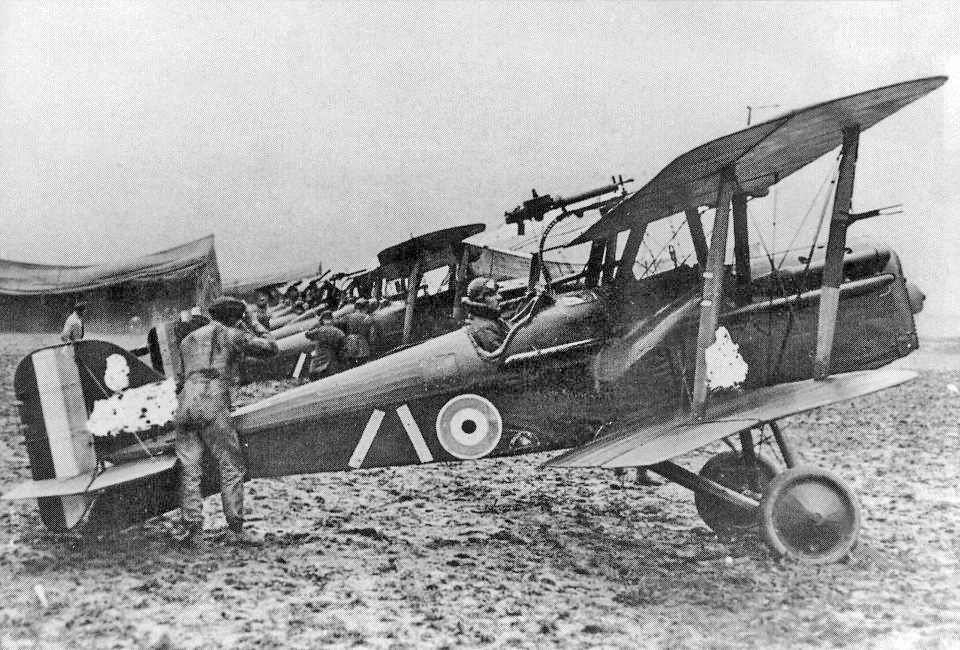
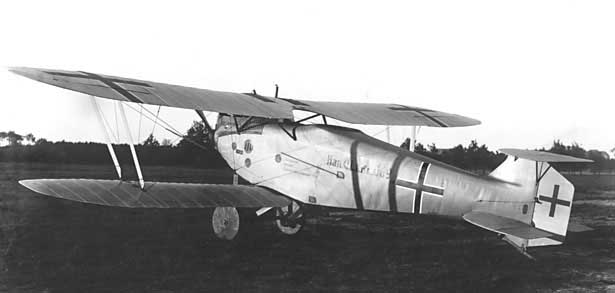
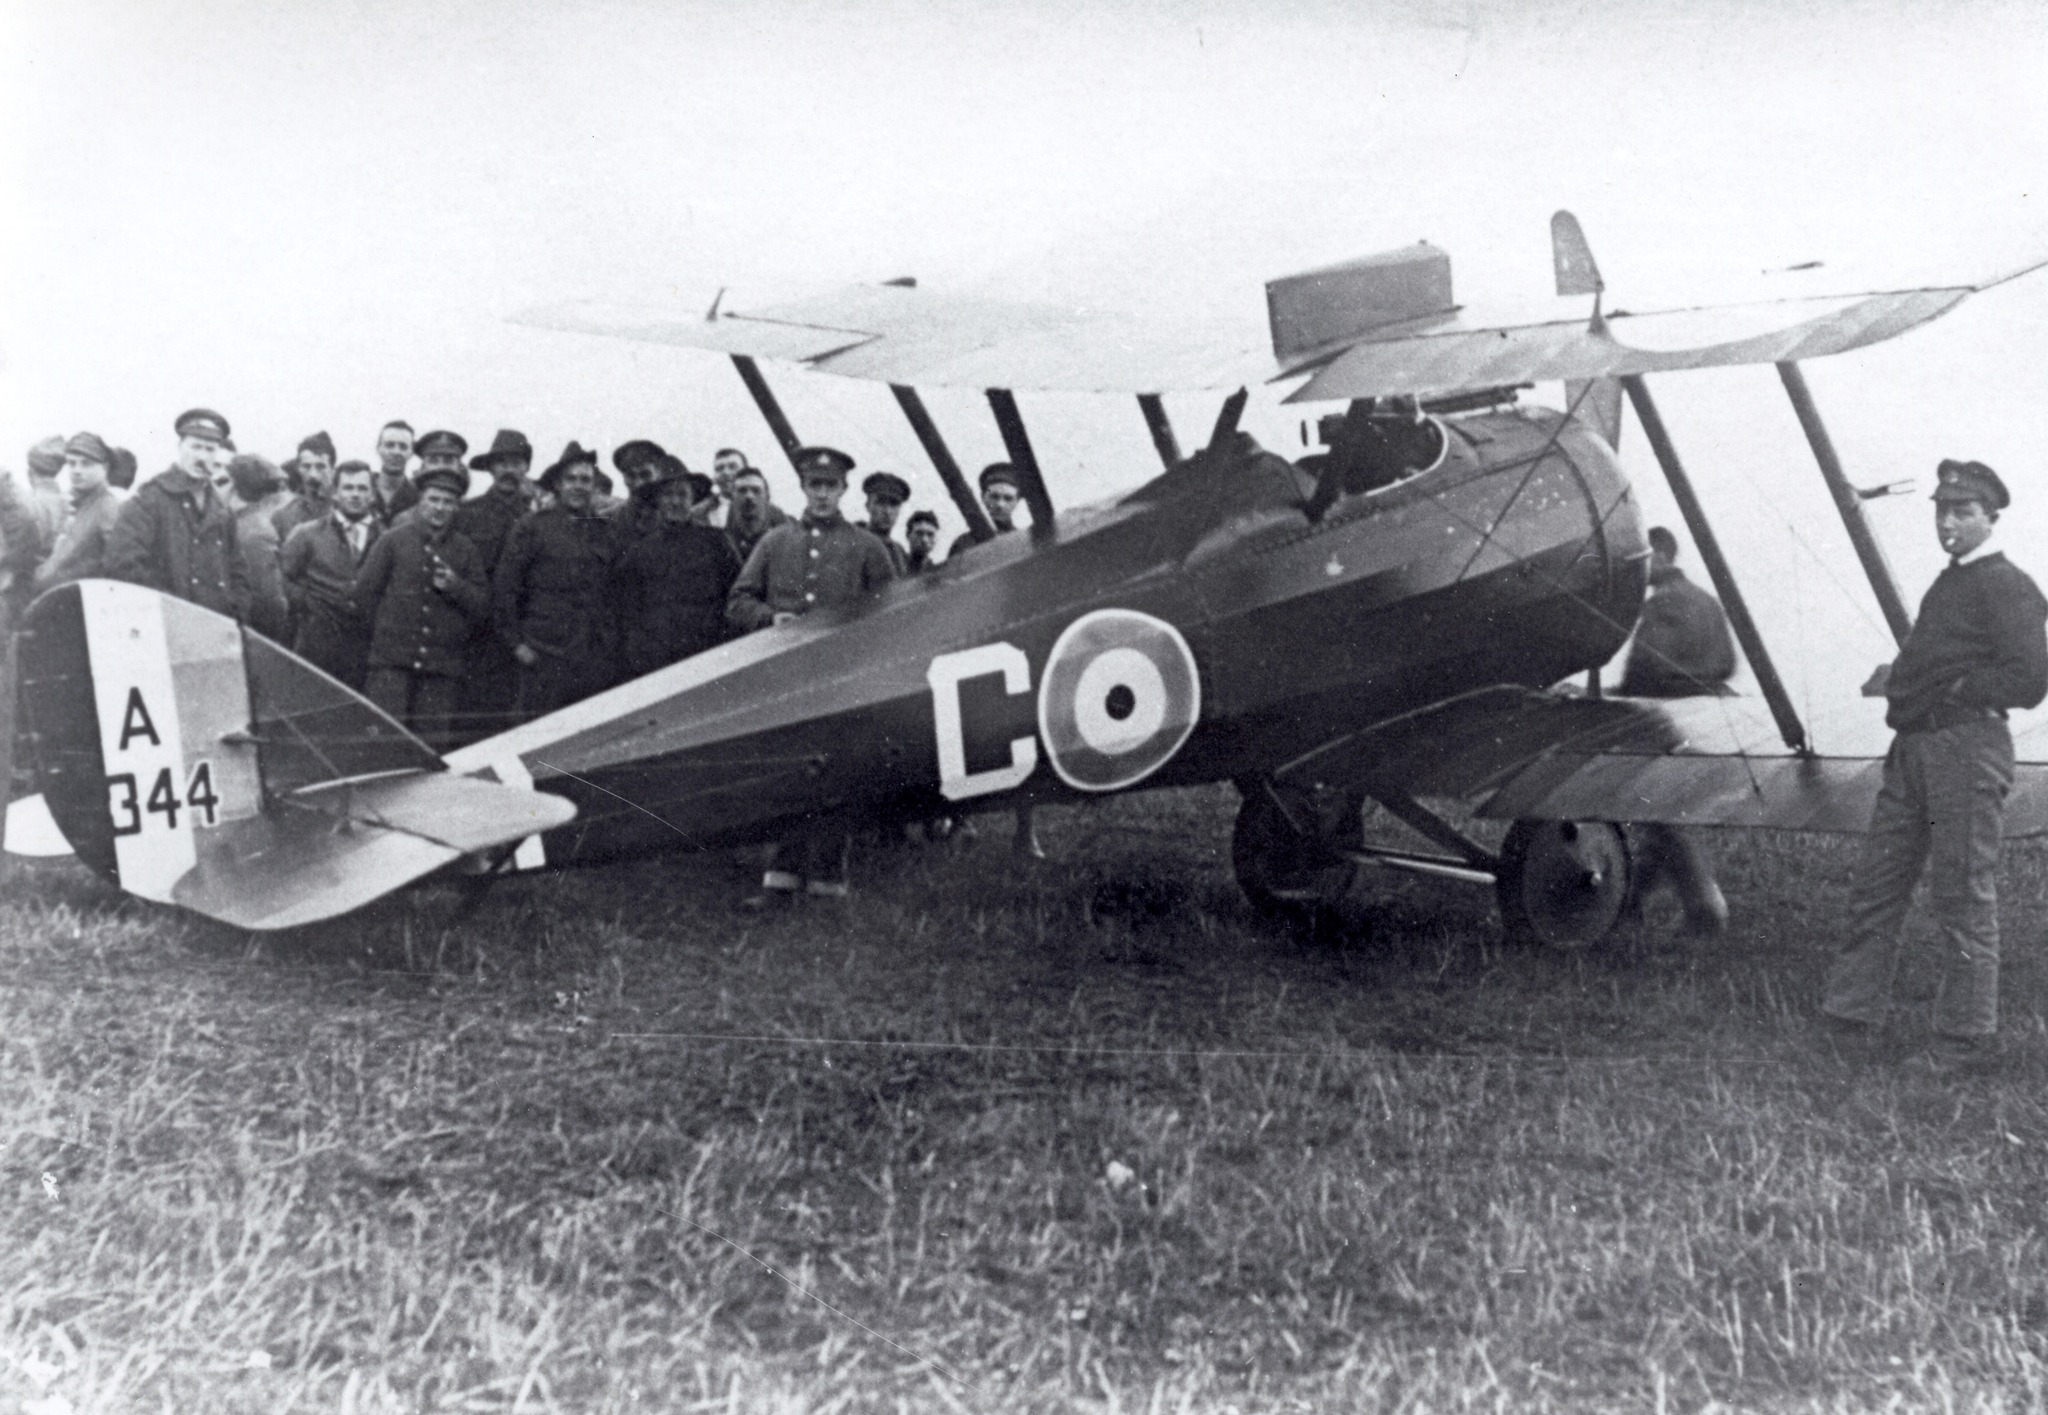
The DH5 was a product of the de Havilland design team but was not a great machine; powered by a 110hp Le Rhône engine, it was manoeuvrable, but its performance was below that expected of contemporary aircraft, particularly in respect to speed and the time taken to gain altitude, where it was no real improvement on the Sopwith Pup, which preceded the DH5 into service by some eight months.
Thanks to its ‘back-staggered’ wing arrangement, the pilot of a DH5 did enjoy an uninterrupted view forwards and upwards, but a very poor one to the rear and the armament of a single .303 Vickers machine gun was inadequate by the standards of the day.
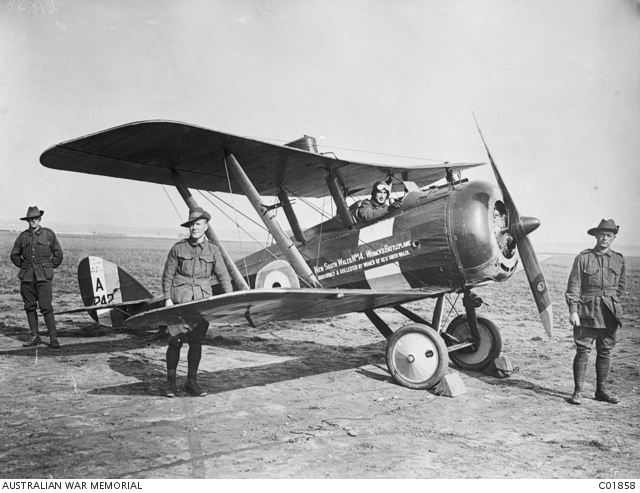
The RFC soon learned that while the DH5 was a capable aeroplane for ‘trench strafing’ (as ground attack sorties were known at the time) it was unable to fight most German aeroplanes on an equal basis.
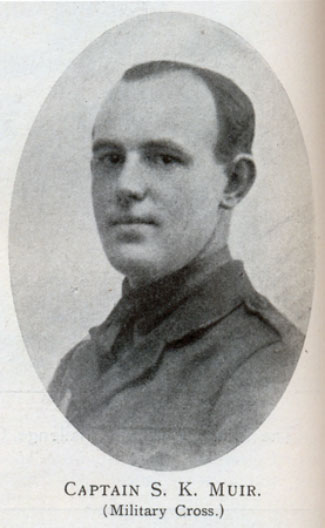
While forming up at Harlaxton, the squadron suffered a major blow when an experienced Flight Commander, Lt Stanley Muir MC,[9] an Australian serving in the RFC, was killed in a flying accident after a lower wing of DH5 A9275 folded up in flight, causing the aeroplane to crash.

On 21 September 1917 2/Lt Pratt flew DH5 A9265 - bearing the individual identification ‘2’ in ‘B’ Flight – (an aeroplane built by the Aircraft Manufacturing Company at Hendon) with the rest of the squadron from Harlaxton to St Omer, on 23 September.
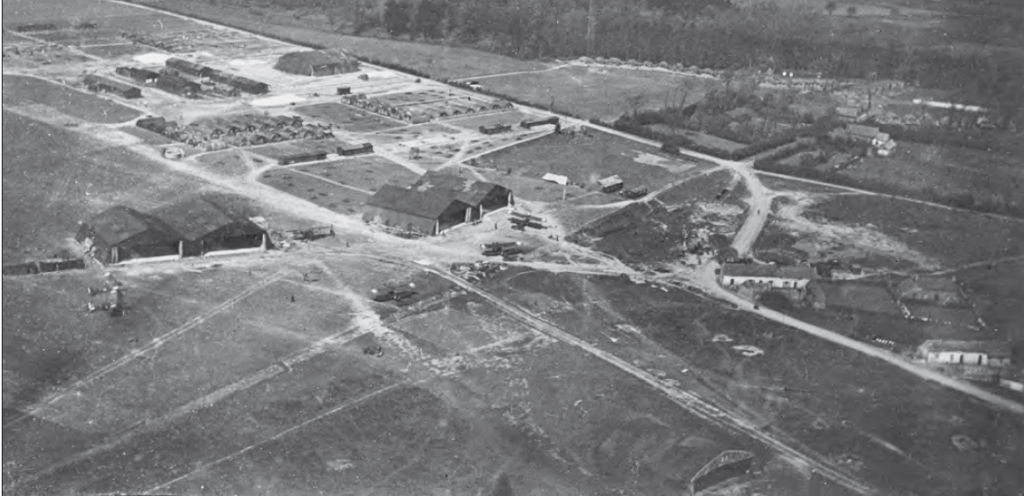
Baizieux, (sometimes spelt Baisieux) some 6 kilometres west of Albert, was to be the Australians’ base as part of the RFC’s 13th (Army) Wing under Lt Col G.F. Pretyman DSO.
Together with the 12th (Corps) Wing, the Wing was in III Brigade, commanded by Brig Gen J.F.A. Higgins DSO, operating over the sector of the Front held by General Sir Julian Byng’s 3rd Army and then on to Warloy the next day, before flying to Bazieux.
The aeroplanes flew to France [10] and the ground-based support staff followed them to Bazieux on 26 September. At about this time, the DH5s were painted with the squadron identification of a single vertical white bar on the fuselage, just in front of the tailplane.
After test flights on 29 and 30 September, on 1 October 2/Lt Pratt flew his first operational mission with the AFC in A9265 (his regular aeroplane) accompanying Capt R.C. Phillipps [11] in A9288, as a two-man close offensive patrol departing at 1200 (COP: meaning a patrol that penetrated into enemy air space, but remained more or less over the front lines).
They were later joined by Capt G.C. Wilson in A9464, who departed Baizieux at 1315.
A German two-seater was seen at 4,000 feet over Vitry, but it avoided the Australians by diving out of range. As was often the case when DH5 formations sought combat, enemy aircraft were able to avoid action by simply diving away and gaining speed. The patrol returned at 1400.
On 2 October, 2/Lt Pratt was involved when ‘B’ Flight flew a COP under Capt Phillipps in A9288, with Capt Wilson in A9464 and 2/Lt C.C. Sands [12] in A9263. They departed 1200 and returned at 1415 after chasing a German two-seater seen at 5,000 feet over Bourlon Wood. The enemy aeroplane flew to the east and the patrol was unable to catch it before it was lost in poor visibility.
Next day ‘B’ flight attempted another COP, with Capt Phillipps in A9463, 2/Lt Pratt in A9462, 2/Lt Wilson in A9464, and 2/Lt C.C. Sands in A9466. The formation departed at 1500 only to see Capt Phillipps return at 1505 due to trouble with his Vickers gun. The rest of the formation returned at 1515 “on orders from the Commanding Officer”; presumably they weren’t to cross the lines without the patrol leader.
For the rest of October, and the first nineteen days of November, ‘B’ Flight, like the rest of the squadron, endeavoured to carry out patrols on most days, but the airmen were frequently frustrated by engine malfunctions and poor flying conditions, especially limited visibility due to low cloud.
The losses due to mechanical failure during this period make grim reading.
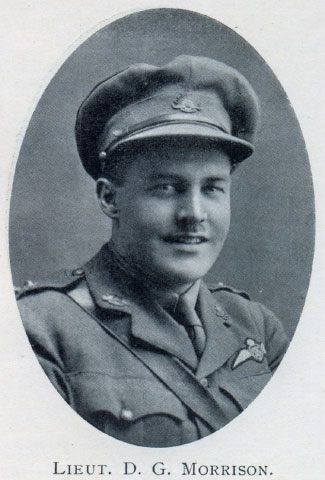
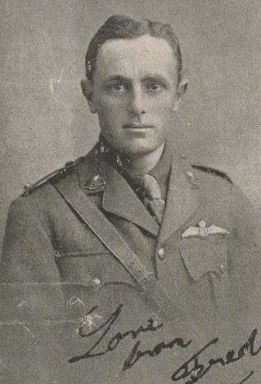
Lt Morrison [13] was flying A9242 on 1 October when he was forced to land near Honnecourt due to a magneto failure - the aircraft was written off. On the same day, Lt Huxley [14] crashed A9324 at Honnecourt due to a broken tappet rod.
On 9 October Capt Wilson crashed A9464 due to ignition trouble. Two days later 2/Lt Holden [15] crashed A9245 at Baizieux while landing and 2/Lt James [16] crashed A9226 at Roequinqy thanks to a broken tappet rod.
On 16 October Lt Bartlam crashed in A9373 at Guoy after engine trouble.[17] Lt Taylor [18] crashed A9224 on landing at Baizieux on 20 October due to engine trouble.
Unreliable engines weren’t the only problems faced by the squadron’s pilots at this time. Their opponents in the Luftstreitkräfte were also active and caused some casualties.
On 2 October Lt Agnew [19] in A9271 was last seen over Villers Outreaux, and was posted as missing in action; it was later learned that he had been taken a prisoner of war. Worse, on 13 October Lt Morrison in A9227 was badly wounded when shot down by enemy aircraft near Quéant. [20] He came down in No Man’s Land and was rescued by the infantry, only to die from his wounds. Three days later Lt Howard was flying A9284 when the DH5 was badly shot about by enemy aircraft.
2/Lt Pratt flew thirteen patrols in this period and led three of them. Enemy aircraft were infrequently seen and, when they were, the Australians soon discovered that even German two-seaters could easily avoid action by just turning away from the pursuing fighters and increasing speed.
On 26 October 2/Lt, Pratt was promoted to Lieutenant. It was the usual AFC practice to promote a Second Lieutenant pilot to Lieutenant about three or four months after graduation from flying training. He flew an escort mission on the next day, but without sighting the enemy.
The squadron was no doubt eager to receive its new aeroplanes due to the poor performance of the DH5 and its unreliable nature, especially regular mechanical failures – the type was renowned for its ability to shed valves.
The 28 October was a day of some note for the squadron, as an SE5 (A4856) was delivered to the unit to allow the pilots to become familiar with the type of aeroplane [21] that would replace their unsatisfactory DH5s. Lt Pratt was the first pilot in the squadron to fly the new machine.
The Battle of Cambrai
At this point, it is appropriate to turn away from the squadron and look at the overall situation on the Western Front. In the north, the Third Battle of Ypres had finally ended on 6 November. The Front Line had been advanced only a few miles at the cost of some 310,000 British and Empire casualties, many of whom simply disappeared in Flanders mud.
That same mud also ruined any chance for the newly-created Tank Corps[22] to show the potential of its new weapon, the Mk IV tank. Bogged and broken down tanks, often riddled with holes from shell fire, littered the soggy battlefield, which had proved to be quite impassable for the metal monsters.
Undaunted, the Tank Corps planned a large-scale raid, by hundreds of tanks, over unbroken ground where their machines could demonstrate their capabilities. In order to preserve the element of surprise, and to protect the ground from being churned into a morass by a heavy preliminary bombardment, the tanks would attack with an artillery barrage just creeping in front of them, then punch a hole in the elaborate German defences, known as the Hindenburg Line, before retiring after inflicting maximum damage.
However, it would have been very difficult to exploit fully any breakthrough, primarily because there were almost no infantry reserves available, due to the heavy casualties at Ypres.[23] In preparation for the offensive, men, guns and tanks were moved into the Third Army’s area.
Fortunately for the British, the weather conditions that so often curtailed No 68 (A) Squadron’s operations also prevented German reconnaissance aeroplanes from observing the build-up. Like other RFC units, the squadron began intensive training in low-level infantry support operations and the DH5s were fitted with racks to carry four 25lb (11kg) Cooper bombs. On 17 October, during this period of low flying, Lt Taylor in A9224 collided with a haystack when he was forced to land due to engine failure.
On the eve of the offensive, III Brigade was able to deploy 125 two-seat reconnaissance and artillery observation aircraft in the 12th (Corps) Wing and 134 single seat fighters, plus 18 Bristol Fighters and 12 DH4 bombers in the 13th (Army) Wing.
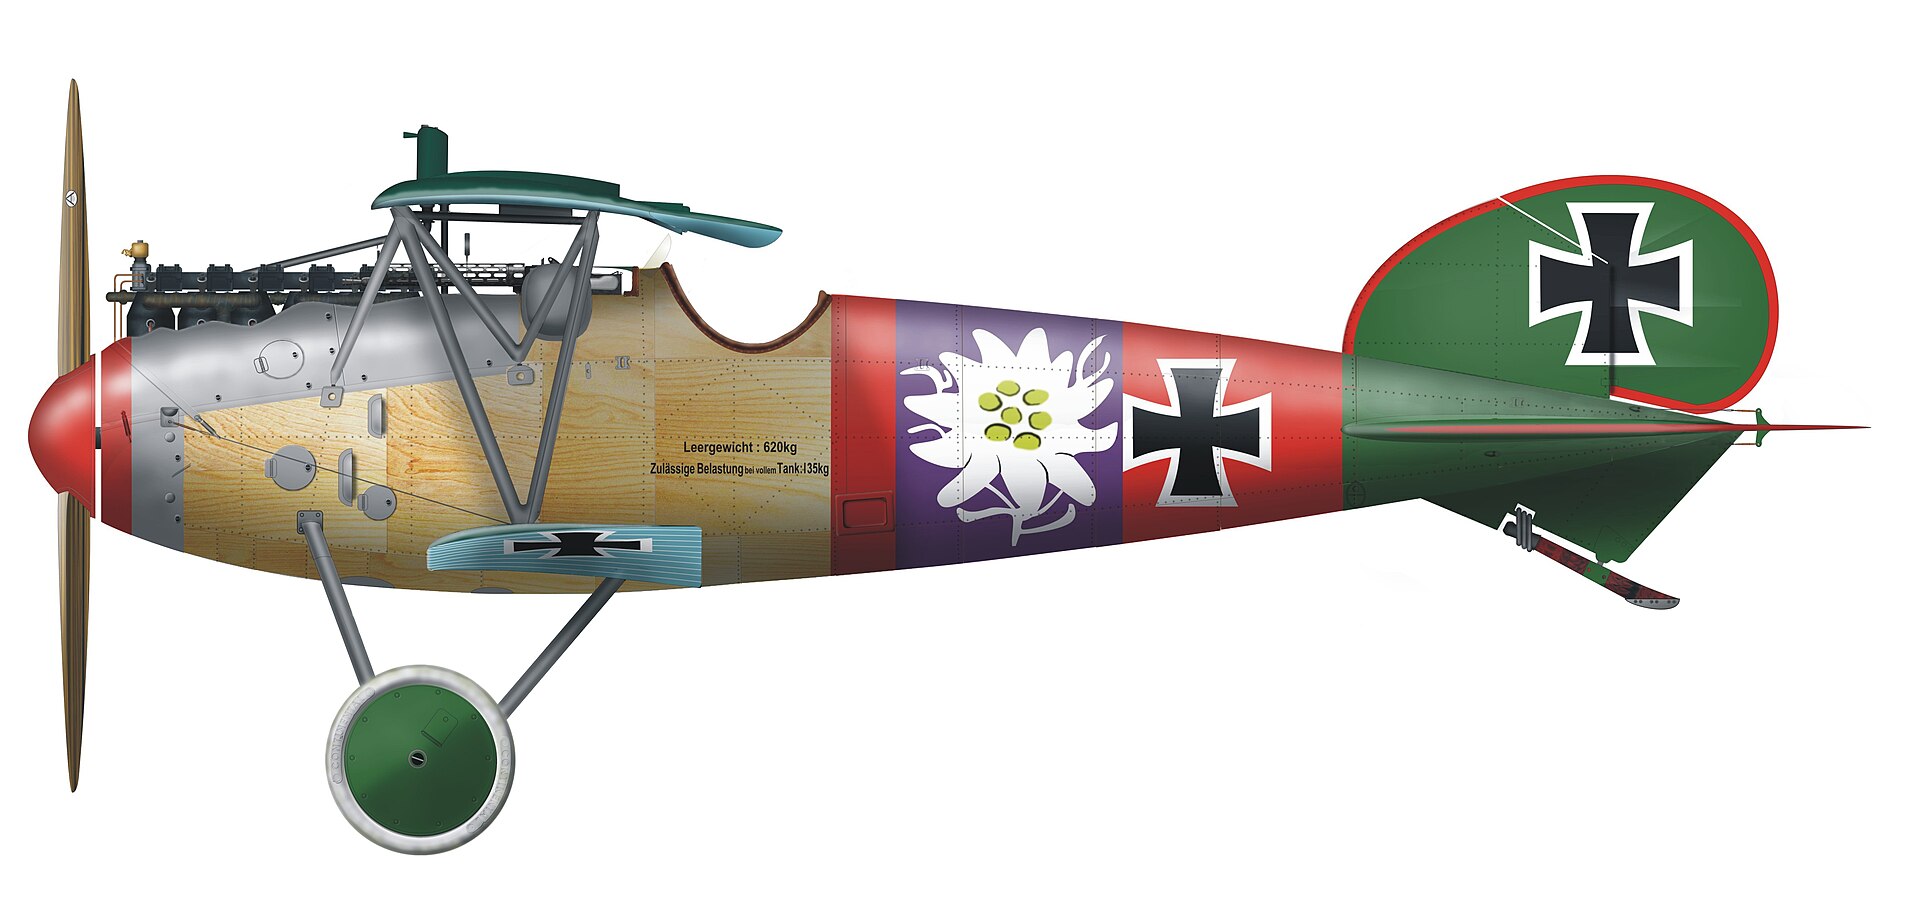
Advanced Landing Grounds were constructed near the Front Line to provide bases close to the offensive and to cater for damaged aircraft that could not fly back to their home aerodromes. Only one German fighter unit initially opposed the RFC in the sector: the green-tailed Albatros scouts of Jasta 5 at Estourmel.

On 20 November 1917, the Battle of Cambrai commenced at dawn and featured the first British mass use of tanks on firm ground.[24] Two Army Corps were involved in the first phase of the Battle: III Corps with the 6th, 12th 20th and 29th Infantry Divisions, and IV Corps with the 36th (Ulster), 51st (Highland) and 62nd (West Riding) Infantry Divisions and the 1st Cavalry Division, supported by 1,000 artillery pieces, were concentrated against the Front held by the German 2.Armee. Also, the 2nd and 5th Cavalry Divisions were in reserve, ready to speedily advance through any break in the German front line – cavalry was the fastest way to occupy enemy territory if the opportunity arose. Most significantly, the British attack was spearheaded by 476 tanks.[25]
There were 378 fighting tanks in nine battalions of 42 tanks each, 54 supply tanks, wire pullers (to rip up the German barbed wire), seven gun carriers, two bridging tanks, nine wireless tanks and one transport tank. Here it should be born in mind that although the Mk IV Tank in both its ‘Male’ (two 6 pounder guns, plus three .303 Lewis or Hotchkiss machine guns) and ‘Female’ (five .303 Lewis or Hotchkiss machine guns) versions was then the latest thing in armoured fighting vehicle development, it was nevertheless ponderously slow – moving at walking pace (3.7 mph on good ground) – and was mechanically unreliable.
The attack, aided by thick fog that initially hampered German efforts to counter-attack, achieved complete surprise and penetrated some 6 kilometres by late afternoon – an enormous distance when compared to previous offensives.
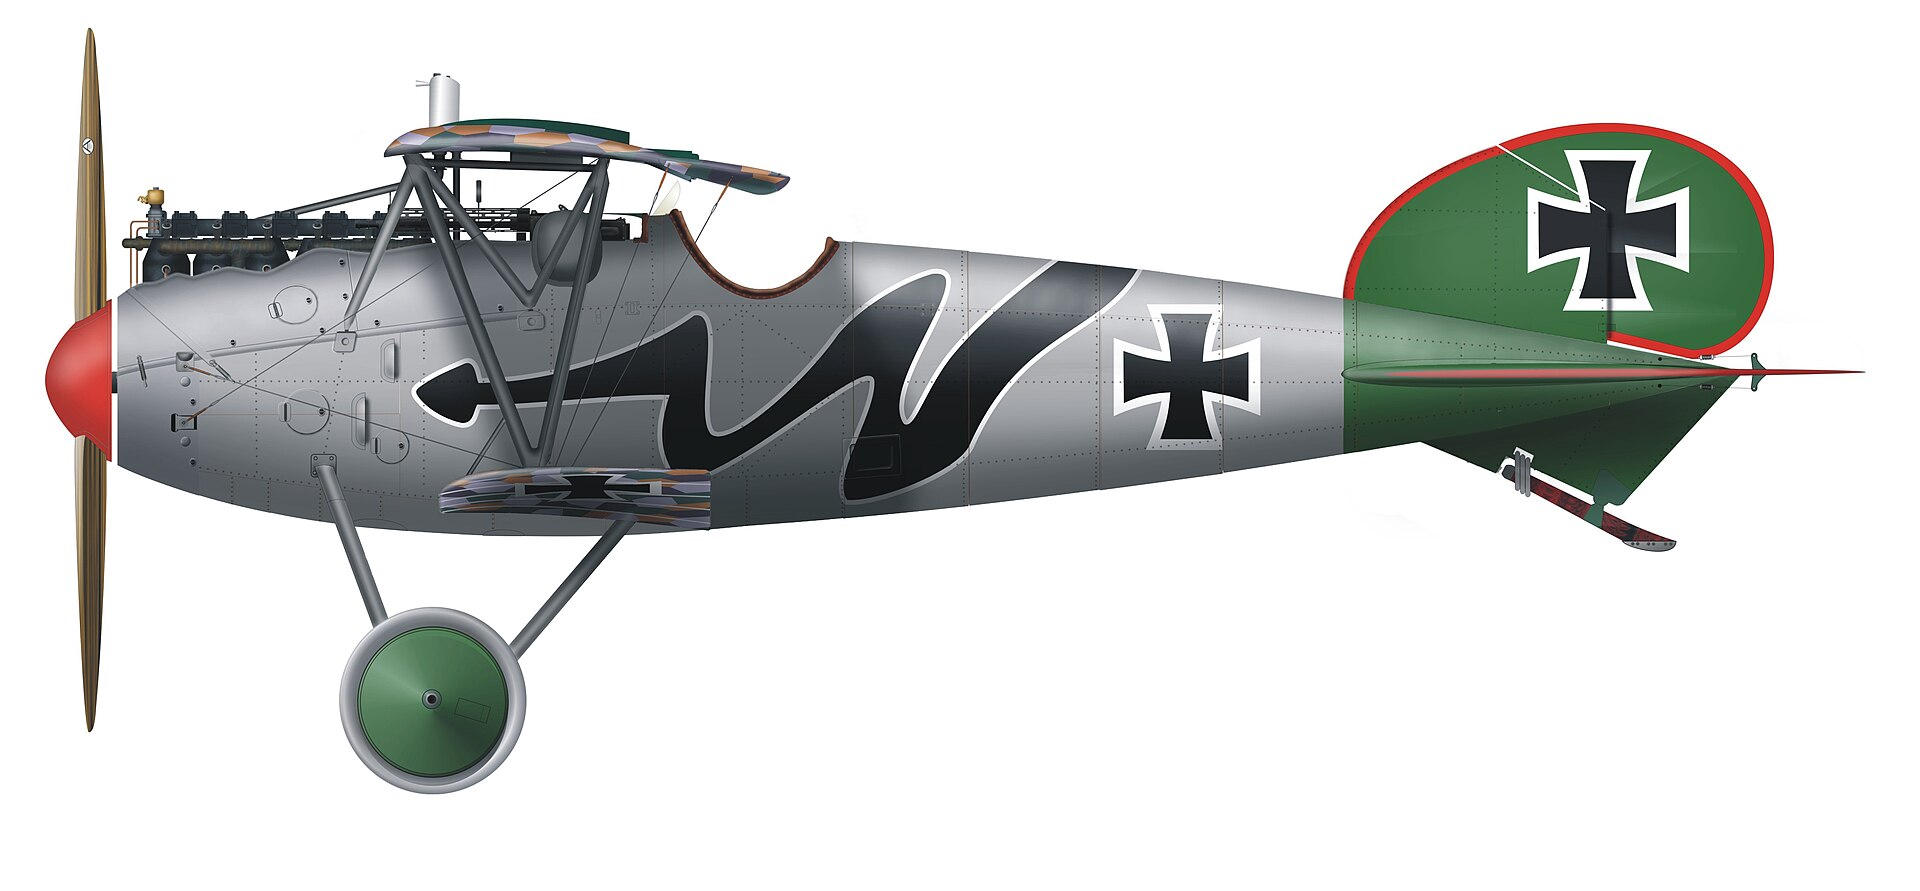
However, as was inevitably the case when the Allies attacked on the Western Front, the German defenders quickly rallied and resistance stiffened as infantry and artillery reinforcements were rushed to the Cambrai Front. In the air, Jasta 5 was soon reinforced by other units, including the redoubtable Jagdgeschwader Nr I led by Rittm Manfred von Richthofen, and the first deployment of the new Schlachtstaffeln (specialist ground attack units) equipped with the Halberstadt Cl. II and Hannover Cl.II.

The War in the Air
In the air above the battle, the RFC was fully committed, with aeroplanes flying below cloud at very low level – 10 to 15 metres above the ground – under the cloud as pilots dropped bombs and used their machine guns to great effect as they supported the infantry and tanks.
Both DH5 squadrons involved, Nos 64 and 68 (A) together with their contemporaries in Nos 3 and 46 Squadrons flying Sopwith Camels, were exceptionally busy, as their rotary-engined machines were deemed more suitable than aeroplanes with inline engines for the close support missions that they were now flying.[26]

As an indication the ferocity of the fighting, the fighter units involved in the Battle suffered 30 percent losses. For his part, Lt Pratt bombed two heavy machine gun positions and attacked troops and motor vehicles on the Cambrai road. Poor weather conditions curtailed flying on 21 November.
At 1000 on 22 November, Lt Pratt took off from an Advanced Landing Ground near Bapaume on a Special Mission (meaning intensive ground attack). Unfortunately for him, A9265 was hit by ground fire – probably infantry machine guns - and he was forced to land just inside British-held territory after suffering a minor wound.[27] He was rescued by the infantry, but before being taken to hospital he reported the location of a German battalion headquarters at the north-west corner of Bourlon Wood that he had bombed and machine-gunned. He was only briefly hospitalised before rejoining his squadron on 23 November. However, A9265 was wrecked and written off.
On a brighter note for the squadron, on the same day, another ‘B’ Flight pilot, Lt F.G. Huxley, flying A9461, was credited with the squadron’s first victory in aerial combat [28] when he shot down an Albatros scout at 1045. His victim was probably Ofstv Karl Bey of Jasta 5, who was killed over Anneux at 1140 German time (an hour ahead of Allied time); he had been credited with his only victory, a Bristol Fighter,[29] only five days earlier.
The tremendous efforts of the squadron were appreciated by the RFC hierarchy. Maj Gen Sir Hugh Trenchard, the commander of the RFC on the Western Front, wrote to General Sir William Birdwood, the Commander of I ANZAC, on 22 November:
“Dear General, I have just been to see the Australian Fighting Squadron No 68 for the second time in the last week, and I have talked to some of the pilots who carried out the great work on November 20th, 21st (sic) and to-day. Their work was really magnificent . . .
“These pilots came down low and fairly strafed the Hun. They bombed him and attacked him with machine-gun fire from fifty feet, flying among the treetops; they apparently revelled in this work, which was of great value. You might like to let some of your people know that I think them really great men, and I am certain that in the summer next year they will all give a very fine account of themselves. They are splendid.”
In summary, the opening phase of the Battle of Cambrai was a period of intense fighting for No 68 Squadron, as indicated by the following table of pilot and aircraft losses.
Losses to 68 squadron
20 November
A9278 Lt L.H. Holden was shot down by enemy aircraft but was unhurt.
A9378 Lt H. Taylor was brought down by ground fire.
A9399 Lt L.N. Ward [30] was last seen over Marcoing; he was posted as missing in action and was taken prisoner of war. [31]
A9457 Lt F H Sheppard was wounded when shot down by ground fire.
A9473 Capt J. Bell was shot down from the ground; he died of his wounds on 27 December. [32] His aeroplane was written off.
A9483 Lt W.A. Robertson [33] had to land at an advanced landing ground after his aeroplane was badly damaged by enemy aircraft.
B377 Lt R.W. McKenzie [34] was shot down by ground fire at Fremicourt.
21 November
No operational flying due to weather conditions
22 November
A9265 Lt A.J. Pratt was wounded when brought down by ground fire. Aircraft
A9294 Lt R.W. Howard was forced to land at No 56 Squadron’s aerodrome at Lavuévukke due to thick fog, his aeroplane badly damaged.
A9477 Lt D.G. Clark [35] was killed in action in aerial combat after last being seen over Bourlon Wood.
23 November
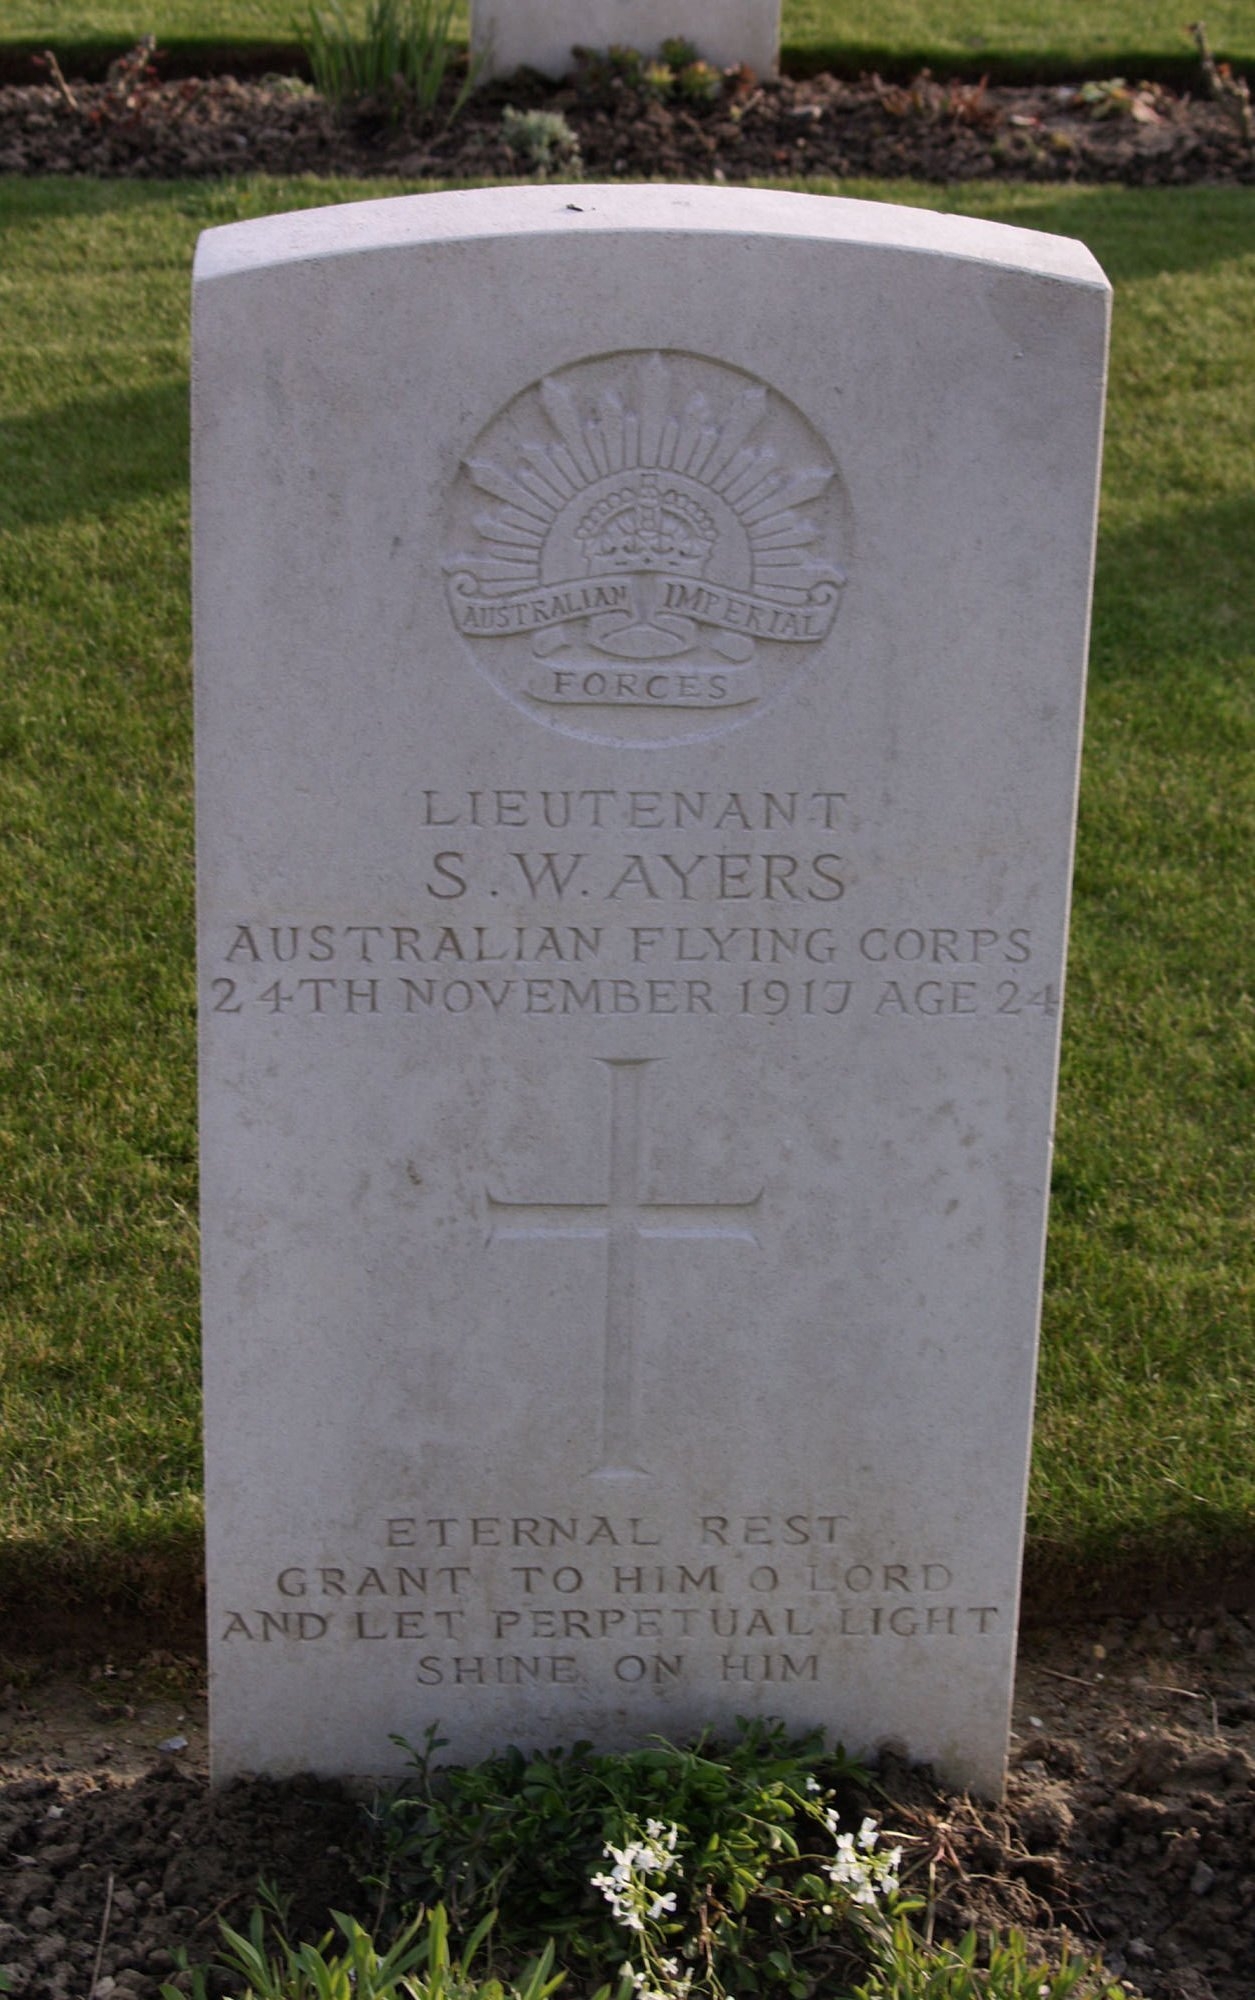
A9263 Lt S.W. Ayers [36] was shot down, probably by ground fire, and died from his wounds.
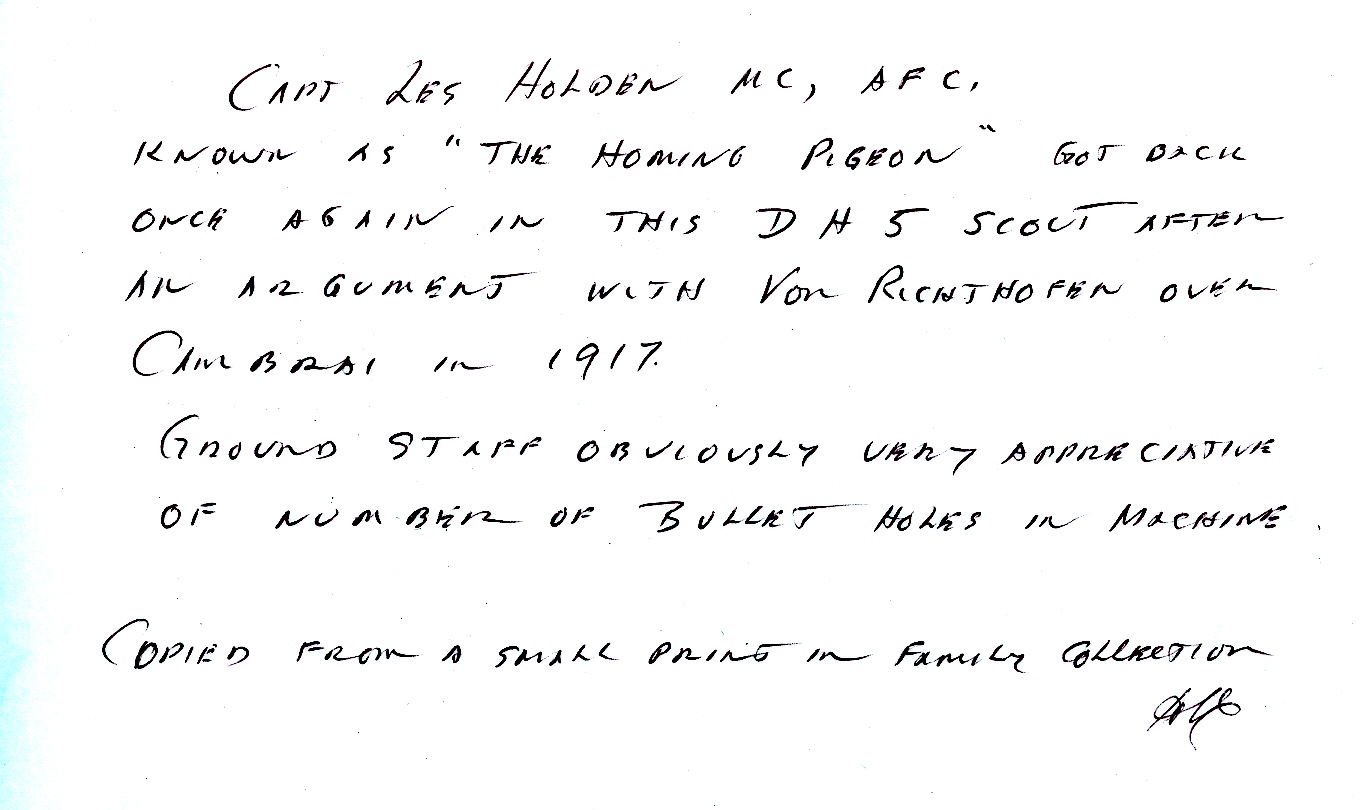
A9326 Lt L.H. Holden was uninjured when his aeroplane was very badly damaged by ground fire our Bourlon Wood.
A9428 Lt A. Griggs [37] was last seen over Bourlon Wood. He was shot down, probably by ground fire, and died of his wounds.
A9536 Lt E.D. Grant [38] was forced to land after damage, probably due to enemy ground fire, and his aircraft was badly damaged.
24 November
No operational flying.
25 November
Limited operational flying.
26 November
Limited operational flying.
27 November
No operational flying.
28 November
No operational flying.
29 November
A9330 Lt E.D. Grant was forced to land due to engine problems and the aeroplane, was badly damaged.
A9517 Lt R.W. Howard was uninjured when his aeroplane was badly shot up by enemy aircraft.[39]
German Counter-attack
A massive German counter-attack began on 30 November, commencing with a short ‘hurricane’ artillery bombardment that included heavy use of smoke and gas shells. In a preview of the tactics to be used in the March 1918 Kaiserschlacht, the advancing infantry attacked in small groups, bypassing centres of resistance and leaving them to follow-up groups and artillery. The RFC was again busy, this time supporting retreating British infantry. Losses in No 68 (A) Squadron in the second phase of the Battle were:
30 November
A9532 Lt H.G. Cornell [40] was shot down by enemy aircraft and had to spend 24 hours in a heavily shelled position before rescue.
1 December
A9341 Lt L. Benjamin [41] was uninjured when shot down by enemy aircraft.
A9541 Lt R.W. McKenzie was uninjured when shot down by enemy aircraft after being credited with a victory over an Albatros D.V which dived, landed hard and crashed into a shell hole north-west of Villers-Guislain.[42] (No German fatal loss matches this victory, so the pilot evidentially survived.)
A9461 Lt W.A. Robertson was uninjured when shot down by enemy fire.
4 December
A9336 Lt H. Taylor was uninjured when his aeroplane landed roughly after action
5 December
A9544 Lt R.W. McKenzie was uninjured when shot down by enemy aircraft.
6 December
A9279 Lt Johnson [43] was uninjured when his aeroplane was badly shot up by over Bourlon Wood.
Lt Pratt did not fly on operations again until 5 December when he flew A9338 as part of a seven- aircraft patrol led by Capt G.C. Wilson; the formation had an indecisive combat with twelve Albatros scouts and four two-seaters over Bourlon Wood.
On 6 December, the penultimate day of the battle, he flew DH5 A9338 as part of a morning low patrol and bombed enemy troops in the village of la Fontaine. In the afternoon, flying the same DH5, he bombed troops near Lateau Wood before being forced to return with engine trouble.
The Battle of Cambrai ended on 7 December, after about 45,000 British and 50,000 German casualties. The net result was a minor bulge in the Allied Front Line known as the Flesquières Salient.
No less than six squadron pilots, Capts R.C. Phillipps and G.C. Wilson, Lts L.H. Holden, R.W. Howard, F.G. Huxley and H. Taylor, were awarded the Military Cross for their deeds during the battle.
Also, Sgts B.F. Jones [44] and R. Lonsdale, [45] together with Cpl W.B. Campbell [46] and Pte H.S. Raphael [47] were awarded the Military Medal for bravery in salving aeroplanes under fire.
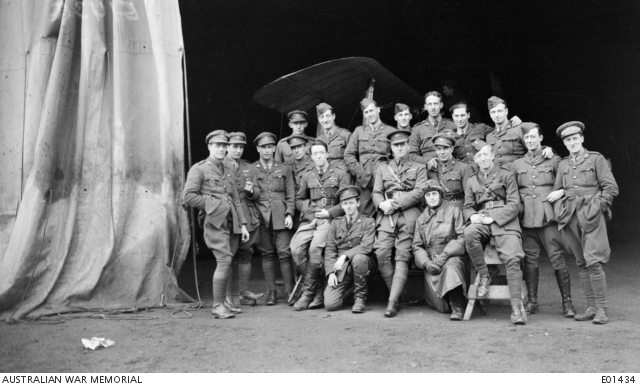
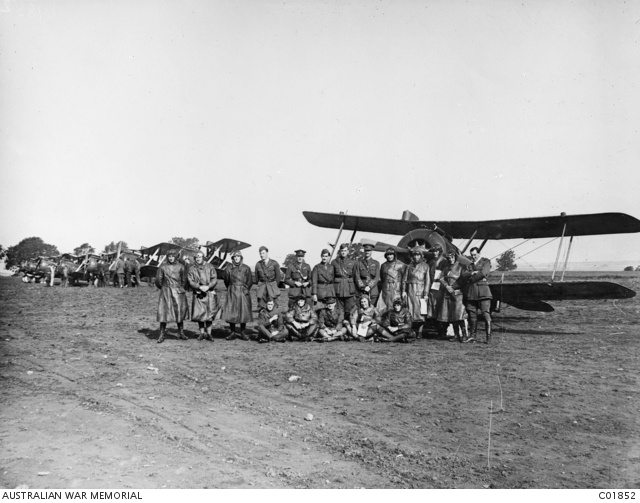
Left to right, back row: Lieutenant (Lt) Louis Francis Loder; Lt Thomas Grant; Captain (Capt) Leslie Hubert Holden MC AFC; Capt Richard Watson Howard MC (died of wounds 22 March 1918); Lt Lawrence Benjamin; Capt William Alexander Robertson; Lt Archibald James Pratt.
Front row: Lt Clive Chisholm Sands; Lt Harry Taylor MC MM (accidently killed 18 August 1918); Lt Lewis Septimus Truscott; Lt Frank Armstrong Power; Second Lieutenant Percy Harold Lawson (killed in action 6 January 1918); Lt David Charles Allardice; Capt Henry Garnet Forrest DFC; Lieutenant Colonel Walter Oswald Watt OBE; Lt L R Clark; Capt Gordon Campbell Wilson MC DCM.
Kneeling: Lt William Alfred Turner; Capt Frederick George Huxley MC.
Later events: Archibald Pratt
After the Battle had drawn to a close, the squadron began converting to the SE5a, the aeroplane that it would operate until the Armistice, just under a year later, though operations with DH5s would continue for some weeks.
At 0935 on 12 December Lt Pratt attempted to take off in SE5a B699 (an aeroplane built by Vickers Ltd at Weybridge and delivered to the squadron five days earlier) intending to fly to the aerial range at Berck sur Mer, repeating a flight he had made two days earlier. Unfortunately, the aeroplane crashed during take-off, something attributed to the rough nature of the aerodrome. The pilot was assessed as being ”OK” but the SE5a was wrecked, with broken longerons, engine bearers, wings, centre section struts and propeller.[48]
On 23 December Lt Pratt proceeded to the UK on leave, returning on 14 January. However, he continued to suffer from a concussion, almost certainly the result of one his crashes, and was detached from his squadron on 16 January and admitted to No 24 General Hospital at Etaples. Following an examination on 20 January he was sent to England and admitted to the RFC Central Hospital at Hampstead on 25 January 1918. After further examinations, he was deemed to be unfit for flying, and in March he was struck off the strength of the AIF and set out to return to Australia on the transport ship Durham Castle.
When the ship reached Cape Town, he moved to another transport, the Kenilworth Castle, for passage to Durban where he joined the Hospital Ship Field Marshall in which he returned to Australia on 22 May, with his illness specified as war-induced neurosis.
After arrival in Australia, it was determined that Lt Pratt was no longer able to carry out his military duties and so, on 10 July, his appointment in the AIF was terminated. As is often the way with government service, instead of the thanks of a grateful nation, on 16 July he was sent a letter which requested the return of all items issued during his service, and a reminder that any personal items for which he had been paid an allowance were now government property, and must be handed in. Also, he was reminded that he was not to wear his uniform unless authorised to do so.
Although no longer in the AIF, Arch Pratt was still determined to play his part in the war effort, and he joined the Merchant Navy, only to arrive back in Europe as the Armistice came into effect. After the Armistice, he returned to Melbourne before moving to Wellington, New Zealand, where he married Mary Bell. The couple had a daughter, Betty. At some time in the 1930s, the family moved to Homebush, NSW, where they lived in George Street.
Sadly, Archibald Pratt was only 44 when he passed away in Royal Prince Alfred Hospital on 21 March 1937. He is buried in Rookwood Cemetery.
Later events: the squadron
No 68 (Australian) Squadron RFC was officially renamed No 2 Squadron AFC on 19 January 1918. Equipped with the SE5a, the unit flew with distinction up to the Armistice, claiming about 170 enemy aircraft. Some of the pilots mentioned in the above account went on to considerable success: Capt R.C. Phillipps was credited with 15 victories; Capt R.W. Howard was credited with eight, and Lt R.W. McKenzie was credited with six.
References
1. Maj Oswald Watt, a merchant and grazier from Sydney, was born in Bournemouth, England in 1878. A pre-war pilot who flew with the French Aviation Militaire after service in La Légion Étrangère, he transferred to the AFC after attaining the rank of Capitaine, and being awarded the Légion d’Honneur and the Croix de Guerre. At the Armistice, he had reached the rank of Lieutenant Colonel. He drowned in an accident in 1921.
2. Capt Phillipps’ experiences with No 32 Squadron included being shot down by anti-aircraft fire near Elverdinghe while flying DH5 A9372 on 7 August.
3. Capt George Campbell Matthews, a master mariner born in Stranraer, Scotland. He flew a Sopwith Wallaby in the contest to fly from England to Australia in 1919.
4. Capt Gordon Campbell Wilson MC AFC DCM, a pattern maker from Newcastle, NSW; he was killed in a motor vehicle accident in 1929.
5. Capt Richard Watson Howard MC, an engineering student from Hamilton, NSW.
6. No 70 Squadron was the first operational Camel unit in the RFC, having equipped with the type in June 1917.
7. An ‘out-of-control’ victory meant that the enemy aeroplane wasn’t seen to have crashed.
8. The flight by eighteen aeroplanes, leaving Harlaxton at 0930 and arriving at St Omer at 1700, was an RFC record for rotary-engined aeroplanes.
9. Capt S.K. Muir MC, from Melbourne, had served in the Light Horse before being commissioned in the King’s Royal Rifle Corps before transferring to the RFC, where he flew with No 67 (Australian) Squadron in the Middle East. He was awarded his MC for actions on 22 December 1916 [this would have been the AFC’s first combat victory, but it was not confirmed] and 1 January 1917 when he forced down enemy aeroplanes.
10. The authoritative account in de Havilland Aircraft of World War I, is at some variance with the Squadron War Diary, which indicates that the following pilots flew to France, but doesn’t identify their aeroplanes: Maj Watt, Capts Bell, McCloughry and Phillipps, Lts Griggs and Matthews, 2/Lts Wilson, James, Holden, Howard, Robertson, Morrison, Huxley, Pratt and Taylor. 2/Lts Agnew, Ayers, Bartlam, McKenzie, and Ward, plus Lt E.A. Tooth (Equipment Officer) 2/Lt W.A. Turner (Recording Officer) and 2/Lt L.T. Loder (Armament Officer) came by ship with the ground staff.
11. Maj Roy Cecil Phillipps MC DFC, an accountant from Perth, WA.
12. Lt Clive Chisholm Sands, an engineering student from Randwick, NSW.
13. Lt Douglas George Morrison, an orchardist from Kilmore, Victoria.
GREVILLERS BRITISH CEMETERY
14. Lt Frederick George Huxley MC, a shop keeper from King Island, Tasmania.
15. Capt Leslie Hubert Holden MC, an assistant manager from Turramurra, NSW.
16. Lt Cecil Holman James, a motorist and aviator(?) from Alexandra, Victoria.
17. Lt John Richard Bartlam, a motor driver from Townsville, Queensland.
18. Lt Harry Taylor MC MM, a mechanic born in Birmingham, England. He was killed in an aeroplane accident in August 1918.
19. 2/Lt Ivo Cumberland Fraser Agnew, a pastoralist from Tasmania. He was repatriated to the United Kingdom on 29 November 1918.
20. Ltn Hans Staats of Jasta 12 claimed a DH5 over Quéant; it was his only victory before his death in a collision with an SE5a of No 24 Squadron RFC on 6 March 1918.
21. The DH5 in No 68 (A) Squadron was replaced by the SE5a, a more powerful development of the SE5.
22. The Tank Corps was created from the Heavy Section of the Machine Gun Corps on 27 July 1917.
23. BEF infantry reserves were further depleted when five divisions (together with six French divisions) were sent to the Italian front to bolster their Ally in its struggle against the Austro-Hungarians. The Italians had been forced into a major retreat after the Austro-German attack at Caporetto on 24 October 1917.
24. The battle is often erroneously noted for being the first large-scale use of tanks in a major offensive operation. However, the French had deployed large numbers of tanks in April (130+), May (48), and October (92) 1917 and, of course, more than 200 British tanks were used during Third Ypres.
25. The tank assault at Cambrai was one of the very few occasions during the war when an assault was directly led by a general. Brig-Gen Hugh Elles, the Commander of the Tank Corps, rode into action aboard Hilda, Tank No 1 of ‘H’ Battalion, commanded by Lt T.H. de B. Leach. The tank flew the Corps’ new flag of brown, red and green horizontal stripes, signifying the hope of ‘through the mud and blood to the green fields beyond’.
26. [Then] Lt Arthur Gould Lee provided an excellent contemporary first-hand account of his experiences as a No 46 Squadron Camel pilot over Cambrai in his book No Parachute.
27. Reported in Flight magazine of 3 January 1918.
28. He was also credited with the squadron’s last aerial victory while flying the DH5; a DFW two-seater shot down on 6 December.
29. Ofstv Bey’s victory was over Bristol F2B A7231 of No 11 Squadron RFC. The crew, 2/Lts E. Scholtz and H.C. Wookey, were taken prisoner of war and then tried by a Court Martial as their aircraft was carrying propaganda leaflets. The airmen were sentenced to ten years’ penal servitude but were transferred to an ordinary POW Camp when only a small fraction of their sentence had been served. A7231 was used for training purposes by the Germans with the legend Gute Leute, Nicht Schiessen! – Good people, don’t shoot! – painted on the wings.
30. Lt Leslie Norman Ward, a clerk from Walkerville, South Australia. Taken prisoner of war, he was repatriated to the UK on 17 December 1918.
31. See Clipped Wings by Charles Schaedel in the 1993 edition of The ’14 –’18 Journal by the Australian Society of World War One Aero Historians.
32. Capt John Bell, a grazier from Rokewood, Victoria. He died of wounds on 27 December 1917. TINCOURT NEW BRITISH CEMETERY
33. Capt William Alexander Robertson, an engineering student from Albert Park, Victoria.
34. Lt Robert William McKenzie, a chemist from Adelaide, South Australia.
35. 2/Lt David Goodlet Clark, a grazier from Picton, NSW. He was killed in action on 22 November 1917 and has no known grave. He is commemorated on the Arras Flying Services Memorial.
36. Lt Sydney Winton Ayers, a mechanic from Cootamundra, NSW. He died of wounds on 24 November 1917. He is buried at Lebucquiere Communal Cemetery Extension
37. Lt Albert Griggs, a civil engineer born in Missouri, USA. He died from wounds on 23 November 1917 and has no known grave.
38. Lt Eric Duncan Grant, a student born in London, England.
39. There are two possible German claims for this aircraft. Ltn Hans Klein and Ltn Alois Heldemann of Jasta 10 both claimed a ‘Sopwith 1 seater’ over Crevecour.
40. Lt Harold Gordon Cornell, an electrician from Richmond, Victoria. Cornell was killed in action on 11 December 1917, aged 26, and is buried at Dernancourt Communal Cemetery Extension
41. Lt Lawrence Benjamin, a student from St Kilda, Victoria.
42. This was the first of his eventual six victories.
43. A mystery man: it’s difficult to find a Lt Johnson, Johnston or Johnstone who served in No 68 (A) Squadron at the time of the Battle of Cambrai.
44. 2/Lt Bertram Fitzhardinge Jones MM, a dental mechanic born in Dunedin, New Zealand.
45. Sgt Richard Lonsdale MM, born in British Columbia, Canada.
46. Cpl William Bennett Campbell MM, an engine fitter from Mackay, Queensland.
47. Pte Herbert Silvester Raphael MM, a clerk from Orange, NSW.
48. The wreck of B699, which had been delivered only a week earlier, was repaired and then delivered to No 84 Squadron RFC on 3 March 1918. Lt G.O. Johnson was credited with three victories (one shared) while flying it before it was struck off charge after a forced landing on 2 April. The Canadian Capt Johnson was eventually credited with 11 victories, including the 27 victory German ace Ltn Kurt Wusthoff, who was captured on 17 June 1918. In the Second World War, Air Marshall G.O. Johnson headed the Royal Canadian Air Force in the United Kingdom.
Becoming a member of The Western Front Association (WFA) offers a wealth of resources and opportunities for those passionate about the history of the First World War. Here's just three of the benefits we offer:
Identify key words or phrases within back issues of our magazines, including Stand To!, Bulletin, Gun Fire, Fire Step and lots of others.
The WFA's YouTube channel features hundreds of videos of lectures given by experts on particular aspects of WW1.

Read post-WW1 era magazines, such as 'Twenty Years After', 'WW1 A Pictured History' and 'I Was There!' plus others.


