A Cockney Soldier and the Great War: Corporal William Charles Blumsom MM
Like so many that have an abiding fascination with the First World War, my interest was kindled when I learned that a relative had served in the conflict – in my case, my grandfather. I never knew him; he had died a quarter of a century before I was born. Inspired by family lore, I embarked upon an almost lifelong quest to reconstruct his life. Initially, I only had the barest details of his army life to work with, however in 1988 I wrote to the MOD for his service record, and this provided the documentary evidence I needed to continue my search in earnest. This was to be augmented by photos and previously unseen documents that my aunt Florrie kept in the family archive. I would make numerous visits to The National Archives (TNA) at Kew taking a deep dive into my grandfather’s battalions War Diaries. My research was turbocharged with the development of the internet along with TNA’s digitisation of War Office records. In tandem with annual trips to Belgium and France walking in his footsteps, I was able to compose a comprehensive narrative of his life as a soldier.
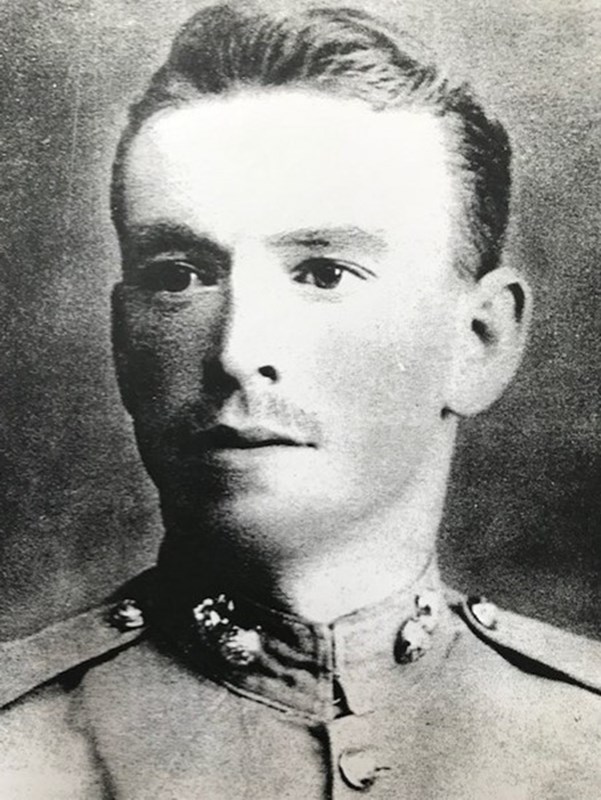
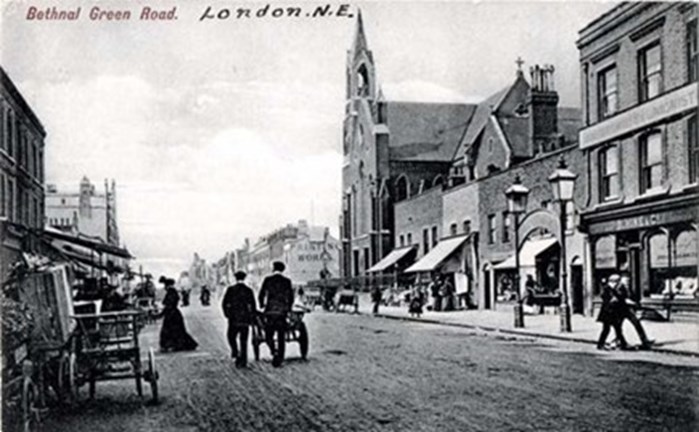
William Charles Blumsom was born on 21 November 1881 to William Blumsom senior (1857-1901), a bootmaker, and Frances née Mears (1857-1926) at 7 West Street (later renamed Mowlem Street), Bethnal Green, London, joining his older sisters, Elizabeth, and Sarah. A brother, James, followed in 1883, and two further sisters Ada and Florry in 1885 and 1887 respectively. The family would eventually settle at 59 Russia Lane, Bethnal Green, and William would attend the nearby Mowlem Street Elementary School to learn the three r’s. The East End of London was a very deprived area in the Victorian and Edwardian eras – unemployment and casual working was commonplace, the workhouse the worst of all possible fates – but fortunately William found a steady job with a furniture maker, Edwin Atkins of Church Row, Bethnal Green Road, as a labourer.
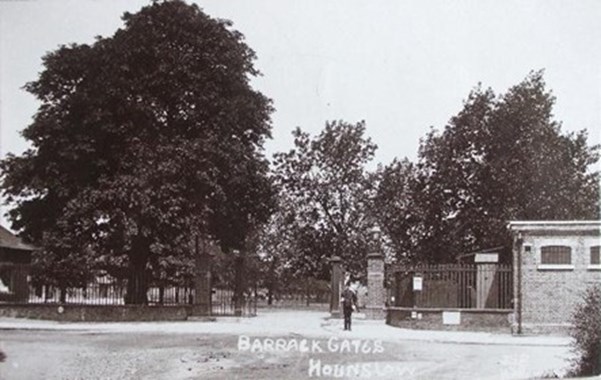
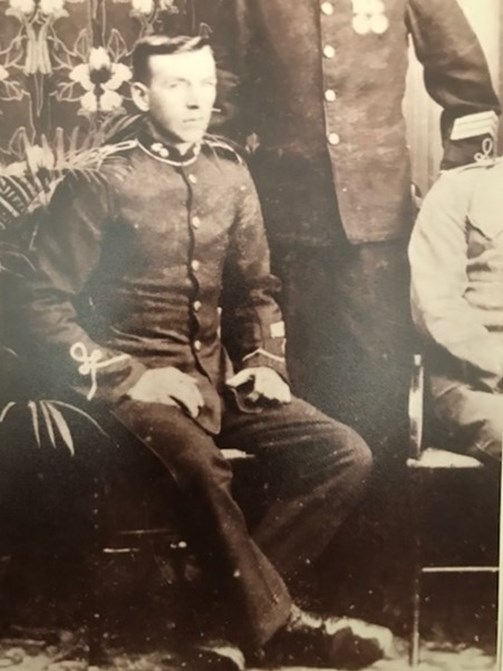
But William had a wanderlust, a thirst for adventure, and in September 1898, at the age of 16 he enlisted with the 5th Battalion Royal Fusiliers as a part-time soldier. The Royal Fusiliers was a London-based regiment, who recruited locally, and the 5th was a militia battalion, predecessors to the modern-day Territorial Army, and William would be required to complete at least 49 days training annually whilst still holding down a job. He clearly lied about his age to join up, and this might be the factor that prevented him from joining as a full-time soldier. Perhaps the recruiting sergeant, guessing his real age, advised him to join the militia in order to build up his physique in preparation for the regulars. And a year later, this is precisely what happened, on 4 October 1899, William enlisted with the Royal Fusiliers at Dalston Barracks, Hackney, claiming that he was 18 years and 10 months old (perpetuating the earlier lie) and was posted to the regimental depot at Hounslow.
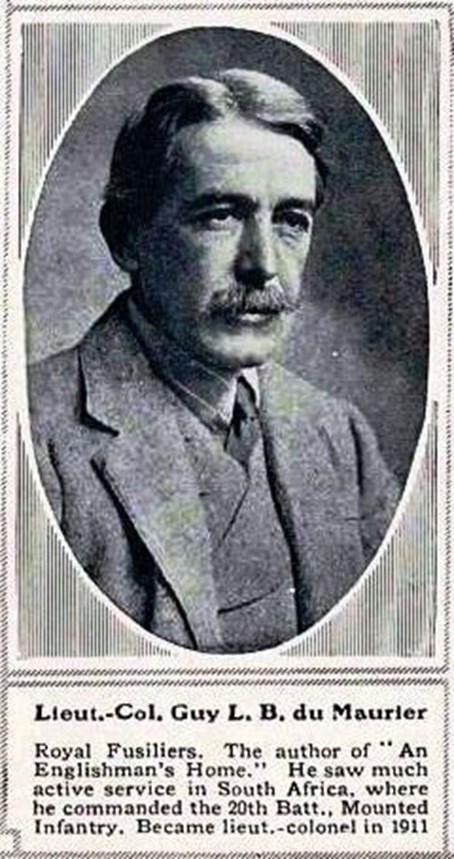
Just a week after William joined up, on 11 October 1899, the Boer War broke out, but it would be some time before he was mobilised. On 8 March 1900, William was transferred to the newly established 4th Battalion, under the command of Guy du Maurier, uncle of the famous author Daphne du Maurier.
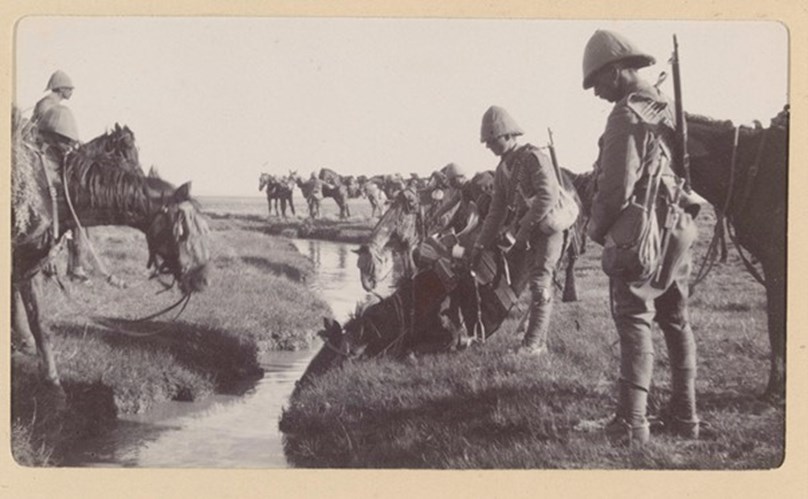
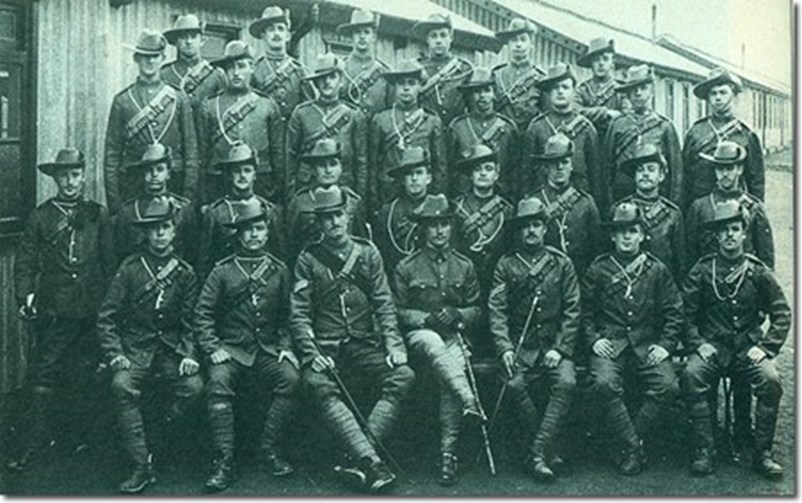
The best part of a year later, William successfully passed the Mounted Infantry course with flying colours at Shorncliffe Barracks, and on 16 March 1901 found himself embarking for South Africa at Southampton Docks on the HMS Kildonan Castle with the 20th Mounted Infantry (MI) Battalion. He saw active service for the remainder of the war, traversing the vast plains of the veldt, pursuing the Boers in a game of cat-and-mouse, spending hot days in the saddle and sleeping through freezing cold nights, often in the open air.
But just as William was having the adventure of his life, tragedy struck. Whilst he was serving during the Boer War, back home his father had died at the relatively young age of 44, leaving his mother in a very precarious position. The war came to an end, the 20th MI was disbanded, and the horses were sold off. William was transferred to the 2nd Battalion on 11 August 1902, a combat veteran at the age of 20, and returned to the UK, disembarking on 21 October 1902, and would serve for the next year and 112 days on home service.
On 9 February 1904 he was transferred to the 1st Battalion, who at that time were posted in India. He embarked on 11 February, arriving on the sub-continent on 5 March. He spent the next three years and 271 days stationed at Lebong near Darjeeling, a hill station in the foothills of the Himalayas in the northeast of India, near to the borders with Nepal, Tibet, and Bhutan. He arrived back in the UK on 9 November 1907 and was transferred to the army reserve at Gosport. He completed his first period of engagement on 3 October 1911, having completed 12 years’ service, which included a spell serving with the regimental police.
William returned to civilian life, taking up a position with a vinegar brewery on the City Road just north of the City of London. Nearly three years later, shortly after the outbreak of the Great War, he re-enlisted at Finsbury Barracks – not half a mile from the vinegar works – the home of the Honourable Artillery Company which doubled as the local recruiting office. It would be some time before William departed for France, disembarking at Rouen on 2 April 1915. He reported to the 6th Divisional Base above the port and was posted to his old battalion, the 1st Royal Fusiliers (RF), who were then deployed at Chapelle D’Armentieres near the Belgian border, and he joined them there on 11 April. The 1st RF would serve in the Armentieres sector until early June when they were redeployed to the Ypres sector, arriving on 4 June 1915 to camp at woods northeast of Poperinghe. Over the next year the battalion would serve at various points on the salient, including La Brique, Hooge/Sanctuary Wood and Ploegsteert. In October, the battalion, along with the rest of the 17th Brigade, were transferred to the ‘new army’ 24th Division to add some much-needed experience and stiffen their spine. In early August 1916 they received orders to move south to join the Battle of the Somme.
The 1st RF spent a week training in Riencourt, followed by a further week practising attacks uphill in camp at Sandpits, 3 miles southeast of Albert, before going into the trenches between Delville Wood and Trones Wood west of Guillemont on 9 August 1916:
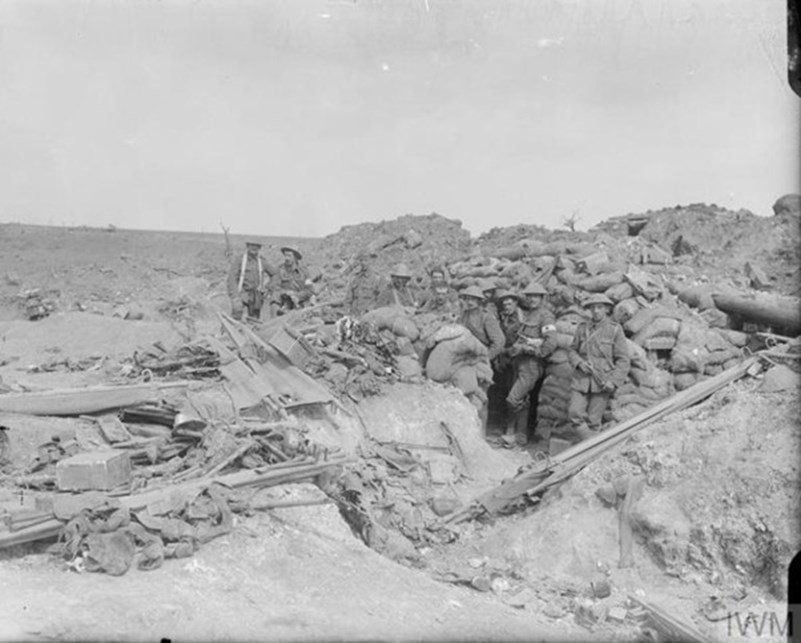
‘The preceding two weeks training had been in preparation for an attack on the village of Guillemont, or Gillymong as the men nicknamed it, towards the southern end of the British sector on the Somme front. It was an important strategic point, the southernmost village on a ridge held by the Germans that ran from Thiepval lying roughly to the north-west just over 7 miles away and down through Pozieres before reaching Guillemont, approximately 4 miles north of the river Somme. It was crucial that it was captured to enable the progress of the whole of the right flank of the Fourth Army, taking out a salient at Delville Wood in the process. The village itself, or what little remained of it, commanded the surrounding countryside, one of the highest points on the ridge with a maximum elevation of over 500 feet, it was key to the whole advance. The Germans could monitor British movements of men and matériel coming from Amiens into Albert eight miles to the west from their observation posts and were determined that it had to be held at all costs. They had the advantage of a network of concrete fortifications and underground tunnels to defend their position; it was considered an almost impenetrable stronghold’ [1].
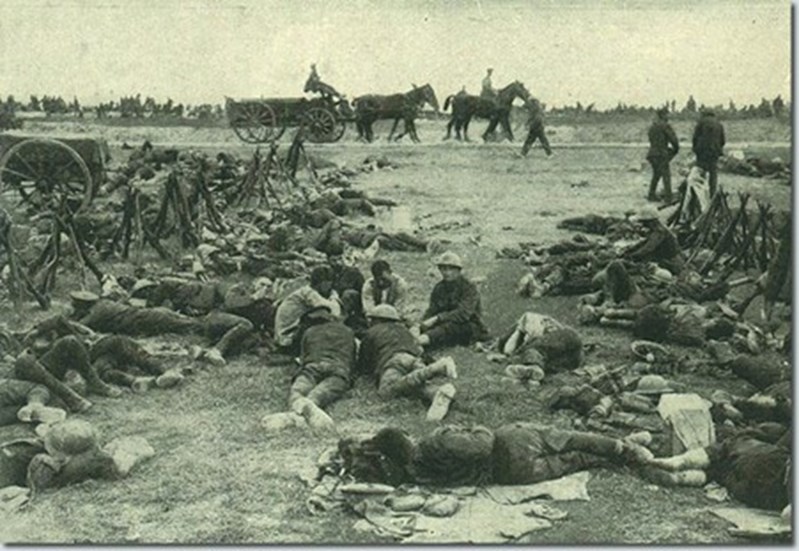
Numerous attempts had been made to take Guillemont throughout July and into August, all to no avail; in Lyn Macdonald’s words:
‘For six weeks, division after division battered up the slope against the defences of Guillemont village. Time after time they were thrown back again. Time after time the ragged remnants of battalions were withdrawn, decimated and demoralised. Like High Wood, Delville Wood, Mametz Wood, Thiepval and Beaumont Hamel, the name of Guillemont was already imbued with overtones of horror, which the passage of a whole generation would not erase’ [2].
The 1st RF had an eventful time over the next few days, including being shelled by their own artillery, before they were relieved on the night of the 11th/12th, enduring a further shelling from the Germans as they retired through Trones Wood. But there was no rest for the Londoners, over the ensuing nights they were tasked with digging jumping-off trenches deep into no-man’s-land in preparation for the next assault on the ruined village:
‘On the 18th August, the battalion took up their position in Trones Wood in readiness for the attack, of which the Guillemont sector was only one element of a much larger assault on a broad front of 12,000 yards, which included taking High Wood, Delville Wood and Ginchy as well. The 1st RF was in close support to the 3rd Rifle Brigade (RB) and the 8th Buffs, with the 12th Royal Fusiliers in reserve’ [3].
The 1st RF, the 3rd RB, and the 8th Buffs, who formed the 17th Brigade of the 24th Division along with the 12th RF, were the most successful of the forces that took part in the attack, taking Guillemont Station and ZZ Trench:
‘The most important gains of the day were made by 24 Division to the north and east of Guillemont in an attack which apparently caught the Germans unawares. It advanced the British lines some 500 yards. In addition, all units speak of the accuracy of the creeping barrage. Nevertheless, the division sustained heavy casualties, probably from machine-guns in Ginchy and Guillemontwhich were beyond the range of the creeping barrage and untouched by the feeble preliminary bombardment’ [4].
However, the 3rd Division on their right had failed in their efforts, leaving the 17th Brigade’s flank up in the air, and a planned attack for the following morning was cancelled. Due to their success, the 24th Division were chosen to resume the attack on 21 August. At 15:30 that day, the 1st RF attacked Hill Street and Brompton Road trenches in Guillemont, and the War Diary records that ‘after a strenuous fight all opposition was overcome and enemy driven from his trench in front of Hill Street.’ The War Diary details:
‘Capt. M.C. Bell took out his two officers and four other ranks as markers, also a Lewis Gun team, some distance in front in no-man’s-land, for his Company to form up on, to enable the Company to start parallel to the objective. The whole Company moved out on to the alignment made by the markers, five minutes before “Zero Time”, under cover of our artillery barrage. Very few casualties were sustained in this movement. As soon as attack was launched a party of bombers including HQ bombers made an unsuccessful attack on a strong point between left of ‘A’ [company] and right of RBs [Rifle Brigade]. Bombers were about 20 strong, and had heavy casualties amongst them, only three getting back to Company. Remainder of Company reached their objective as previously mentioned. Capt. M.C. Bell and Lt. F.E.B. de Uphaugh were both wounded early in the attack. Capt. Bell remained with his Company until consolidation had commenced, when 2nd Lt. J.H. Jacobs took command. 2nd Lt. L.O. Massey was killed when bringing up party with fresh supply of bombs. Capt. Bell and 2nd Lt. Jacobs displayed great coolness and courage. The bombers made a great and gallant fight against overwhelming odds. The strong point which they attacked having been overlooked by the Heavy Artillery. Sergeant Rye although wounded voluntarily took a message to his Company Commander and returned with the reply, being again wounded, in so doing. All ranks without exception upheld the traditions of the Regiment on this day.’
It was during this attack that William sustained a gunshot wound. Following his evacuation from the battlefield, the MO decided that it was a ‘Blighty Wound’; one that was serious enough to merit an intensive course of treatment back in England. For now, William’s war was over, but it proved to be temporary. Once he had been successfully treated, he made a full recovery and was available for redeployment. However he wouldn’t be returning to his fellow Londoners in France. On 24 January 1917, he embarked at Devonport upon a troopship bound for Salonika. Arriving on 7 February, he was posted to the 10th (Irish) Division’s depot five miles outside the city.
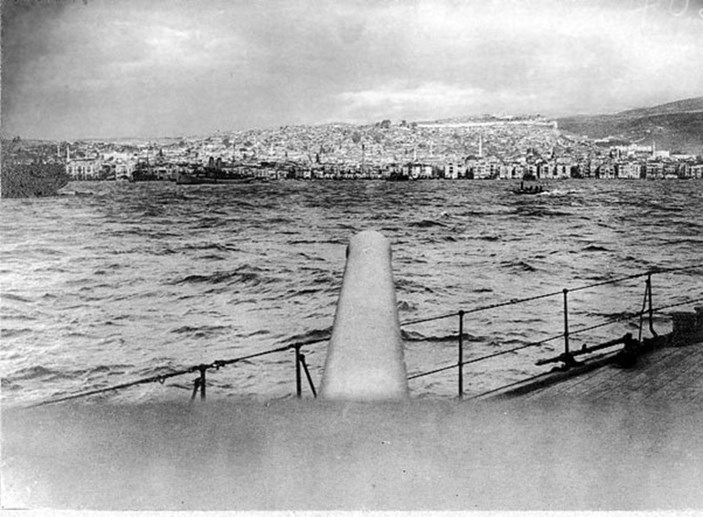
By the time William entered this theatre of war, the campaign in Macedonia had been rumbling on for sixteen months. The British Salonika Force (BSF) had arrived on the 5th October 1915 – along with the French – to support the Serbians who were under attack from Bulgarian, German, and Austro-Hungarian forces. Unfortunately, they were too late, Serbia fell, with the remnants of their army taking refuge on the Isle of Corfu. The allies dug in, creating a heavily fortified defensive line protecting Salonika and running east towards the Gulf of Orfano, the front became known as ‘the Birdcage’, and the line remained static, with no gains made by either side. This inaction led the future prime minister of France, Georges Clemenceau, to label the troops disparagingly as ‘the Gardeners of Salonika’ [5].
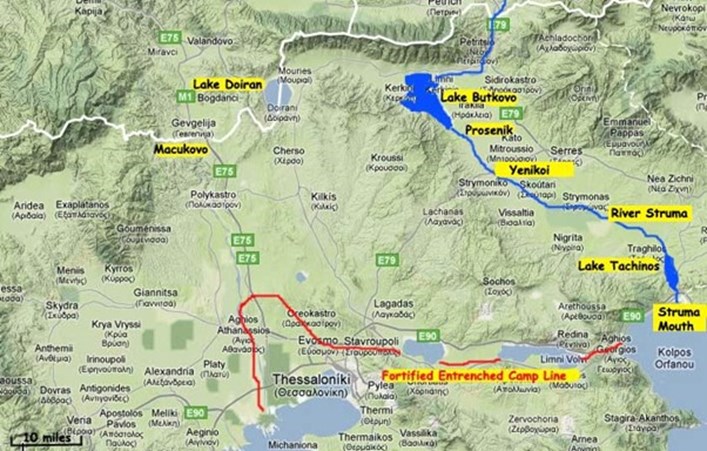
Having initially served with the 10th Division mainly engaged on entrenching duties since his arrival, William was transferred to the 6th Royal Dublin Fusiliers on 26 May 1917. The rest of his time with the BSF was relatively uneventful, the main enemy being malaria, the troops constantly involved in an ongoing battle with the mosquito. Sickness rates were so high from the disease that the GOC decided to vacate the low-lying marshland of the river Struma, the Bulgarians retiring likewise, creating a no-mans-land 9 miles wide. The men were put to work cutting down scrub within 200 yards of the camps, draining swamps and filling in waterholes. Quinine was issued to fight the disease, a daily dose of which, due to unpleasant side effects, was most unpopular with the rank and file.
The void left by the tactical withdrawal of the British – mirrored by the Bulgars on their side – was filled by sporadic skirmishes between the adversaries, small patrols on either side engaging with each other as they probed the vacated space. William’s battalion:
‘…went back into the line at Turica on the 1st August. They were to spend the best part of three weeks in the line, improving defences and observing enemy movements. There were two events of note during this period, on the 9th of August, William received a promotion to Lance Corporal (unpaid), and on the 14th, an enemy patrol were espied approaching Cuculuk, one of the villages vacated by the BSF in the general withdrawal. Unaware that they were under surveillance, the Bulgars entered the village into a planned ambush, however the trap was compromised by over-enthusiastic Tommies breaking cover prematurely, and the enemy fled north towards Kumli. The 6th RDF opened fire on them from a distance of 200 yards, killing two and wounding numerous others, taking one prisoner in the process’ [6].
The 6th RDF were relieved in the line on 19 August, and the following day learned that they were bound for the Middle East to join the Egyptian Expeditionary Force (EEF). They embarked on the 9th of September, docking at Alexandria three days later on the 12th. As part of the EEF, they took part in the Third Battle of Gaza, breaking the Gaza-Beersheba line and taking Jerusalem on 8 December 1917.
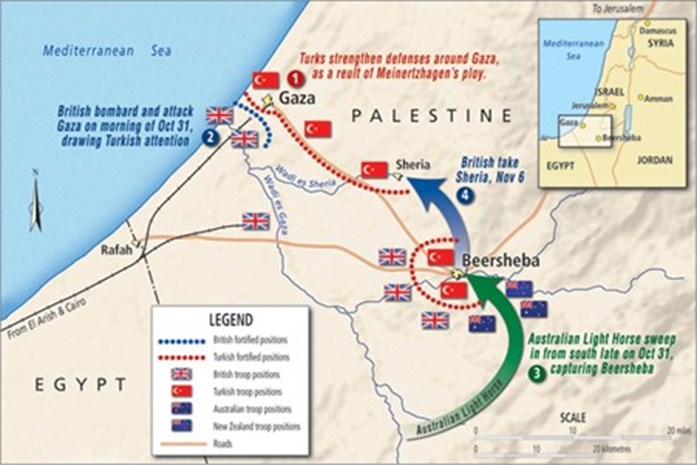

The GOC, General Allenby, was intent on pressing on and taking Damascus to the north, but the Turkish had other ideas, on Boxing Day 1917 they launched a counterattack with the objective of retaking Jerusalem:
‘…a bloody battle ensued, the 10th Division fighting amongst the rugged hill country to the west of the Nablus Road. Using fire and movement tactics, with each battalion taking it in turn to provide covering fire as they leapfrogged each other, they ascended the ridges and skilfully scaled the 6- to 10-foot-high terraces to drive the Turks from the peaks; William took part in the capture of Shamrock Hill by the 29th and 30th Brigades with the 31st taking Kefr Shiyan. The Turkish counterattack had been repulsed across the entire front, and the pressure from the EEF was unremitting, it turned into a rout as the enemy retreated at speed. In a letter to Colonel Clive Wigram at GHQ, Allenby wrote that ”by the evening of the 28th, not only had the enemy failed to take Jerusalem, but he was pushed 7 miles further from that city than when his attack started” [7].
Such was the pace of the EEF’s progress, that a period of consolidation was necessary. They were in danger of outstripping their supply and communication lines and a programme of roadbuilding was embarked upon. The 10th Division’s expertise gained from Salonika was invaluable and they were set to work. Throughout January and February 1918, they toiled, and it was during this period that William sustained a serious injury to his right leg. He was transported to hospital in Cairo for treatment. So began a dreadful period for William, he suffered successive bouts of illness for the next six months shuttling back and forth between hospital and convalescent depot. Initially diagnosed with a tonsillar abscess, he would eventually be found to be suffering from diphtheria, a potentially fatal disease before the development of antibiotics. Fortunately, he made a full recovery and returned to full duties. In the interim, the 10th Division had been disbanded and the 6th RDF had been redeployed to France and the Western Front. William followed, embarking on the HMT Indarra on 17 August 1918.

He re-joined the 6th RDF on 4 September at Serqueux camp near Dieppe where the battalion were in training, now forming part of the 66th Division. William received some welcome news when he learned that he had been granted leave. From 18 September to 6 October – when he returned to France – he made the most of his time with his widowed mother and sisters in Bethnal Green.
Two days after disembarking, he was thrown straight back into the fray, crossing the St Quentin Canal at Le Catelet with the battalion in preparation for a large-scale offensive:
‘They gathered at the assembly tapeline and straightaway they came under intensive fire from machine guns and gas shells and suffered a hundred casualties, including four officers, before the advance had even started. They endured the enemy bombardment for over four hours before zero hour at 05:10, and then the British artillery opened up, putting down an awesome barrage, and the battalion advanced over a front measuring 600 yards, capturing their first objective, an unnamed farm, exceptionally quickly and within ten minutes, thirty-five minutes ahead of schedule and taking 40 prisoners. Their next objective was Petit Verger farm and they came under heavy machine gun (MG) fire from their left; a platoon was dispatched to deal with them, which they successfully did, and by 06:00 they had captured this farm also and taken another 50 prisoners. The attack continued but was temporarily held up by three machine guns and a number of snipers from a position 200 yards west of Marliches Farm. A smoke screen was laid down by the artillery and a company under Captain Shadforth of the 6th RDF were able to push on undetected and assault a sunken road adjacent to the farm and take a further 40 prisoners. They went on to take the farm but were driven back by machine gun fire from the rear and the flank on their left, and had to withdraw to the sunken road, where the heavy MG fire continued. Further to their left, their colleagues were able to outflank the MG nests and managed to take and clear the village of Villers Outreaux, leaving the German line untenable, causing the enfilading MG teams to retreat, and the advance continued, reaching Lampe Farm by 13:00 hours where they established outposts and consolidated their position. The 6th RDF had suffered 271 casualties during the day, taking 170 prisoners and capturing a substantial amount of the enemy’s ordnance including 14 field guns and 41 machine guns’ [8].
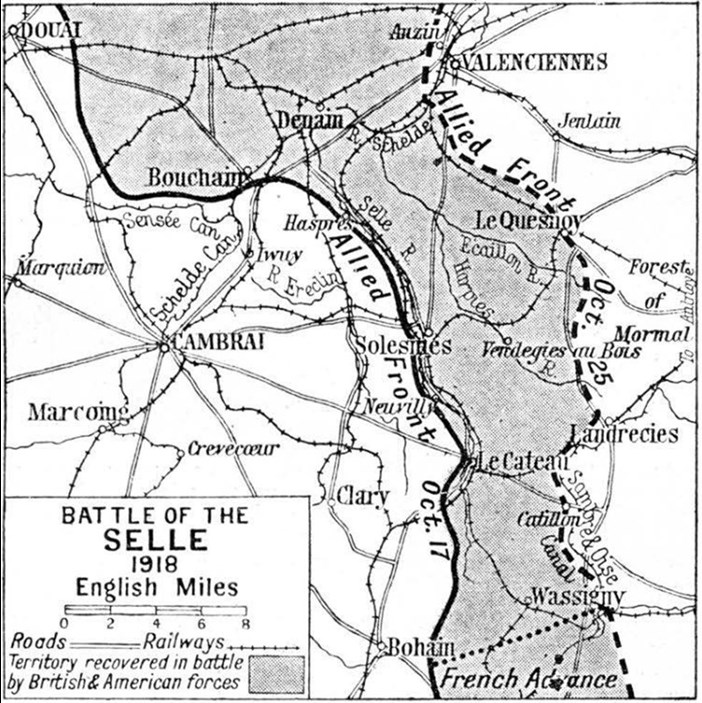
The following three days (the 9th to the 11th) became known as the Pursuit to the Selle, the 66th Division spearheading the advance, forcing the Germans to retreat to the river Selle where they had constructed a defensive line, known as the Hermann Line, following the initial breaking of the Hindenberg Line. On the last day of the Pursuit, William was wounded again, this time not so seriously. His casualty form records the incident as Wounded in Action – at duty, denoting that after treatment and the application of a field dressing he was able to resume soldiering. Two days later, on the 13th, he was promoted to full Corporal. The advance paused at Le Cateau on the west bank of the Selle, where the 66th Division were preparing to cross the river and break the Hermann Line, clearing the town of the enemy. The Battle of the Selle commenced on 17 October, the 6th RDF crossed the river with minimal casualties and entered Le Cateau from the north and the west. The battalion’s war diary details the day’s events:
‘A’ Company met with considerable opposition from all quarters by machine guns and snipers. The enemy were a very brave and stout lot of fellows, and I regret to say treacherous. About 11:00 one platoon had just taken two snipers when a runner reported that another platoon was held up and the platoon officer and others killed. Lieut. Hannin and a Lewis Gun section immediately put a screen of prisoners in front of them and proceeded direct along the street and called on them to surrender. Ten came out with their hands up apparently for this purpose, but instead of surrendering opened fire with a machine gun killing some of our men and taking cover. Needless to say the prisoners in possession were promptly despatched to another world. Our party then quickly fell back to cover and erected a barricade in front of two Lewis guns which were turned on to the house and good street fighting began. Half an hour later CSM Cooke reported to his company commander, Capt. Hayes, that there was another strong party of about twenty in a house with machine guns in another street, and that he had captured four. Lieut. Whyte, who speaks German fluently, instructed one of them to go down the street and tell his comrades that if they would surrender they would get a safe conduct through our lines, and that if he himself, who was covered with rifles, did not return, his other three comrades would also be shot. This prisoner did as he was instructed, but the reply he got was ‘No surrender’. Curiously enough this man was allowed by the party referred to, to return safely to us. On hearing of this obstinacy I despatched a platoon of 5th Royal Inniskilling Fusiliers, who had come up, round to the south of the town for the purpose of enveloping these parties. This was successfully done.
The 6th RDF went on to capture the whole town by nightfall. They had performed superbly, and this is reflected in the report of the Brigadier General Commanding:
The BGC wishes to congratulate the Brigade on their performances of the last 12 days. During that period they have advanced 13¾ miles on 10½ of which they were actually in touch with the enemy, have captured 484 prisoners, 23 field guns, 3 heavy howitzers and a large number of machine guns, in addition to inflicting heavy casualties on the enemy. Their final effort was to clear the town of Le Cateau, east of the River Selle, so liberating over 1,000 French civilians who have been under German domination for four years. This result has been attained by the hard work and unselfishness of all ranks, coupled with a determination to do their duty and get to grips with the enemy in spite of all deterrents. The BGC regrets the casualties sustained in fighting a stubborn enemy, but he knows that now the Brigade has got the measure of the enemy and that he can rely on them in future operations to do equally good work in bringing the war to a speedy and victorious conclusion.
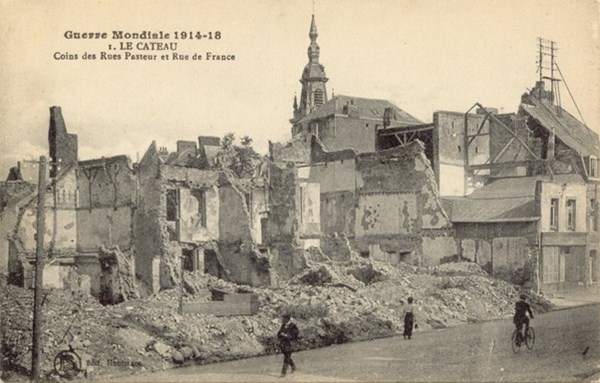
For his part in the Battle of the Selle, William was awarded the Military Medal for gallantry and devotion to duty in action [9]. After their hard-fought victory, the 6th RDF were relieved on 18 October, initially to reserve trenches and then to billets in Maurois on the 20th for a well-earned rest. When they had gone into battle on 8 October their fighting strength was 41 officers and 806 other ranks, by its end they were reduced to 20 officers and 240 other ranks. Historians have described the often overlooked and seldom mentioned Battle of the Selle as ‘one of the greatest military victories in the nation’s history’ [10], and for their part the performance of the 66th Division was crucial, they were ranked as the most successful infantry division serving within the Fourth Army, with a 100% victory rate in battles fought during the last Hundred Days. This was the last action they would see. Although they didn’t know it, in just over three weeks’ time the war would be over.
On the day of the Armistice, the 6th RDF were employed repairing a road at Dompierre when they received news that hostilities were to cease at 11:00am. The Battalion’s CO, Colonel Little was the messenger. One of the officers, Lieutenant Noel Drury, described how the message was received by the men; ‘…they just stared at me and showed no enthusiasm at all. One or two just muttered, “We were just getting a bit of our own back”. They all had the look of hounds whipped off just as they were about to kill’ [11]. The 6th RDF initially took part in The March to the Rhine but ended up 70 miles short of the German border at Jemelle, Belgium. William was posted to the 66th Division Traffic Control for the rest of his service and eventually demobilised on 23 February 1919.
Upon his return to civilian life, he resumed his job at the vinegar works, now relocated approximately two and a half miles from City Road, across the Thames just south of Tower Bridge. The workplace move would also bring about a dramatic change in his personal circumstances, an army pal introduced his cousin, Florence Gilbey, to William. Florence was a 29 year old war widow with two young children, who lost her husband, Able Seaman William Gilbey, at the start of the war, when his ship HMS Pathfinder was sunk by a German submarine on 5 September 1914, the first successful U-boat attack of the war. A whirlwind romance was followed by marriage on 11 April 1919. The newlywed couple lived at 4 Perseverance Street, Bermondsey, of which Florence was the sitting tenant. They had three children together (including my father) bringing the family unit up to seven.
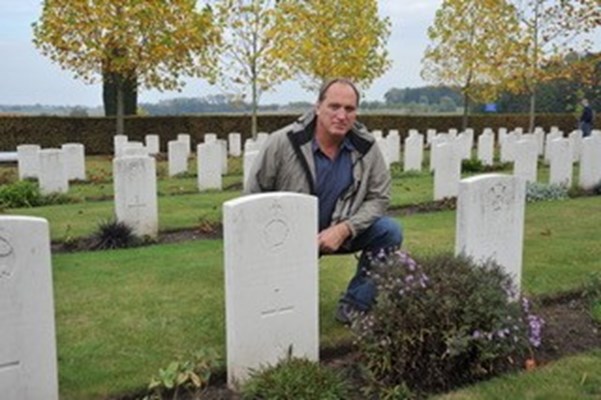
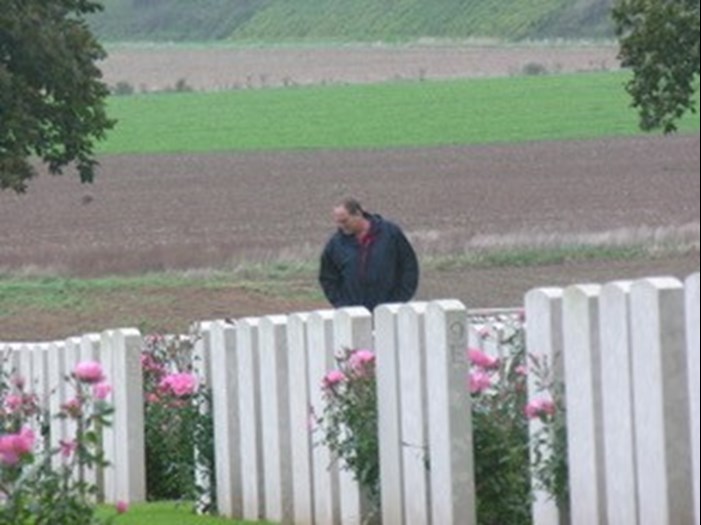
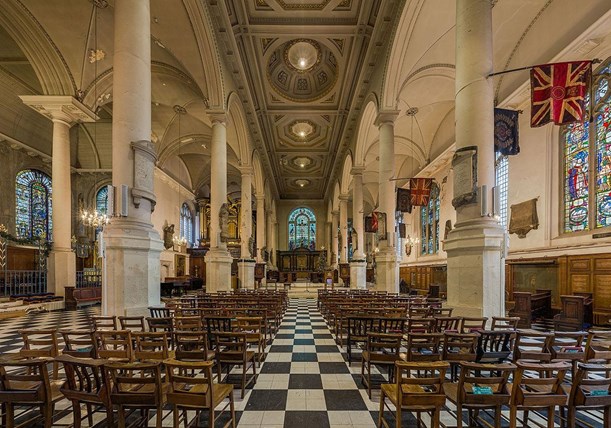
On 18 February 1932, William returned home from his shift at Sarsons complaining of stomach pain. His condition deteriorated until he was doubled up in agony. A doctor was sent for who immediately summoned an ambulance. He was admitted to St Olave’s Hospital, Bermondsey, but died that night on the operating table from a perforated ulcer. He was 50 years old. The interment took place at Nunhead Cemetery, Southwark, in a common grave; a small stone tablet marking the plot. Hardlya fitting memorial to a war hero. On Remembrance Day 2005, he received the honour he was due, when his life was commemorated in a service at the Regimental Chapel in St Sepulchre’s Church, Holborn, his name engraved on the wooden panelling on the south wall.
References
- Blumsom, Paul, Fought Like a Lion: The Life of an East End Soldier, Reveille Press, Brighton, 2025, pp.197-8.
- Macdonald, Lyn, The Roses of No Man’s Land, Michael Joseph Ltd, London, 1980, p.178.
- Blumsom, p.201.
- Prior, Robin and Wilson, Trevor, The Somme, Yale University Press, New Haven and London, 2005, p.166.
- Palmer, Alan, The Gardeners of Salonika, Andre Deutsch, London, 1965, p.70.
- Blumsom, p.228.
- Blumsom, p.243.
- Blumsom, pp.253-4.
- The London Gazette, Issue 31405, dated 13th June 1919, p.7685.
- Hodgkinson, Peter, The Battle of the Selle: Fourth Army Operations on the Western Front in the Hundred Days, 9-24 October 1918, Helion & Company Limited, Solihull, West Midlands, 2017, p.xx.
- Grayson, Richard, S. (ed.), The First World War Diary of Noel Drury, 6th Royal Dublin Fusiliers: Gallipoli, Salonika, The Middle East and the Western Front, Army Records Society, The Boydell Press, Woodbridge, Suffolk, 2022, p.280.
Other sources
WO/95/1613/2 War Diary 1st Battalion Royal Fusiliers 01/10/1914 to 31/10/1915 TNA
WO/95/2207/2 War Diary 1st Battalion Royal Fusiliers 01/11/1915 to 07/07/1918 TNA
WO/95/4836 War Diary 6th Battalion Royal Dublin Fusiliers 01/01/1917 to 31/08/1917 TNA
WO/95/4583 War Diary 6th Battalion Royal Dublin Fusiliers 01/09/1917 to 30/06/1918 TNA
WO/95/3140 War Diary 6th Battalion Royal Dublin Fusiliers 01/07/1918 to 29/04/1919 TNA
Becoming a member of The Western Front Association (WFA) offers a wealth of resources and opportunities for those passionate about the history of the First World War. Here's just three of the benefits we offer:
Identify key words or phrases within back issues of our magazines, including Stand To!, Bulletin, Gun Fire, Fire Step and lots of others.
The WFA's YouTube channel features hundreds of videos of lectures given by experts on particular aspects of WW1.

Read post-WW1 era magazines, such as 'Twenty Years After', 'WW1 A Pictured History' and 'I Was There!' plus others.
Other Articles


