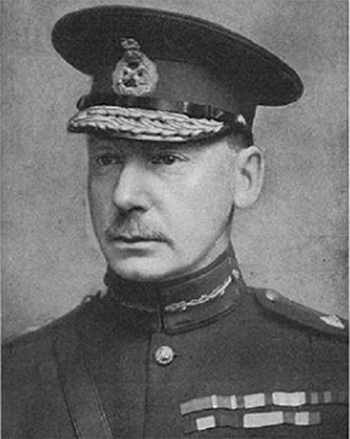
General Maude and the Recapture of Kut
With temperatures ranging from freezing to 130ºF (50ºC) the campaign in Mesopotamia (modern day Iraq) was undertaken in one of the most inhospitable climates imaginable. Despite being a side-show to the main battles of the First World War in France and Belgium, the Mesopotamian campaign lasted virtually the entire period of the war.
A mission had taken place in 1914 to take the strategically important oil facilities at Basra and Qurna. This was successfully completed by troops of the ‘Indian Expeditionary Force D’. Although the region was part of the Ottoman Empire, there was little strategic reason to attempt to defeat the Turks in this hot and diseased area once the oil installations had been secured, however, the ease with which Basra had been taken, led to a disastrous ‘mission creep’.
Despite the lack of logistical infrastructure, suitable boats, maps, medical supplies, equipment and reinforcements, and in the face of the usual spring floods, mud, heat and flies, the commander of the expedition, Major-General Sir Charles Townshend, ordered Force D to proceed up the Tigris river.
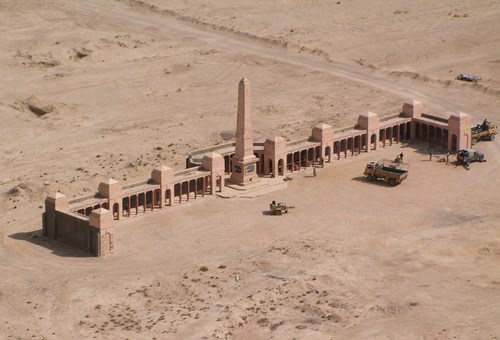
This advance took them to within 25 miles of Baghdad. However, the Battle of Ctesiphon in November 1915 resulted in a stalemate and heavy casualties to both sides. Over 960 fatalities of this battle are commemorated by the CWGC on the Basra Memorial.
With their lines of supply overextended, and medical services overwhelmed, Townshend ordered the troops to retreat to the town of Kut-al-Amara.
At Kut, Townshend formed a defensive position which he correctly perceived would be strong enough to repulse Turkish attack.

Despite a number of attempts in early 1916, the siege which ensued could not be relieved by Allied troops and after five months, Townshend surrendered his forces to the Turks on 29 April 1916. About 13,000 men (including over 3,000 non-combatants) went into captivity.
The humiliating defeat, coming so soon after the withdrawal of troops from Gallipoli, was, in the view of the Government, likely to result in the loss of prestige in the east, and rather than withdraw forces, it was decided to send reinforcements to the newly appointed commander, General Sir Frederick Stanley Maude.
After the evacuation of Gallipoli in January 1916, a parody of the Victorian parlour song, Come Into The Garden, Maud became popular with the troops. It was inspired by the actions of General Maude, who refused to leave the beach until he had been reunited with his servant and baggage:
Come into the lighter, Maude,
For the fuse has long been lit,
Come into the lighter, Maude,
And never mind your kit,
I’ve waited here an hour or more,
The news that your march is o’er.
The sea runs high, but what care I,
It’s better to be sick than blown sky high,
So jump into the lighter, Maude,
The allotted time is flown,
Come into the lighter, Maude,
Or I’m off in the launch alone.
Maude builds up his forces
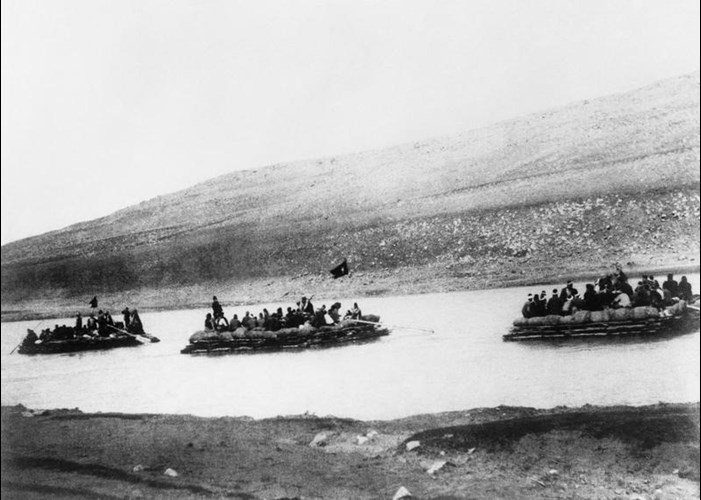
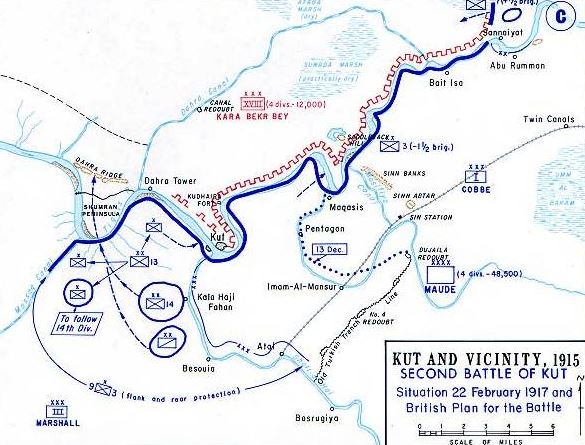
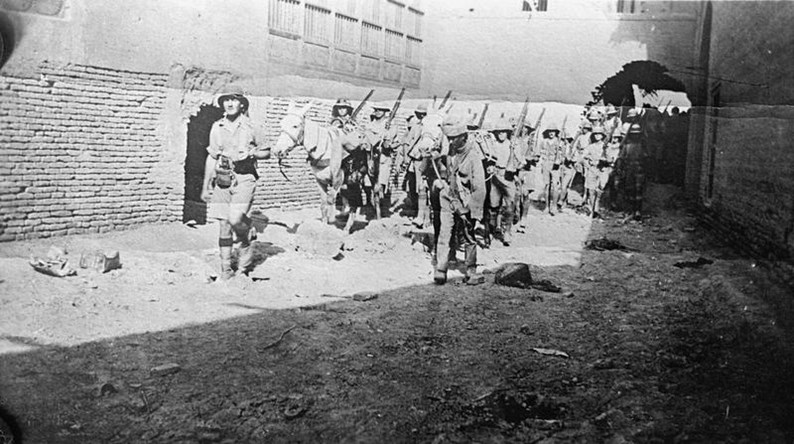
For six months Maude built up his troops, and eventually commenced his campaign on 13 December 1916. Rather than the rapid exploitation that had taken place under Townshend, this time the advance was slow and deliberate. A total of 50,000 men advanced on both sides of the River Tigris. Heavy rain slowed the advance but on 29 January, the fortified Khadairi Bend was taken.
The advance continued with Kut being Maude’s immediate objective. Faced with a quagmire of mud, there was little opportunity for movement except by river transport. However, by attacking at the Shurman Bend (6 miles west of Kut) on 17 February, Maude forced the Turkish commander to withdraw from the town a few days later.
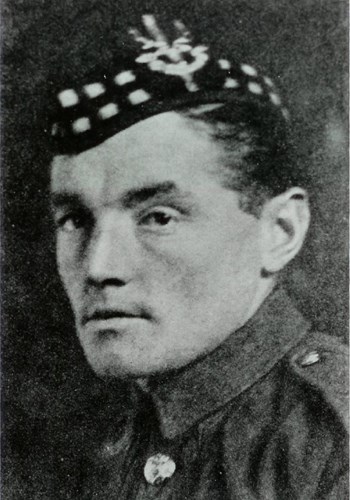
During this period, an act of gallantry resulted in a Victoria Cross being awarded to Serjeant Thomas Steele.
Steele's VC citation reads:
On 22 February 1917 near Sanna-y-Yat, Mesopotamia, at a critical moment when a strong enemy counter-attack had temporarily regained some of the captured trenches, Sergeant Steele helped a comrade to carry a machine-gun into position. He kept this gun in action until relieved and was mainly instrumental in keeping the rest of the line intact. Some hours later another counter-attack enabled the enemy to reoccupy a portion of the captured trenches and Sergeant Steele rallied the troops, encouraging them to remain in their trenches and leading a number of them forward, helped to re-establish our line. On this occasion he was severely wounded.
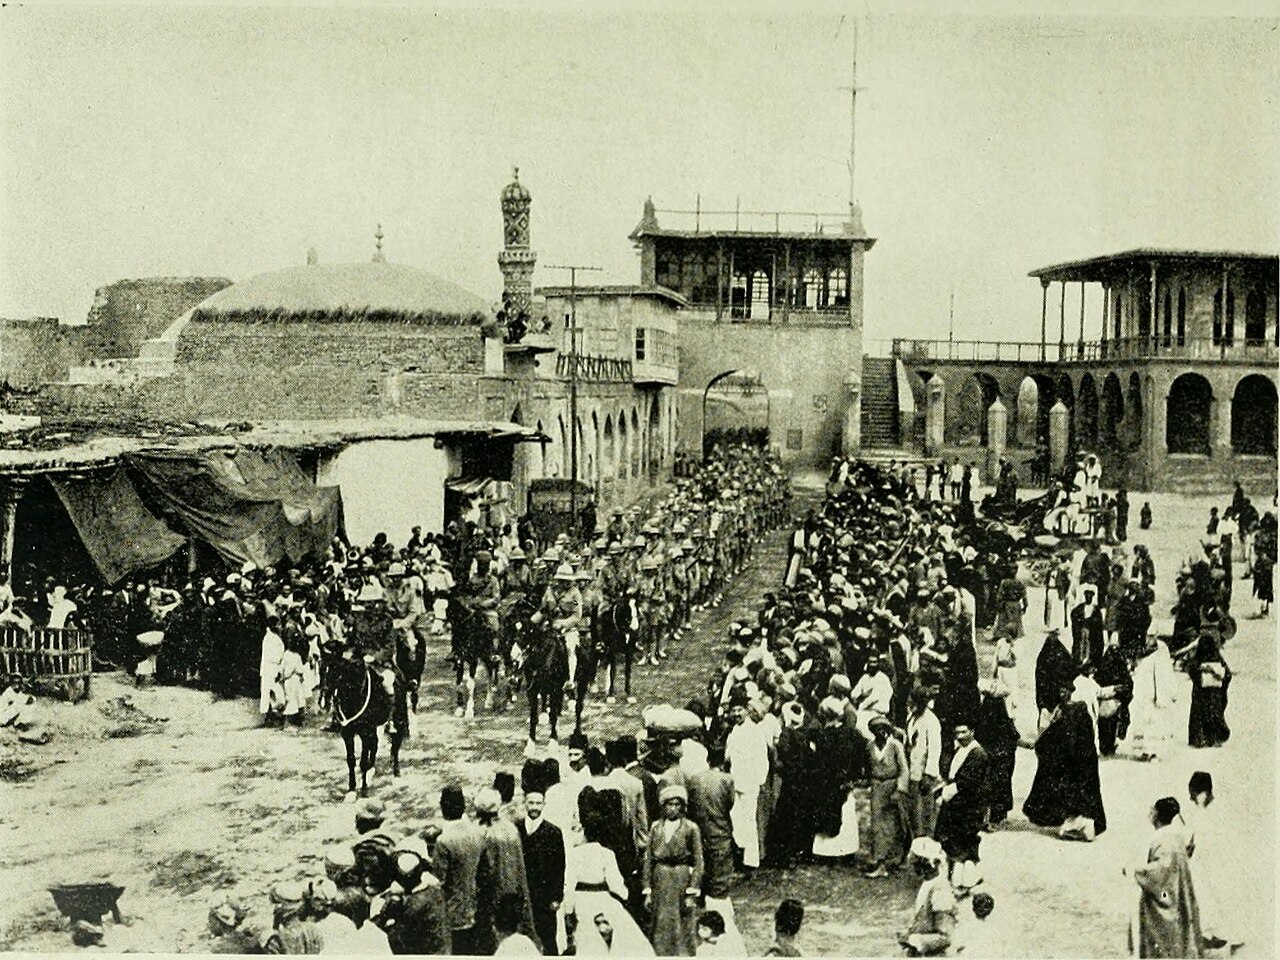
Kut was evacuated by the Turks on 24 February, but it was not the end of the fighting in the area.
Besides occupying Kut, the British took the enemy positions from Kut to Sanna-i-Yat, together with over 1,700 prisoners.
Operations continued on 25 February. These started with forward elements of the British and Indian force advancing up the left bank of the Tigris, while the Cavalry Division moved to the north. By mid-morning, the Hertfordshire Yeomanry established contact with the Turkish rearguard which was positioned on a canal. The yeomanry regiment was ordered to contain the Turks until the arrival of the British infantry. After half an hour various infantry battalions reached the canal position, where they came under Turkish shell fire.
The British Artillery pushed forward into action against the Turkish guns. This enabled the leading battalions to make progress, rapidly driving into the Turkish posts.

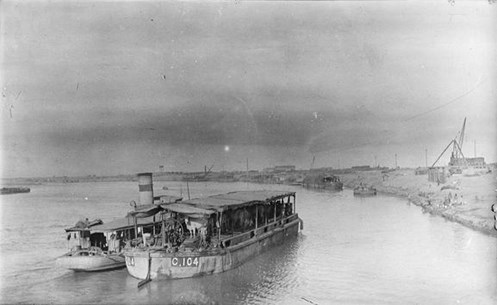
The advance now received support from the Naval Flotilla - Tarantula, Mantis, Moth, Gadfly and Butterfly - which had arrived and was co-operating with the Brigade guns.

The Official History described the scene:
By 12.30 p.m [...] it was clear that the 38th Brigade's advanced line - 6th King's Own, 6th East Lancashire and 6th Loyal North Lancashire, in this order from the right - had been definitely checked by heavy rifle and machine-gun fire from some seven hundred yards from the enemy's trenches and was beginning to dig itself in. At this hour the fourth Battalion of the Brigade, the 6th South Lancashire, was sent to the right to try and turn the enemy's flank. Passing through the line of the Hertfordshire Yeomanry, this Battalion effected a lodgement in a section of the enemy's line about a mile and half north of the Tigris bank, but found itself still south of the enemy's left flank.
At this point in the 6th Battalion, South Lancashire Regiment became involved. The Battalion's War Diary states:
…Enemy encountered about noon, flank guard became merged with advance guns and captured watercourse from enemy. Enemy still held left of watercourse. Party led by 2nd Lt. Jackson cleared watercourse on left with bayonet in face of terrific machine-gun fire, rifle grenades and bombs. 2nd Lts Jackson and Jefferson killed, 2nd Lts. Fletcher and Sharpley wounded, 21 men killed and 58 wounded.
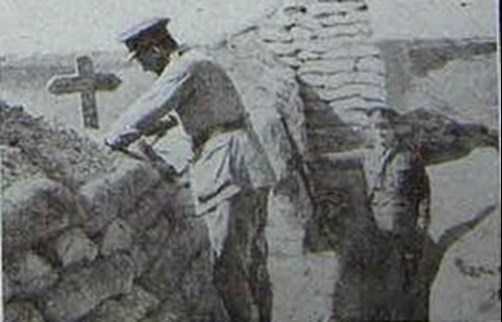
The CWGC Debt of Honour database records 24 men of the battalion were killed in this action. All are commemorated on the Basra Memorial.
The above bald statement in the Battalion War Diary, not untypically, hides the drama of the situation and the courage of individuals. One of the men who showed outstanding bravery in this action was Private John Readitt.
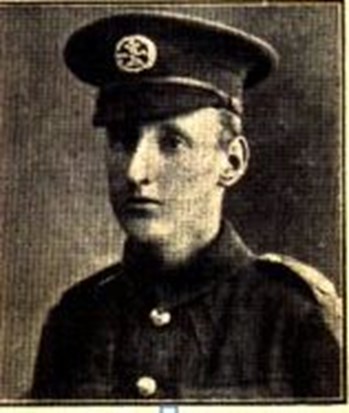
An account in Empire News dated 8 July 1917 states that he was ‘the only survivor’ of the first four bombing raids along the watercourse. It goes on to describe that during the fifth raid, Readitt had to rally the bombers who had scattered in the face of heavy enemy fire, and eventually he moved them up to the Turkish barricade, 'which formed the main enemy position and was the chief obstacle to the advance'.
Here the enemy counter-attacked, but in spite of the fact that the enemy concentrated on him a deadly fire and every sniper in the Turkish ranks seemed to be shooting at him, Readitt never abandoned his so-as-you-please style of retirement. Whenever the enemy pressed him too closely he would just turn and let them have a bomb, which scattered them in all directions.
Finally he was joined by another bombing party and then he made his most determined stand. Under his leadership, the bombers drove the enemy back once more, and after a fierce fight the whole position was captured and consolidated.
The Turkish commander whom we captured later in the day, said he had never seen anything finer than the way that stripling (Readitt is only 20 years of age) had stood up to a whole army.
John Readitt was awarded the Victoria Cross for his actions. The citation for this award reads as follows:
On 25 February 1917 at Alqayat-al-Gaharbigah Bend, Mesopotamia, Private Readitt advanced five times along a water-course in the face of heavy machine-gun fire at very close range, being the sole survivor on each occasion. These advances drove the enemy back and about 300 yards of the water-course was made good in an hour. After his officer had been killed, Private Readitt, on his own initiative, made several more advances. On reaching the enemy barricade he was forced to retire, but gave ground slowly continuing to throw bombs. When support reached him he held a forward bend by bombing until the position was consolidated
Promoted to Sergeant, Readitt was decorated for gallantry by King George V at Buckingham Palace on 26 November 1919. After the Great War, he returned to work with his father and took over the family business as a clogger and shoe repairer. John Readitt died on 9 June 1964, aged 67 years, at his home in Bury Brow, Clayton and was buried in Gorton Cemetery.
The recapture of Kut led to the eventual defeat of the Turks in Mesopotamia. It is doubtful, however, that this campaign shortened the war in Europe by a single day.
On to Baghdad
After the recapture of Kut, Maude was able to continue his advance up the Tigris and took Baghdad the following month. The Tigris Corps entered Baghdad on 11 March 1917 after months of difficult fighting.
On 14 November 1917 General Maude attended a theatrical show at a Jewish School. During the interval coffee was served, Maude took milk with his coffee which - as it turned out was to have fatal consequences.
Two days later on 16 November 1917 Maude went to his office as usual but was noted as looking unwell. That evening, the staff Surgeon Dr.Maloney, brought Colonel Wilcox, the Consulting Physician of the Force, with him to check on Maude’s condition. No serious symptoms were present but Wilcox insisted that Maude cancel all his commitments for the evening.
Maloney again visited Maude later in the evening and noted with concern that a change for the worse had taken place and Colonel Wilcox was summoned for a second time. At this point Maude’s illness was diagnosed as a strain of Cholera. The milk from the Jewish School was assessed to have been contaminated with the Cholera bacteria. (Previously, Maude had refused to be inoculated believing that a man of his age was immune to the disease).
Colonel Wilcox gave the following account:
"At about 7.45pm on Friday 16 November 1917 an acute attack of Cholera commenced with great suddenness and, in a few minutes, a state of extreme collapse occurred. Without delay immediate treatment was adopted and everything possible was done to combat the acute symptoms. Lt Maloney and myself as consulting physicians remained with General Maude throughout his illness. Miss Walker, the Matron of No. 31 British Stationary Hospital, and four specially selected nurses carried out with greatest care and devotion their nursing duties. Maude retained his mental ability in spite of his great weakness until just before his death. A few hours prior to his death he received a telegram from Lady Maude and was able to dictate an encouraging reply."
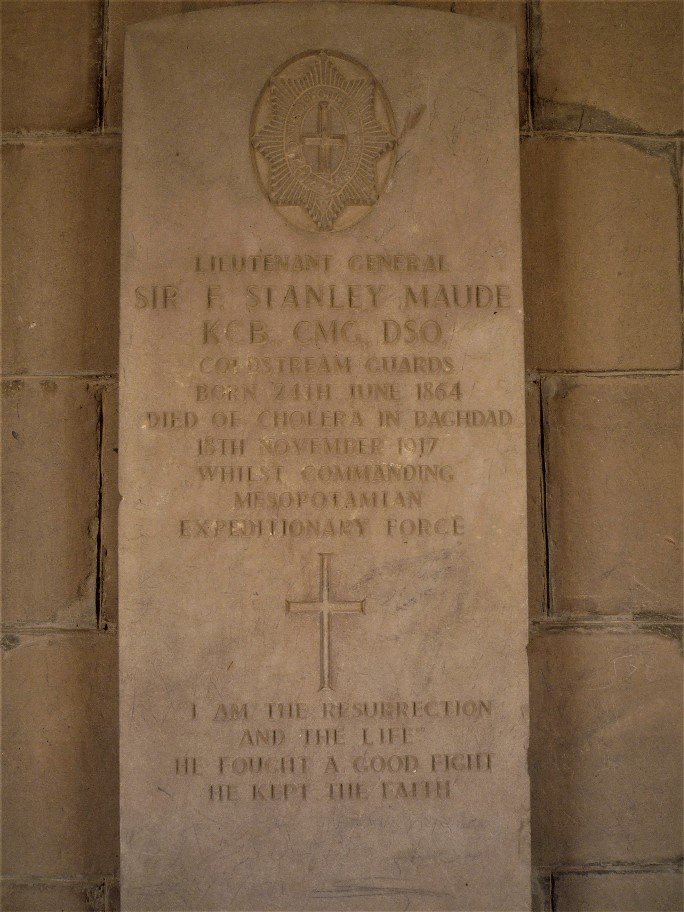
At 4.30pm on 18 November 1917 Maude fell unconscious and passed away peacefully at 6.25pm.
The cause of death was “cardiac failure consequent on the toxaemia of a very severe cholera injection.”
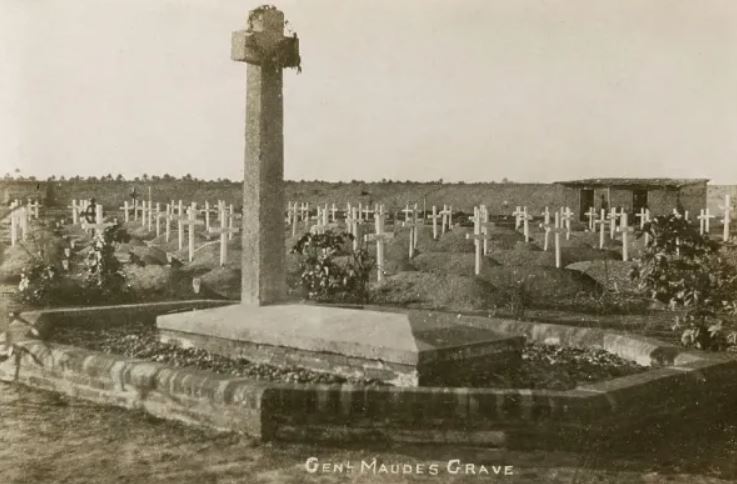
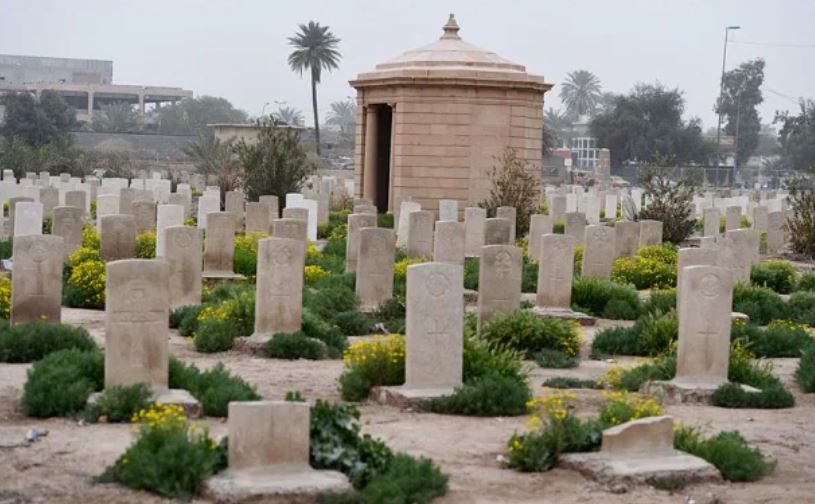
General Stanley Maude was buried on the afternoon of 19 November 1917 in the cemetery beyond the North Gate of Baghdad.
Aftermath
It is believed that over half of the surviving Kut garrison of 13,000 died of ill treatment and neglect during forced marches of hundreds of miles and in subsequent captivity. Having been held in luxurious accommodation, General Townshend survived the war. When the news of his special treatment was made public, and compared to the ill-treatment meted out to his men, his reputation was irreversibly ruined.
Further reading (Online Book):
On the Road to Kut: A Soldier’s Story of the Mesopotamian Campaign
The anonymous author was part of the 6th (Poona) Division, Indian Army. The high temperatures forced much inactivity on the commonwealth troops through the campaign. The author wrote “From 6 a.m. to 9 a.m. it was hot. From 9 a.m. to 12 damned hot. From 12 to 5.30 much too damned hot.”
Becoming a member of The Western Front Association (WFA) offers a wealth of resources and opportunities for those passionate about the history of the First World War. Here's just three of the benefits we offer:
The WFA regularly makes available webinars which can be viewed 'live' from home. These feature expert speakers talking about a particular aspect of the Great War.
Featured on The WFA's YouTube channel are modern day re-interpretations of the inter-war magazine 'I Was There!' which recount the memories of soldiers who 'were there'.
Explore over 8 million digitized pension records, Medal Index Cards and Ministry of Pension Documents, preserved by the WFA.


