Gallipoli Maps
In many histories of the Gallipoli campaign, much attention has been focused on the poor quality of the maps and what we would now call, geospatial intelligence. In their book Grasping Gallipoli, Peter Chasseaud and Peter Doyle argue that the attacking forces did have adequate prior intelligence but that the cartographic accuracy of the maps was inferior to what was achieved on the Western front.
The latest maps uploaded to TrenchMapper™ illustrate these ideas.
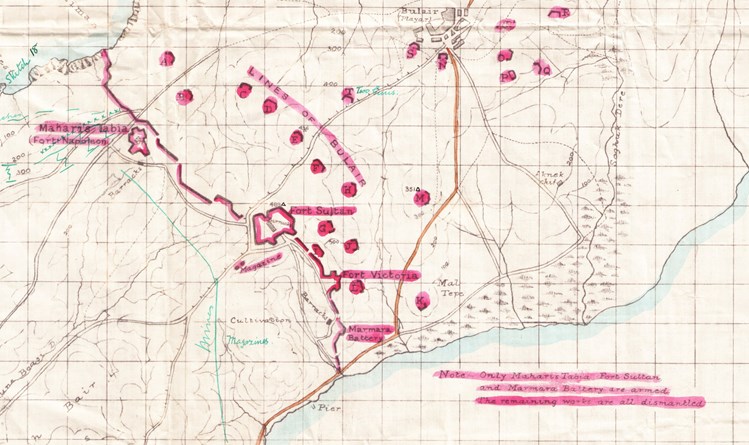
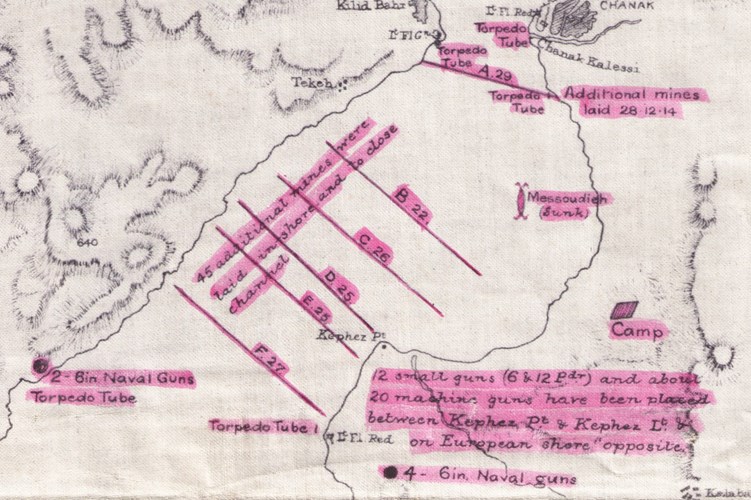
There is a set of four Admiralty charts that show the extent of the shore batteries along the peninsula as well as marine mine fields, mined beaches etc. It was these batteries that were the target for the naval operations in February 1915 prior to the landings on 25th April. One map is annotated "Defences known to have been placed in position since 4th August 1914", i.e. much was known before 1915. Also shown are the positions of field gun batteries; it was a source of frustration at the time that the Ottoman Turks were using mobile artillery against shipping; these batteries were difficult for the navy to target.
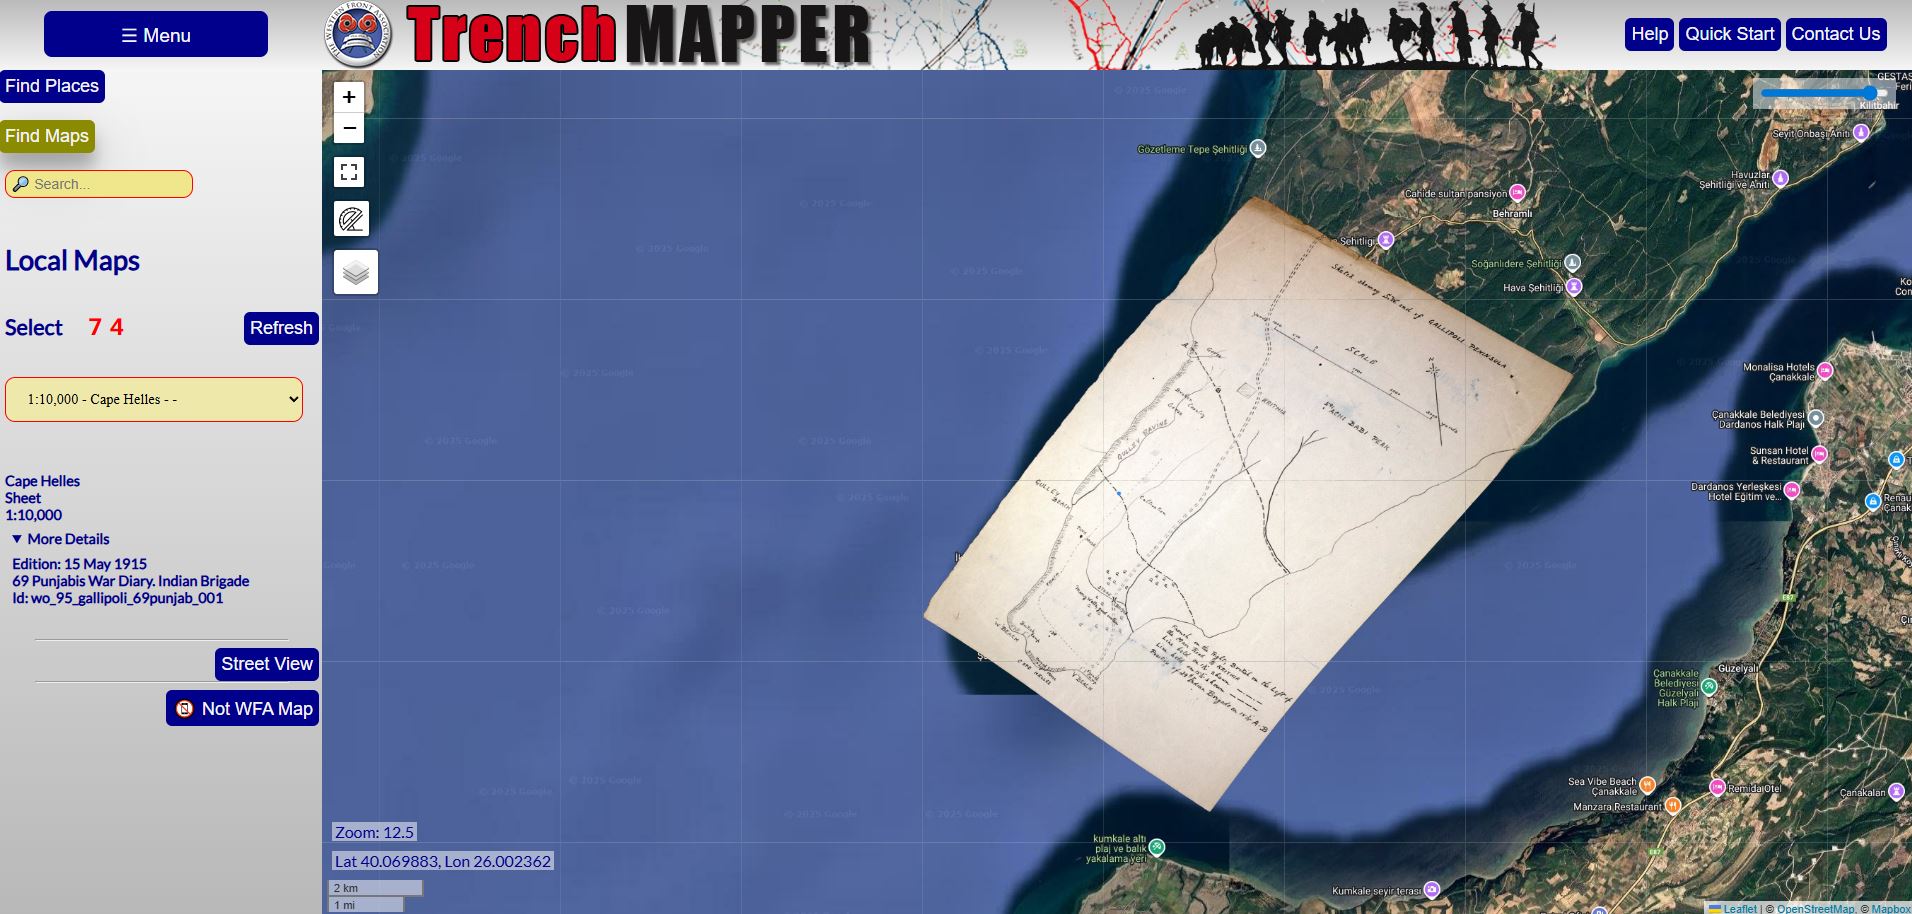
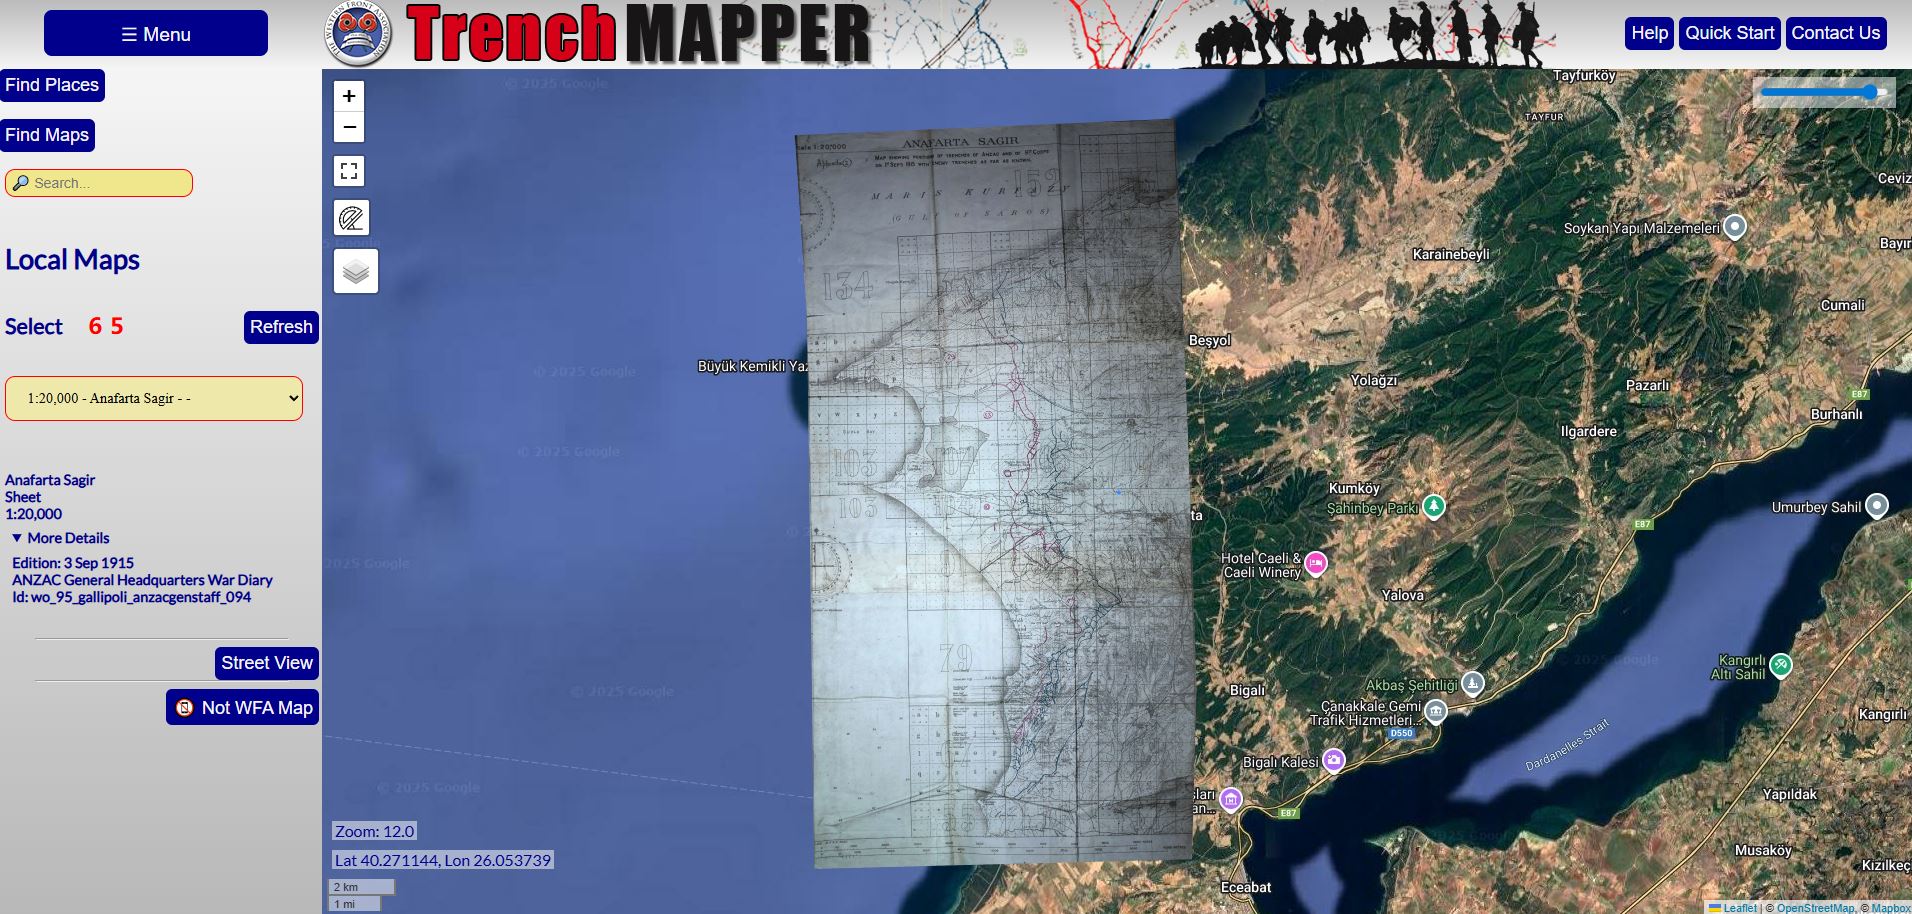
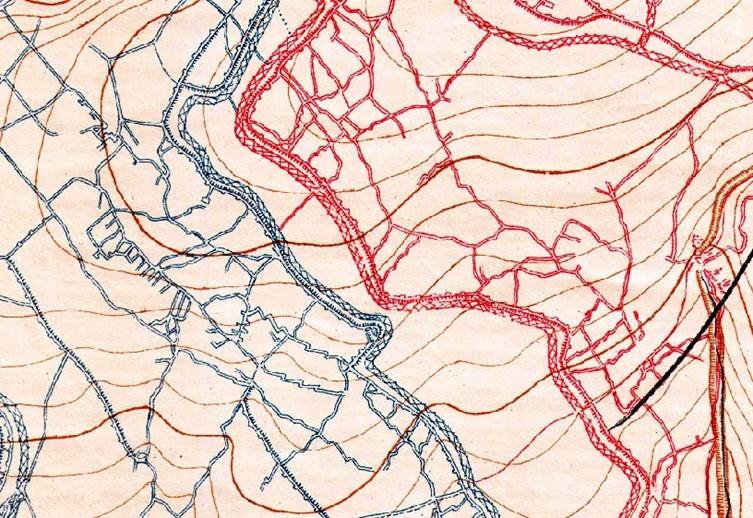
Also uploaded is a set of trench diagrams (not good enough to be called maps) covering Cape Helles, some headed "The relative position of the trenches are correct within small areas, but the diagram should not be used to measure long distances or bearings". This shows the problems referred to in the histories. It also causes problems for the TrenchMapper™ team, georeferencing these diagrams is a challenge as they “fit where they touch”, i.e. overlain on a modern accurate map the shortcomings the cartographic accuracy is plain to see. Nevertheless, much detail is visible, trench names, aid posts etc.
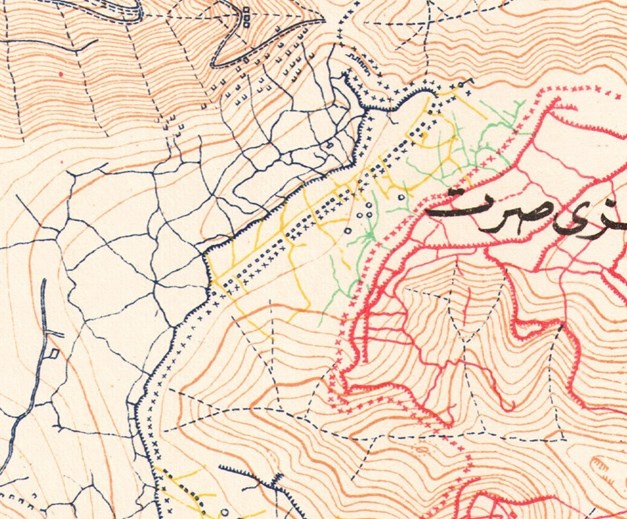
Already in place are all 43 of the Çanakkale Fortification Maps otherwise marked as the Post-evacuation maps or sometimes as the Şevki Paşa maps after the Turkish cartographer in command of a remarkable team that mapped the whole battlefield in great detail immediately after the evacuations were complete.

These show trenches in unprecedented detail along with artillery positions, encampments, water supplies, tunnels, abandoned vessels and a great host of other features. The trenches and positions are not named but such names can be found on the allied trench diagrams. The cartographic accuracy of these 1:5,000 maps is far better than the trench diagrams used by the British and Anzac forces but still posed a problem to fit to a modern map. Much has changed on the peninsula over the last century, especially the coastline.
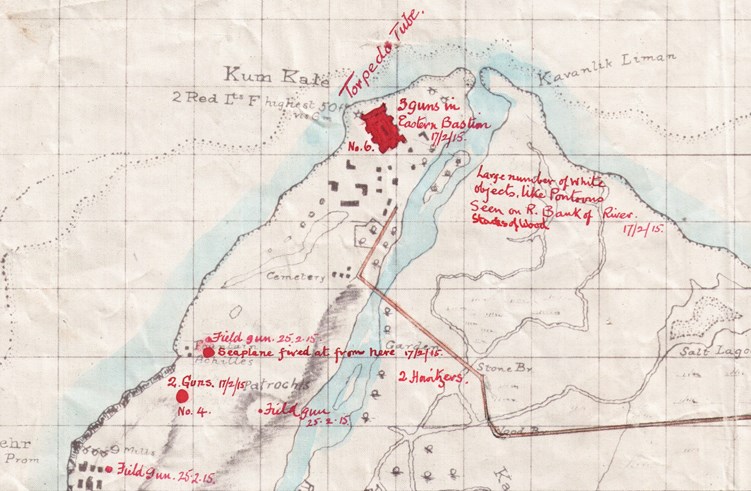
A fragment of sheet 17 of this set is shown below, it was used by Charles Bean when writing the Australian Official History. Close examination of parts of the Anzac area shows yellow and green lines in advance of the blue Allied and red Ottoman Turkish trench lines. These are tunnels, never shown on Western Front operational trench maps for security, even secret editions, but these were drawn after the fighting had stopped. These tunnels were explored and the results reported on in the book Anzac Battlefields published by the Cambridge University Press.
Article contributed by Howard Anderson